Coffee Enema – After reading tons of positives about the effects of enemas, I thought long and hard about trying coffee enemas for myself.

After I initially resisted it and couldn’t really get used to the idea, I then made a “heroic” self-experiment of the effect myself.

After that I felt as pure as never before and my energy level was “superb” all day!

Enemas are by no means a new trend from the “biohacking scene”, but have been used for centuries – if not for millennia – for various purposes.

In this article you will find out why I now swear on (coffee) enemas and how I use them on a regular basis. Don’t worry, there won’t be any explicit pictures of the application 😉 😉

—> THIS ARTICLE IS ALSO AVAILABLE IN GERMAN! <—


Everything You Always Wanted to Know About Coffee Enemas * But Were Afraid to Ask

An enema is called clyster.

This comes from the Greek klysma, klysmatos = intestinal enema or irrigation. The origin of the word is derived from the Greek verb klyzein = rinse, rinse, clean (Becher et al. 1995).

With the enema, the name says it all, different types of fluids can be passed through the anus into the intestine. Anus comes from Latin and means “ring”, because of the ring-shaped muscles in this area (Becher et al., 1995).

Generally, enemas can of course be used with a wide variety of liquids/solutions. Depending on the area of ​​application and objective.

The story of the (coffee) enema

Although enemas have been known and used for thousands of years, the use of the coffee enema is comparatively “new”.

History of the Coffee Enema, source: Pixabay.

Naturopath (Heilpraktikerin) Ariane Zappe writes in her book (written with co-author Dr. med. Dietrich Klinghardt) “ImmunSymbiose” on the coffee enema, among other things:

The healing and pain relieving effect of coffee enemas was discovered by chance during the First World War, when, as a result of the occupation of Germany, morphine and other painkillers were no longer available in sufficient quantities. […] Some nurses had the idea of ​​adding the surgeons’ leftover coffee to the enemas. Lo and behold, the soldiers reported an enormous relief and pain relief through this application ”(Zappe and Klinghardt, 2017).

The above quote was translated by myself.

In an article by Dr. Lawrence Wilson, I was even able to find information on somewhat earlier usage. According to that Dr. Wilson writes:

“Coffee enemas have long been in use. In a case report in the Pacific Medicaland Surgical Journal in December 1866, M.A. Cachot, MD, described successful use of a coffee enema to treat a child dying from an accidental poisoning. Articles from the late 1800s reported that coffee enemas were helpful in post-operative care; at a medical meeting in 1896, Dr. W.J. Mayo, one of the founders of the Mayo Clinic, mentioned coffee enemas as a routine part of care for patients after abdominal surgery.  Coffee enemas were listed as a stimulant and as a treatment for shock in medical and nursing textbooks in the early 1900s.[…]” (LD Wilson Consultants, Inc., 2019).

On the way to my own coffee enema

Since this article is expressly only an information article, be only my anecdotal experiences are presented here. It is not about healing statements, promises or treatment recommendations. Please note the disclaimer / note at the very end!

The topic of the coffee enema has come across me (July 2019)  again and again “by chance” in various kinds of literature. Well, since I don’t believe in “coincidences,” I still believe in the meaning of the word.

So since I got this “in-formation” over and over again, I decided to take a closer look at the topic. Although I could not really get used to the idea of a ​​physical application at first, I was fascinated by the positive qualities, of which I found more and more to read about.

Depending on the literature, I found (partly) overlapping statements, among others at Zappe / Klinghardt, Wilson or Greenfield e.g. over:

Detoxification properties, colon cleansing, pain relief, stimulation of bile production, opening of the bile ducts, vasodilation (vasodilation) of the portal vein circulation, strengthening of glutathione-S-transferase (responsible for removing toxic radicals in blood and serum), stimulation of the organ-nerve system, anti-inflammatory (due to theophyllines & theobromines contained in coffee), etc.

All of this sounds exciting, of course, and made me very curious. The desire for the “heroic” self-experiment grew. After all, you can only report authentically about what you have tried out yourself.

Why do I give myself (coffee) enemas?

At this point I can only speak for myself again, but I am of the opinion that we live in a world that is becoming more and more toxic. It used to be said: “Go out into the fresh air”. But how “fresh” is our air really today?

How pure is food from the sea? How are meat, vegetables and fruits from our fields treated? How many minerals are still in our soils? In my article: “Magnesium chloride -“ legendary ”salt” I go into more detail.

Who can tell me how much – from my point of view – other harmful substances are contained in shampoos, cosmetics, beverages, plastic packaging, dyes, etc.?

Who can honestly tell me how artificial substances will affect my health in the long term?

It is therefore my aim to avoid these substances as far as possible. In particular:

1. Phytoestrogens

2. Mycoestrogens

3. Atrazines

4. Triclosan & APEs (alkylphenols)

5. BP & 4-MBC (Benzophenones & 4-Methylbenzylidene)

6. Red dyes # 3 and # 40

7. Parabens

8. Phthalates

9. BPA & BPS (isphenol A & S)

10. EE2 (17a-ethinylestradiol

This list comes from the book “Estrogeneration” [Affiliate Link], by Dr. Anthony G. Jay. I strongly recommend you to read this book!

In addition, in this world I see myself increasingly confronted with other harmful substances such as:

· Lead

· Mercury

· Cadmium

– Arsenic

Aluminum (nickel)

· Uranium

· Beryllium

· Bismuth

· Antimony

· Zirconium

· Gadolinium

· Tin

·      etc.

How can this be tested? Well I do use a device called SO/Check, respectively “Oligoscan”. It uses spectra/photo/metrics to determine the 21 most important minerals, Vitamins and 15 most toxic heavy metals intra- and extracellular.

This is a super-fast, non-invasive method to get an overview of your “toxicity-level”. If you’re interested in getting measured, please consult me over my “Heilpraktiker”-Practice (= Complementary and alternative Medicine Practitioner) in Germany.  

 Feel free to drop me a mail: info@heilpraktiker-stoesslein.de

Then there are herbicides, fungicides, pesticides, insecticides and certainly thousands of other chemicals. More about the origin of these words and an alternative to “sprayed” vegetables can be found in my article: “Greenunit 2.0 – Your start to the garden in your own four walls?”

Even if I live a healthy lifestyle, these and other substances could still build up in my body. In order to expel these and keep my intestines healthy and functional, I give myself coffee enemas.

Positive effects on me

Through my research on the subject of coffee enemas, I found other positive properties about this procedure. The following has worked for me:

To me, coffee (when used as an enema) seems to have an antioxidant effect. In contrast to other antioxidants, the coffee enema is also said to have a yang effect (Wilson, 2019).

At this point I don’t want to go into the principle of Traditional Chinese Medicine (TCM) of Yin & Yang in detail, because that would fill an entire article. Let me just mention so much for a better understanding:

Yin und Yang; source: Pixabay.

Yin and Yang are words used to describe opposing forces in nature. Yang means warm, astringent and centripetal. Yin means cold, expanding and having a centrifugal effect.

I am convinced that the balance between Yin and Yang significantly reduces my stress level, contributes positively to my spiritual development, can better drain toxic metals, chemicals, etc. from my body, has a beneficial effect on most of the enzyme reactions in my body and promotes my vitality!

To what extent mediation can be helpful in this process, you can read in my article “Why you should meditate – your thoughts create your reality”.

Own experience:

I can only confirm the alleged Yang effect that coffee enemas have! A 45-minute coffee enema, with constant self-massage of my colon (counterclockwise), was by far the most relaxing thing I have done in the last 30 years!

I can’t say 100% whether it was just the coffee and / or the combination with the self-massage, but I can only underline the YANG effect!

Perhaps the massage simply mechanically stimulated the vagus nerve and thus triggered a parasympathetic (relaxing) effect. Anyway, just fantastic!
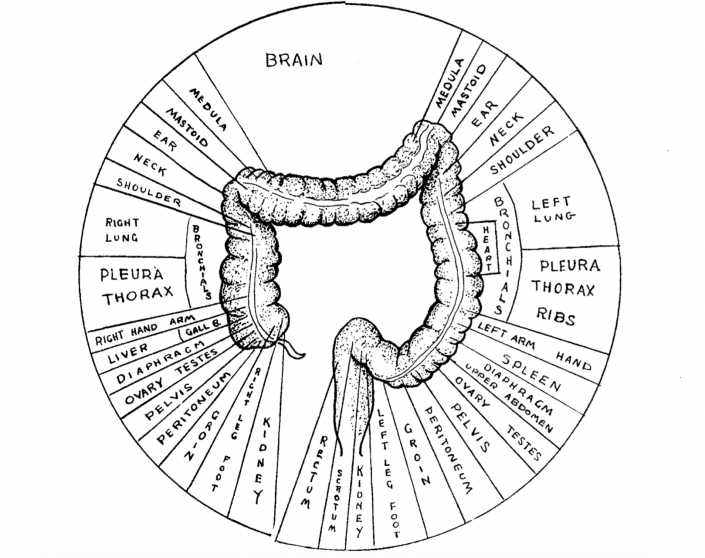
 The colon and its reflexpoints; source: Iridology Simplified, Bernard Jensen Healthy Living Publications.

The graphic is from the book: “Iridology Simplified” [Affiliate Link], by Bernard Jensen. Courtesy of Bernard Jensen Healthy Living Publications!

Possible positive effects of coffee (as an enema)

In the course of my research, I have found all kinds of positive aspects about coffee. So Dr. Max Gerson, a big proponent of the coffee enema application, said:

Heubner and Meyer of Goettingen University, Germany had shown in animal models that rectal administration of caffeine would dilate bile ducts and promote bile flow. Theophylline and theobromine, major constituents of coffee, dilate blood vessels and counter inflammation of the gut. The palmitates of coffee enhance glutathione S-transferase, which is responsible for the removal of many toxins from the blood. Finally, the water in the enema stimulates peristalsis or the movement of toxic substances from the duodenum or upper intestine, through the intestine, and out through the rectum.” (Wilson, 2019).

Palmitic acid

Palmitic acid (Kahweol & Cafesol Palmitate):

“(Hexadecanoic acid) is a saturated organic acid and is counted among the fatty acids (= higher carboxylic acids). Palmitates (systematically also hexadecanoates) are the salts and esters of palmitic acid. Palmitic acid is a colorless solid at room temperature (Wikipedia, 2019).

Zappe writes: “Palmitates in coffee strengthen the so-called glutathione-S-transferase, which are responsible for removing toxic radicals in the blood and serum.” (Zappe, 2017).

As far as I could research, this discovery dates back to the late 1970s and early 1980s and was made by researchers in Lee Wattenberg’s laboratory.

As cited above, palmitates are said to act as potent enhancers of glutathione S-transferase (an important liver enzyme).

Adding coffee beans to the diet of mice increased glutathione S-transferase by 600% in the liver and by 700% in the small intestine. Similar stimulation of glutathione S-transferase in humans by coffee is likely (Wilson, 2019).

Mechanical cleaning

In my experience, a coffee enema cleans my colon by simply “cleansing” it – physically speaking – with the amount of liquid flowed in.

This gives me the feeling that my intestinal villi and microvilli are mechanically cleaned and give me the opportunity to remove toxic substances, parasites, bacteria, yeast colonies and other deposits from me. In this way, I can basically empty all kinds of substances that are not removed otherwise.

Theobromine and theophylline

Theophylline and theobromine are ingredients of coffee types (Lehmann and Martinod, 1965) and tea types (Franzke et al., 1968). They cause vasodilation. (Zappe, 2017). That is, an increase in the diameter of a blood vessel by relaxing the smooth vascular muscles. The term comes from Latin vas = “vessel” and Latin di / latatio from latus = broad, wide, of large size = di / latatio = expansion, expansion (Becher et al., 1995).

When blood vessels expand, blood flow naturally increases in the corresponding area.

You can read more about the “Latin-Greek vocabulary in medicine” in this lexicon or my article: “Latin-Greek vocabulary for personal trainers?”.

Expansion of the biliary tract / “dialysis” through the colon wall?

According to the “Gerson Regimen”, it is believed that the caffeine from the coffee enema either causes a type of “dialysis” of toxic products from the blood via the colon walls or could cause the biliary tract to widen, which in turn could cause the process of removing toxic products from the liver more easyly (Gerson, 1978, 1999).

More N-methylpyridinium from dark roast?

The question arose, of course, about the “optimal” coffee for my enemas. After intensive research and correspondence with Dr. Larry Wilson, who – by his own account – had recommended coffee enemas to over 30,000 people, Dr. Wilson said:

[…] medium or dark roast, Columbian or at least South American is usually best.

Dr. Wilson also writes that the nutrients in the soil of Colombia would be best for growing coffee (Wilson, 2019).

However, it could also be decisive that coffee from a dark roast should contain more N-methylpyridinium.

This substance is produced by roasting coffee beans and a “dark roast” should therefore be more effective – compared to a weak, “light” coffee roast – in terms of body fat reduction (through better glucose utilization) and in terms of restoring Vitamin E in red blood cells, and glutathione concentrations (Kotyczka et al., 2011 and Riedel et al., 2014).

I  have  tested looooots of coffee brands and I currently stuck to Dave Asprey’s “French Kick”, a dark roasted blend from his “Bulletproof” Company. This, btw, is also recommended by Dr. Wilson!

For ME it has proven to use the whole coffee beans and then grind them fresh. For this I use a “Skyline” coffee grinder from WMF [Affiliate Link].

This coffee grinder is not very expensive and you can set the grinding degree differently. This is interesting because you can use it to chop the beans sometimes more and sometimes or less.

Of course, this changes the surface structure of the bean or has an effect on the contact surface between water and bean.

Of course, high-quality coffee also needs to be stored appropriately in order to retain all of its valuable ingredients for as long as possible. For me, the container from Coffee Gator® have been best.

I keep all my coffee beans stored in an airtight container and then prepare them with a so-called “French press”. I also got this from Coffee Gator® because it is made entirely of stainless steel!

This means that microplastic particles cannot dissolve through the hot coffee! Here are my recommendations:


Enema equipment

Of course, for a coffee enema – in addition to a suitable coffee (more on that later) – you also need an enema set [Affiliate Link]. There are different ways of doing this. An enema set consists of an irrigator (either a kind of “bucket” or a bag) and a tube with different attachments (for anal and vaginal rinsing).

Such an enema set [Affiliate Link] was kindly made available to me by the company P. Jentschura [advertising, not paid for] (see picture).
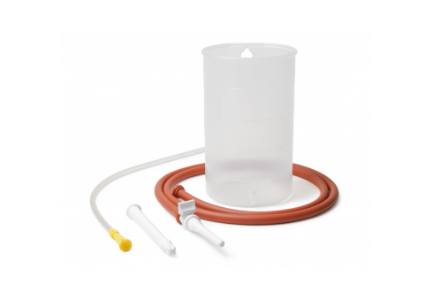
Enema device from P. Jentschura, consisting of: irrigator, enema hose (brown), enema end piece (removable) with stopcock, attachment for vaginal irrigation, and flexible enema piece (with yellow attachment), source: © Jentschura.

This set consists of the irrigator (in which the inlet liquid is located), an inlet hose, two different attachments and a flexible hose end piece.

I prefer the enema buckets to the bags. One reason for this is the possibility of cleaning. Since the buckets are open at the top, they can be cleaned thoroughly and easily.

There are plastic or glass buckets. But I also use a set made of stainless steel [affiliate link]. Here I would pay attention to the type of metal. As long as it is not stainless steel, there is basically the risk of the metal being oxidized by the coffee!
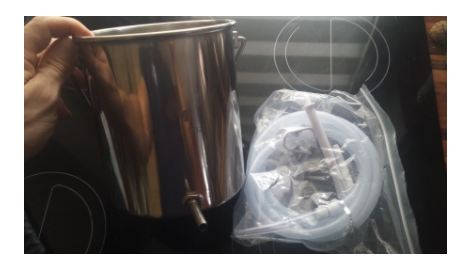
My stainless steel enema bucket + hose, source: own picture.

But caution should also be exercised with plastic. Since I don’t want to ingest microplastics, I only pour the coffee into the mug shortly before use (about body temperature; approx. 36/37° C) or use a glass or stainless steel irrigator.

As a big glass lover, I mostly use an irrigator and end pieces for insertion, made of glass. However, these glass enema sets are very difficult to find and certainly at the upper end of the “enema price scale”.

In my opinion, glass has the advantage (when it comes to borosilicate glass) that it is completely free of metals and plasticizers. The glass end pieces for insertion are probably the best choice for people with sensitive mucous membranes.

Of course, you should be careful with glass!
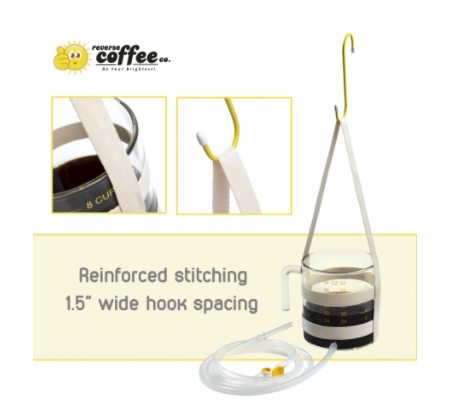
Glass enema Kit, by reverse coffe co. Source: © reverse coffee co.

Such a glass “Ultimate Enema Kit” was kindly sponsored by the Australian company: “reverse coffee co” (advertising, not paid). Thank you at this point!

There are two versions of an enema bag – open at the top or closed. The open bag is – equivalent to the bucket – easier to clean because the opening is larger.

Of course, with the large openings there is always the risk that the coffee might pour out. A closed bag is more difficult to clean. I don’t use an enema bag myself.

My enema application

At this point it should be expressly mentioned again that I am only giving MY experience here for information purposes. Anyone who should thereby play with the idea of ​​also giving themselves an enema should definitely consult a naturopath or doctor beforehand.

1. First of all, I only started with a teaspoon of coffee per liter of water (restructured, filtered, ionized) to see how my body reacts to it. Otherwise I don’t drink coffee. In the meantime I use 4 tablespoons of coffee per liter.

2. Before the procedure (usually in the morning on an empty stomach) there was of course a visit to the toilet. Then I drank about 500ml of lukewarm water (filtered, restructured, ionized, enriched with biophotons).

3. Before the enema, I swung on my mini trampoline for 7 minutes

4. I usually do the enema in the bathtub.

5. Basically I stick to the rule that the whole procedure should not cause any discomfort or pain. Otherwise I would abort the process immediately.

6. The boiled coffee (12-14 min) is cooled down to a little below body temperature, approx. 36/37° C.

7. I use commercially available Vaseline [Affiliate Link] but usually better coconut oil [Affiliate Link] both for myself and for the inlet piece.

8. I hang the irrigator on a coat hook on one of the towel rails above the bathtub. I use about 1 liter of water for the enema.

9. When inserting the inlet piece, I lie on my back. But there are other users who swear on other positions, such as a quadruped stand or lying sideways on the left side.

10. When everything is “in place”, either the stopcock of the inlet piece or the hose clamp can be slowly opened (depending on the model). When the liquid rushes in, I think it’s important to relax completely and breathe calmly and deeply.

11. After the coffee has run in slowly and completely, I lie down briefly on my left side and massage my abdomen counter-clockwise to “move the coffee up” in the colon. Then I perform a “candle” position (feet/trunk up in the air) to let the liquid “flow up” according to gravity.

Because of deep abdominal breathing, I don’t feel uncomfortable. Then I usually lie on my back and lift my hips a little (either with a Rumble Roller®) or just put two to three towels under my hips.

12. I then hold the enema for at least 15 minutes, up to max. one hour. Optionally, I also use my so-called “Gou Gong® – China Lamp” to provide even more relaxation in my stomach area through its infrared heat and minerals from its clay plate.

At the end you have to go to the toilet for emptying, of course always with your feet raised on a stool / “Squatty Potty” [Affiliate Link], so that the bowel can empty itself completely!

You can find out more about it here. When emptying, I rub my right calf, below the hollow of the knee. An acupressure point from TCM that is supposed to stimulate the emptying (seems to work for me!)
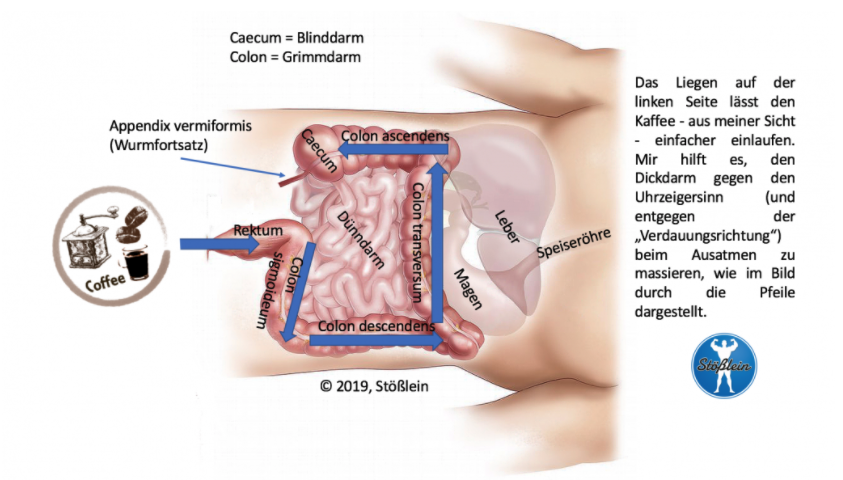
How do I use a coffee enema; Source: Own illustration.

13. For me, the meal after the enema is mostly also a “yang meal”, usually eggs with cooked vegetables from my own garden (no tomatoes, as these should have a “YIN effect”).

If I don’t want to consume a solid meal after the enema not to stress my digestive system again, then I drink, for example just 250ml of water (see above), with a teaspoon of “Ambro Greens” [Affiliate Link].

With regard to the frequency, there are different statements in the literature, from up to 4-6 enemas per day. I think that it depends a lot on the duration of use. I myself prefer only one enema a day / morning and I keep it up to 60 minutes.

In theory, one could perform 4 x 15 minute enemas. For reasons of time efficiency, I prefer an application of up to 60 minutes.

Since the enema is supposed to have a “yang effect”, for me the relaxing effect is most important. Carrying out a hectic and hasty procedure four times would – from my point of view – be rather counterproductive.

Enema breathing technique

Now I’m going to demonstrate a breathing technique called Oxygen Advantage®. As a certified Oxygen Advantage Coach, I use this breathing technique not only during the entire enema procedure, but also in everyday life, e.g. activation of the parasympathetic nervous system.

1. Either lying on the floor or in the bathtub

2. Optionally small Rumble Roller® (RR) [Affiliate Link] with towels under the hip

3. Towel rolled up under the head (keep the cervical spine in a natural position, no pillow / towel that is too high)

4. Soles of feet together (when lying in the bathtub), diamond shape, when lying on the floor, legs upright

5. Breathe in for 4 seconds (diaphragmatic breathing), breathe out for 6 seconds

6. Place your hands either folded below the navel or next to your torso / buttocks

7. Repeat

8. During the application I use so-called “Binaural Beats” (affiliate link), for (my) optimal relaxation, preferably in the theta brain wave range. For listening to them, I use special headphones with pneumatic sound transmission (affiliate link). Why I use them can be read about my EMF optimization in my article.

9. I also like to use red and infrared light during my enema. You can read more about this in my articles on so-called photobiomodulation.

Why not just drink coffee?

Now one or the other might ask the quite legitimate question, why not just drink the coffee instead of giving yourself an enema ?!

The main difference is probably the way the body absorbs the coffee. While coffee that is taken orally has to pass the stomach before it first reaches the small intestine, coffee that is taken rectally reaches the large intestine (colon), see picture above.

Dr. Wilson states:

 “The colon seems to block the absorption of certain toxins found in coffee, including cadmium and some of the caffeine. Drinking one cup of coffee daily is okay, but not recommended. Drinking more than one cup is harmful for most people.” (Wilson, 2019).  

Of course you can argue about the toxicity of drunk coffee and from my point of view, a different dose decides for each individual when to becomes toxic.

That depends to a large extent on the quality of the coffee. As with coffee for drinking, I would only use organically grown coffee for the coffee enema, which is free of impurities, chemicals, pesticides, etc.

But even the best coffee – like all other substances in the world – will contain traces of toxins. That is why the dose decides when something becomes toxic.

Coffee can e.g. contain some toxic metals like lead and cadmium as well as some toxic alkaloids.

Ground coffee can also be rancid because it contains polyunsaturated oils that can go rancid quickly.

(…) from our experience, when taken by rectum, these toxins are not absorbed nearly as much as when the coffee is taken orally.This occurs because the colon is designed to absorb nutrients, while filtering out and leaving behind toxic substances inside the colon. In fact, a healthy colon is quite amazing in its ability to absorb nutrients while protecting the body from a wide variety of toxic substances. This is the reason why drinking coffee is somewhat toxic, but coffee used in an enema is much less so. In fact, we have seen very little toxicity from repeated coffee retention enemas, while those who drink coffee regularly exhibit some toxicity from the beverage.” (Wilson, 2019).

My thoughts on increased fat burning

From a subjective point of view, through the use of regular (daily use) enemas, I have the feeling that I am also seeing increased body fat burning. Especially in the area of ​​the lower abdomen, which is quite stubborn even through good nutrition and exercise.

At this point it should be said that this is not a guide on how to lose weight or get rid of body fat through coffee enemas alone. Bad eating and exercise habits cannot be outdone with coffee enemas.

I am only reporting here on my own experience. I could explain a stronger body fat burning by increased liver activity, added caffeine, N-methlypyridinium in coffee (from dark roast) and by an accelerated metabolism. Information without guarantee, of course!

Coffee enema with DMSO?

The idea of ​​combining a coffee enema with dimethyl sulfoxide (DMSO) came from colleague Dr. rer. nat. Hartmut Fischer. He writes regarding the addition of DMSO in enemas:

If it is rather small enema quantities of up to 500 ml, so I definitely add the full 15% DMSO. At 500 ml, that would be a maximum of 75 ml. For even larger volumes than 500 ml, I leave this 75 ml DMSO as an additive. ” (Fischer, 2020).

I myself add 75 ml to the approximately one liter of liquid that I use for my coffee enema and have no problems with it.

The only side effect lies in the smell (which I don’t smell myself) that I evaporate after the enema (caused by the DMSO).

DMSO has, in a nutshell, e.g. pain- and anti-inflammatory properties, has a cell-protecting and regenerating effect and is part of the new formulation of the German Drug Code (Rezeptformularium des Deutschen Arzneimittelkodex).

FeetUp®, Inversion & the coffee enema

To better distribute the coffee enema in the intestine, you can of course use the gymnastics exercise of the “candle”.

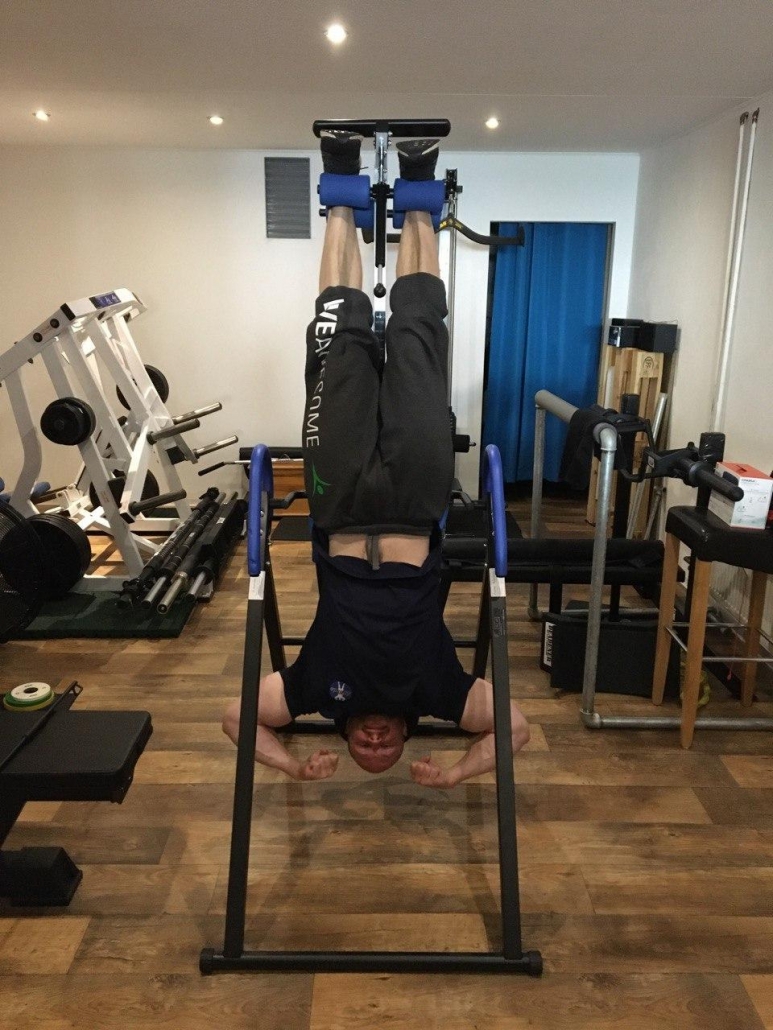
If you want to achieve a better inversion, you can also use an inversion table (a detailed article on this topic can be found here).

Since an inversion table would probably be too bulky for most bathrooms, I discovered the following alternative for myself: A so-called FeetUp® (unpaid advertising).
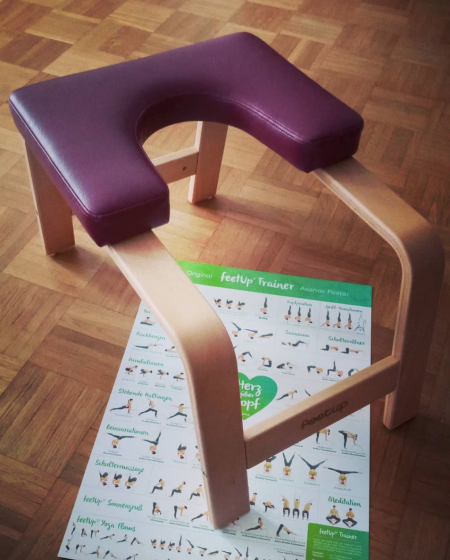
FeetUp®-Trainer, source: own picture.

How do I clean my enema kit?

Every now and then people seem to like to use an enema set that is particularly dangerous for introducing germs, viruses or other things into the intestine.

This is completely incomprehensible to me, since – from my point of view – it is self-evident that the principles of hygiene are also observed in the context of this application.

Enema utensils that are in use should therefore always be appropriately disinfected before and after use, and the enema nozzles should only be used individually and not be shared with other people!

When choosing the disinfectant, everyone can choose his/her favorite agent again. Common alcohol-based products are available in every drugstore and / or pharmacy.

I prefer to use a 3% hydrogen peroxide (H2O2) solution for myself. This is also available from the aforementioned sources.

Coffee Enema Conclusion

I don’t want to make this article too long, which is why I will draw my conclusion:

It was “coincidence” that I stumbled upon the topic of the coffee enema. I couldn’t and didn’t want to ignore that, so I got into this interesting topic.

Since it is well known that trying is more important than studying, a self-experiment was inevitable. Because only those who have tried something can report authentically.

After the mental and physical inhibitions had been overcome, the positive effects reported above also appeared. I can definitely confirm the relaxing yang effect! At least in my experience.

After a coffee enema, I always feel clean as a whistle and super energetic throughout the day.

From a therapeutic point of view, the positive effects mentioned by Zappe, Wilson, Gerson and other sources clearly make sense to me.

I corresponded with Dr. Wilson by email. You can find his extremely detailed article on coffee enemas here.

© HP Bernd Stößlein, Master of Business Administration in Sports Management.

If you liked this article, then subscribe to the blog / newsletter, leave a comment or contact me.

In this and other articles you will find one or the other “affiliate link” to amazon. If you purchase something through this link, you will support my blog articles and create resources for further high-quality research and articles like this. There are no additional costs for you! You can find all of my basic recommendations at: https://www.amazon.de/shop/bernd_stoesslein


Sources/Literature

Lateinische griechischer Wortschatz in der Medizin, 1995, S. 39.

Lateinische griechischer Wortschatz in der Medizin, 1995, S. 112.

Lateinische griechischer Wortschatz in der Medizin, 1995, S. 242.

Ariane Zappe und Dr. med Dietrich Klinghardt, ImmunSymbiose, 2017, S. 285 f.

Coffe Enemas, Dr. Lawrence Wilson, LD Wilson Consultants, Inc., Quelle: https://www.drlwilson.com/articles/COFFEE%20ENEMA.HTM#CH1, Zugriff v. 23.7.19.

Detusches Wörterbuch von Jakob und Wilhelm Grimm, 16 Bde. in 32 Teilbänden. Leipzig 1854-1961. Quellenverzeichnis Leipzig 1971, Bd. 32, Sp. 342 bis 34.

The Kion Coffee Enema: Everything You’ve Always Wanted To Know About Coffee Enemas (But Were Afraid To Ask), Quelle: https://bengreenfieldfitness.com/article/digestion-articles/kion-coffee-enema/, Zugriff v. 23.7.19.

Coffee Enemas, by Dr. Lawrence Wilson, LD Wilson Consultants, Inc., Quelle: https://www.drlwilson.com/articles/COFFEE%20ENEMA.HTM, ZUgriff v. 26.7.19.

Palmitinsäure, Wikipedia, Quelle: https://de.wikipedia.org/wiki/Palmitinsäure, Zugriff v. 26.7.19.

Lehmann G; Martinod P. Über Das Vorkommen Von Theobromin Im Kaffee. Hoppe-Seyler’s Zeitschrift Fur Physiologische Chemie 1965341 (1), 155–156.

Franzke C; Grunert KS; Hildebrandt U; Griehl H. Zum Theobromin- Und Theophyllingehalt von Rohkaffee Und Tee. Die Pharmazie 196823 (9), 502–503.

Gerson Therapy Handbook : Practical Guidance, Resources, and Recipes for Following the Gerson Therapy, Rev. 5th.; Gerson Institute: Bonita, Calif., 1999.

Gerson, M. A Cancer Therapy : Results of Fifty Cases ; and, the Cure of Advanced Cancer by Diet Therapy : A Summary of 30 Years of Clinical Experimentation, Sixth.; Gerson Institute: San Diego, CA, 2002.

Jensen, B. Iridology Simplified : An Introduction to the Science of Iridology and Its Relation to Nutrition, 5th ed.; Healthy Living Publications: Summertown, TN, 2011.

Kotyczka C; Boettler U; Hofmann T; Lang R; Marko D; Stiebitz H; Bytof G; Lantz I; Somoza V. Dark Roast Coffee Is More Effective Than Light Roast Coffee in Reducing Body Weight, and in Restoring Red Blood Cell Vitamin E and Glutathione Concentrations in Healthy Volunteers. Molecular Nutrition and Food Research 201155 (10), 1582–1586 DOI: 10.1002/mnfr.201100248.

Riedel A; Hochkogler CM; Lang R; Bytof G; Lantz I; Hofmann T; Somoza V. N-Methylpyridinium, a Degradation Product of Trigonelline Upon Coffee Roasting, Stimulates Respiratory Activity and Promotes Glucose Utilization in Hepg2 Cells. Food & Function20145 (3), 454–462 DOI: 10.1039/c3fo60320b.

Fischer Hartmut, DMSO-Rundbrief, Zitat entnommen aus: “DMSO & Co. Medizin zum Selbermachen – Dr. Fischer’s Rundbriefe 2017-2020”, Praxisinstitut Naturmedizin, 2020.


Neck Flex – Due to my observation, expertise neck training, besides grip training, is one of the most neglected and underrated parts of strength training. In amateur as well as in professional sports! Just keep in mind, that only because someone pretends to be, or even is, a professional athlete (which is even worse and also embarrassing for his or her trainer) they are not necessarily doing professional workouts! Prepare for some serious neck attacks in this article! I’ll show you how you can proceed from a pencil neck to getting “yoked” with a cool neck training tool, the Neck Flex Pro, and the according techniques.

Let’s get yoked…

Neck Flex  – The Story behind the tool

I communicated with the very friendly staff from Neck Flex as I wanted to know more about what drove them to create their stunning neck training tool. They said:

The co-founders of the Neck Flex both had varying backgrounds in fitness when coming together with the ideals which supported the need for a new and innovative approach to neck training and development.”

They further stated that:

“There was an obvious need for attention to be drawn towards athletes and the importance of neck strength in order to ideally prevent neck and head injuries. The more research that was conducted, the more it became apparent how vital neck strength truly was in preventing these common neck and head injuries that often occur within the field of contact sports and also within the military.”

Moreover they told me:

“As all this research came flooding in, it was then and there that it was decided to create the most effective and versatile neck training device. Everybody is mostly familiar with the standard methods of neck training, such as plate loading with chained head harnesses, machine based neck stations, bridging, and also isometrics.”

In addition to that they wrote:

“So based off the those standard methods, a design was orchestrated that could not only provide a limitless range of motion and resistance, but also provide a very high level of safety in which virtually any gender, age, or background could easily use the product.“

According to that they continued with:  

“After a couple years of testing and development the Neck Flex was finally ready for action. Every step was taken to ensure that the Neck Flex was of the highest quality and a step above all others that have come before.”

Concluding they added:

“The ultimate goal of Neck Flex is to promote and provide the means in which to effectively and efficiently train the neck for everyone from contact sports, military members, youth sports, fitness enthusiasts, and also to those just looking to simply firm or tone their necks. Whatever your training goal is… Neck Flex has got you covered.” (Neck Flex, 2020)

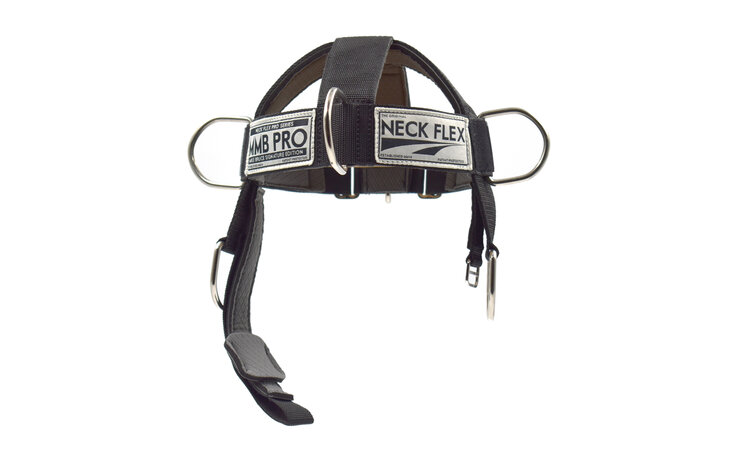
Neck Flex MMB Pro Series, source: Neck Flex.

Neck Training – Last but (not) least?

As you know the saying normally goes: “last, but NOT least”. Unfortunately when it comes to the training of the neck it is probably the opposite!

Of course some bodybuilders build their traps (as traps are supposed to be the “new” abs) but most often only emphasize the upper part of the m. trapezius, which is only ONE of many muscles that enable the movement of your neck!

Moreover, from a sport-specific training point of view, lots of athletes suffer from something that Charles R. Poliquin, aka “Strength Sensei” (R.I.P.) used to call structural balance deficiencies.

According to that it is not uncommon for athletes suffering from faulty movements and/or bad posture.

What your brain has to do with your movements, how your eyes, respectively your sight influence your posture etc. can be found in depth in my article:

POSTUREPRO BRAIN COACH PERFORMANCE CERTIFICATION REVIEW

There are literally thousands of tests to perform/asses restricted movements and or postural deficiencies/disbalances and exercises to correct them. But, how many (ever professional) athletes have you seen performing proper neck training?


It is hardly done and sadly overlooked too often! Why? To be honest I don’t know! Neck training and grip training are probably the two most overlooked things, when it comes to (professional) strength and conditioning training.

More about how to become a certified strength and conditioning coach can be found in my article:

NCSF CERTIFIED STRENGTH COACH REVIEW

Back to the neck: When you are training in a sport specific manner it differs way from what people like to call “fitness” training. Fitness training is more about burning (as much as possible) calories, i.e. in order to lose excessive body fat.

Sport specific strength on the contrary focuses on sparing calories while improving an athlete’s economy, depending on the sport he/she wants to perform (team sport vs. individual sport).

Depending on that, it makes sense that you must train an athlete not only to be strong or to be “in good shape” (lean, and muscular) but in a manner that he/she is able to perform at his/her best during a competition.

That is important as it emphasizes that neck training, in the first place, is not meant to be an aesthetical integration into e.g. a bodybuilding routine.

Remember, as Louie Simmons from Westside Barbell quoted: “big ain’t strong. Strong is strong”. Furthermore, being muscular does not necessarily mean that someone is strong, too!.

But what actually is strength? Well, as this is not the main topic of this article I’ll only give you a very short explanation:

Physical strength is determined by the cross-sectional area of muscle fibers as well as the intensity of so called “motor-unit” recruitment (quality and quantity).

In a nutshell, strength does not equal power, power is not the same as work and/or force and so on.

As you can see, strength and conditioning training is far more complicated than simple “pumping up” in the gym.

You must assess and correct an athlete’s weakness, and create a proper structural balance.

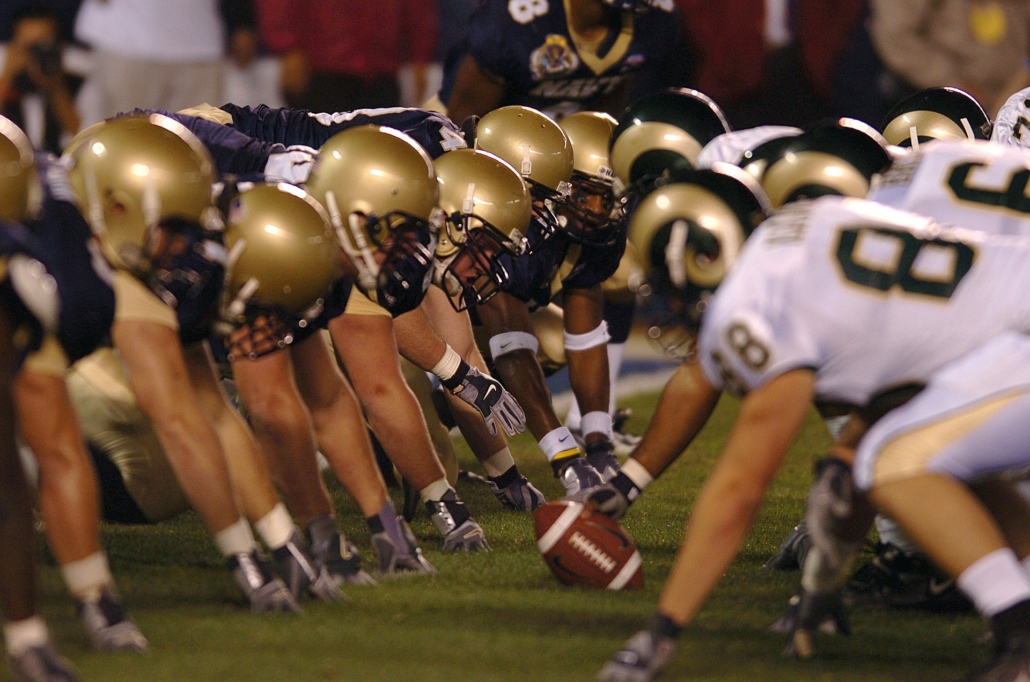
That’s where neck training comes into consideration, as a “pencil neck” won’t be able to enhance an athlete’s performance through increased strength nor enable improved shock absorption capacities in sports with lots of collisions, like American Football or Rugby.

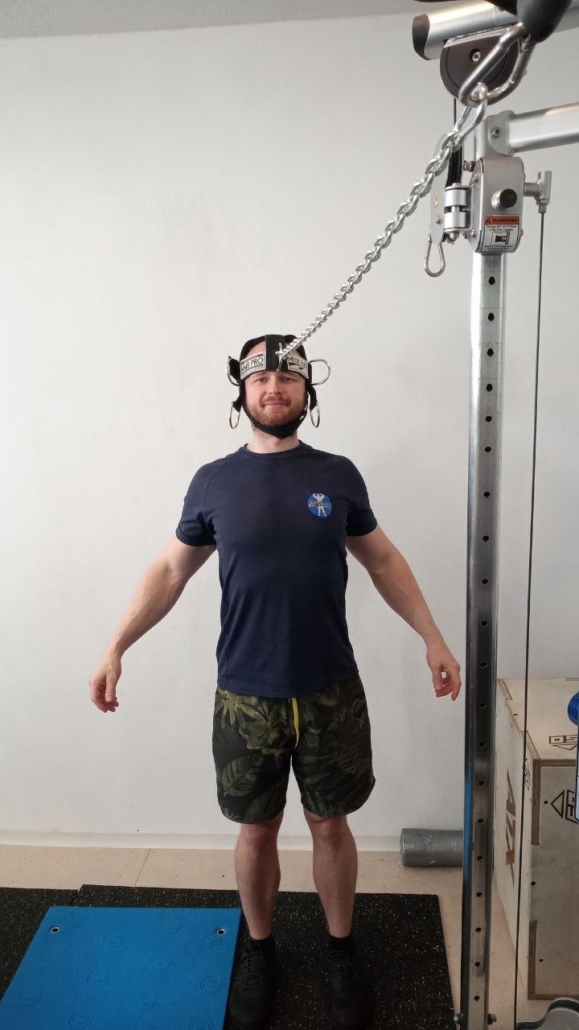
Using the Neck Flex on a cable pulley, source: own picture.

Neck issues and its correlation to chronic fatigue syndrome?

Besides being a Strength and Conditioning Coach/Personal-Trainer & Consulting Biohacker I’m also working in Germany as a “Heilpraktiker”, too.

A proper translation would be something like “complementary and alternative medicine practitioner”. I’m allowed to diagnose and treat disease (with restrictions) and i.e. use invasive techniques, e.g. injections and/or i.v. infusions.

I see lots of patients in my practice who are complaining/suffering from chronic fatigue syndrome, aka “secondary mitochondropathy”. Now I can hear you asking: “What might have mitochondria and a syndrome to do with the training of the neck?”

Well according to Dr.Dr. Kuklinski (affiliate link) an instability of your neck can cause a wide range of (severe) symptoms you normally would not automatically associate with your neck!

Accidents (trauma) and overstretching can damage ligament structures in the neck joint which might lead to a permanent hypermobility in the neck!

Depending on the  head’s postures, this hypermobility might lead to circulatory disorders in the brain, e.g. dizziness, rapid heartbeat or visual field deficits.

Often this isn’t  noticed at all or, as mentioned before, not associated with “issue in the tissue” of your neck.

In addition to that, these circulatory disorders may also occur during sleep, depending on your head resting position.

The brain cells then will start to “panic”, in fear of suffocating, due to lack of oxygen. In response to the circulatory disorder, they release large amounts of nitric oxide (NO).

Dr. Dr. Kuklinski calls this: “nitrosative stress”. The excessive release of NO might lead to the destruction of intracellular vitamins and might excrete micronutrients through the urogenital tract.

This is such an interesting topic, but it is not the main part of this article! I just, again, wanted to show you how many facets the training of your neck “kaleidoscope” has ! And most of them are overlooked.

Like all of my blogposts this one is intended to give you some impulses and to be used as a springboard to your own research!

The only thing I can do is aid you how to help yourself.

Neck Flex – How to attack your neck?

Like in most of my articles about training devices, I like to make a short  but necessary excursion into functional anatomy. Just to give you an overview of how the Neck Flex can be usefully integrated in a structured training program

So, let’s have a look at the neck!

Most important muscles of your neck:

  • M. rectus capitis posterior minor (tilt the head to the same side & dorsal extension)
  • M. obliquus capitis superior (ipsilateral head tilting & double sided dorsal extension)
  • M. rectus capitis posterior  major (ipsilateral turning of head & double sided dorsal extension)
  • M. obliquus capitis  inferior (ipsilateral turning of head & double sided dorsal extension)
  • M. sternocleidomastoideus caput mediale & laterale (unilateral contraction, tilting the head to the same side, turning the head to opposite side, dorsal extension)
  • M. trapezius (pars descendens)

As you can see, the neck is quite a “tricky part”. The above mentioned list is, by all means, not complete and there are much more deep-lying muscles that should be considered!

Neck Flex – How I use it

Neck flex manufactures two different types of neck-training devices. The “original” Neck Flex and the “Neck Flex Pro”. This review focuses on the latter.

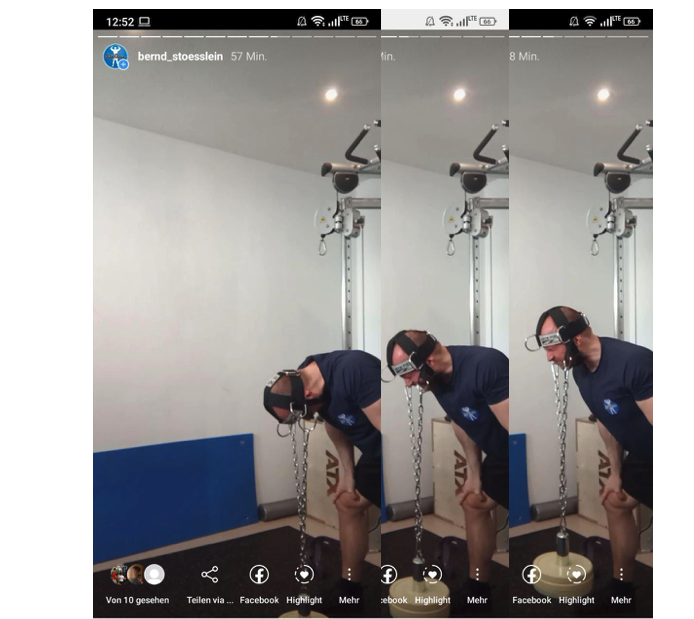
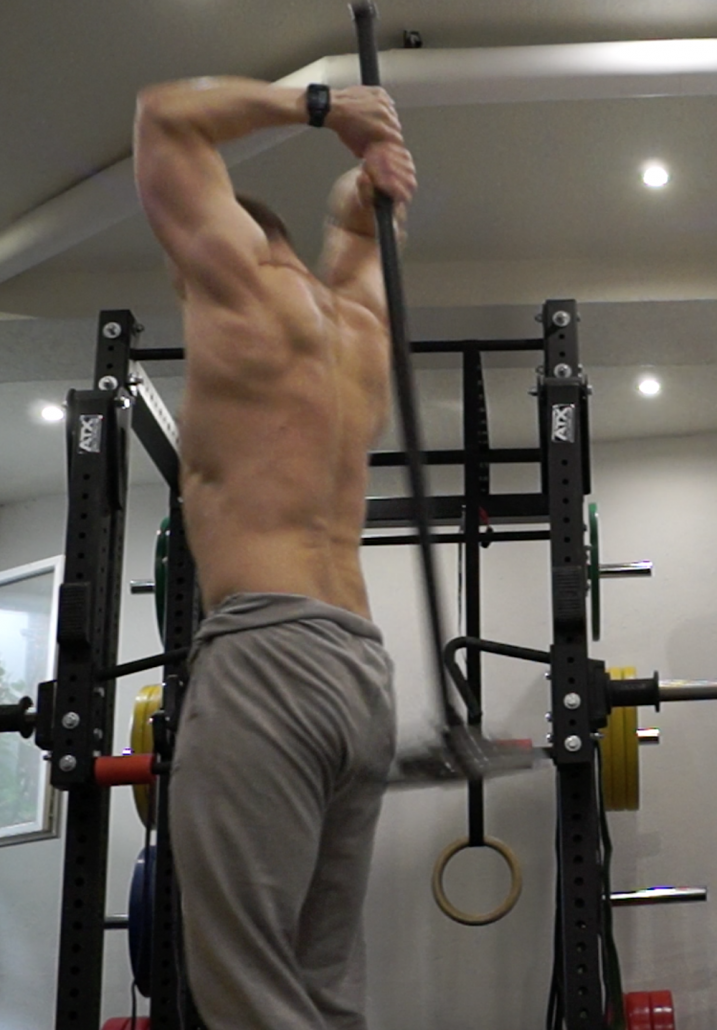
Using the Neck Flex, for neck extension, source: own picture.

The USA-based company itself describes their product as followed:

The Neck Flex MMB Pro Series is truly game changing in all aspects of design. It was developed with the unwaivering intention of producing a harness and kit which surpasses all others in terms of versatility, function, and construction. The MMB Pro Series was designed in close collaboration with Mike Bruce, and thus it proudly bears his initials out of our tremendous respect for all he has accomplished and contributed towards the pursuit of neck strength and conditioning. The MMB Pro series takes our patented Neck Flex platform and introduces”dog ear” anchor points, which allows for the integration of plate loading applications as well as resistance band applications. No other head harness in the world can lay claim to such a design. However the ground breaking design is just one feature of the MMB Pro Series. Our construction materials and methods also adhere to the highest standards of quality. This includes diamond embossed neoprene padding, heavy duty nylon webbing, and all buckles are composed of polished metal. We set forth to raise the bar, and after much time and effort we are proud to present the MMB Pro Series.” (Neck Flex, 2020).

For the Neck Flex Pro the company charges around 110$ which, from my perspective, is a really fair price! Besides the neck harness you’ll get:

  • Heavy Duty Chain for plate loading
  • Carabiners for chain attachments
  • Bodylastics Patented 19 lb (=8,6kg) Resistance Band
  • Bodylastics Door Anchor
  • Neck Flex Tote Bag

Of course the other, priceless, advantage of the Neck Flex is its portability. You can store everything in your gym bag and take it with you when hitting the road and train, in different gyms or even a hotel room! A very versatile approach!

Door mount option of the Neck Flex MMB Pro Series, source: Neck Flex.

Neck Flex/Neck Training Conclusion

As Strength and Conditioning Coach I highly recommend professional athletes to incorporate neck training into their strength training. Of course there are myriads of possibilities how you can train your neck.

With machines, other devices or even only your bodyweight. Incorporating a Neck Flex though might be the most bang for your buck-approach if you don’t have a lot of space/budget for machines or other fancy equipment to get “yoked”.

Integrating neck training into your workout routine might be the “missing link” you’ve been looking for to break plateaus and/or boost your performance. No matter if you’re just a “weekend-warrior” or a professional athlete!

© HP Bernd Stößlein, Master of Business Administration in Sportmanagement.

If you liked this article please share it with your friends, subscribe to the newsletter and the blog.

If you like to book a professional online/offline consultation please feel free to contact me:

 info@bernd-stoesslein.de


Literature

Neck Flex, About us, source: https://www.theneckflex.com/about-us-1, access from 10.09.2020.

Neck Flex, mmb-pro-series, source: https://www.theneckflex.com/mmb-pro-series, access from 11.09.2020.

WristBall was originally designed as a special tool for improving your technique, respectively strength for arm wrestling. As I always point out: I like to think very much: to think outside of the box and grip training. So, why not fusing too cool things together? Although not being an arm wrestler, I implemented the WristBall into my own training and the one of my clients and patients. Why? Because I think this “cool tool” is very versatile and a true enrichment for everyone who is trying to work on improving grip strength. In this article I’ll cover furthermore how you might also use the WristBall besides from grip training!

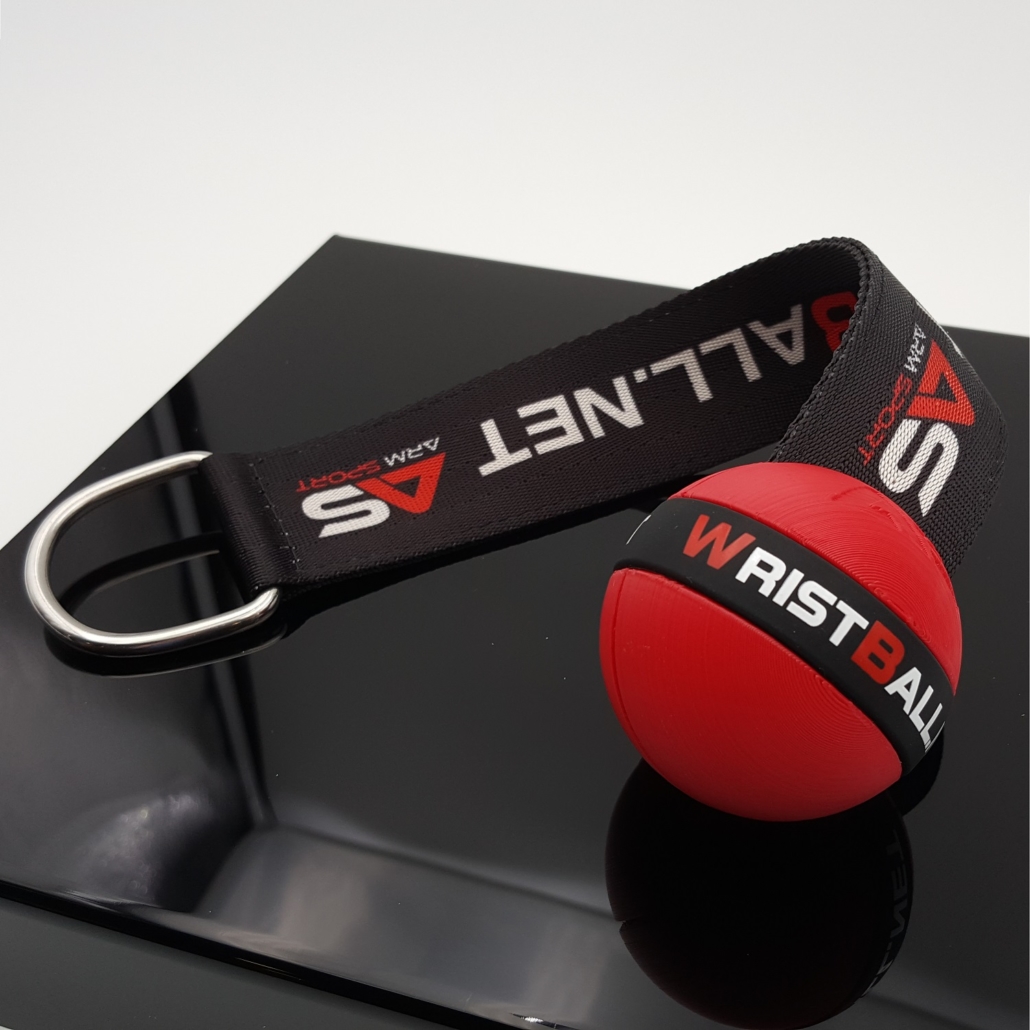
WristBall: 70mm, source: © ArmSprot.

WristBall Review – All good things come in threes?

Special thanks to Misha from Israel who was kind enough to send me not only one of his WristBall trainers but also a pair of his Cone Grips, as well as his WristMax! So, kudos to Misha, respectively his company called “ArmSport”.

If you want to read my other reviews of the aforementioned tools, please feel free to read it in my extensive reviews, here:

WRIST MAX – EQUIPMENT REVIEW

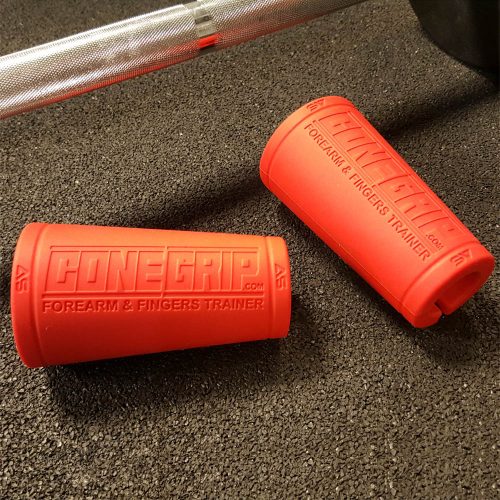
CONEGRIP FOREARM TRAINER REVIEW

WristBall – THE most versatile gripping device?

As mentioned before, I’m a huge advocate of training grip strength. Why? Well, besides neck training and training to improve electromechanical delay, grip strength training is probably one of the most underrated aspects in Strength and Conditioning training!

If you want to know more about the importance of training in regards of electromechanical delay and why it is especially important in esports, I highly recommend to read my detailed article:

STRENGTH AND CONDITIONING TRAINING FOR ESPORTS

So, why might the WristBall be at least one of the most versatile tools for improving grip strength? I’ll give you my expertise.

First of all, the WristBall is suuuuper pricey! They do sell these things (depending on the diameter of the ball) starting from 39.90 (medium, 60mmÆ)-41.90 (large, 70mmÆ)$. Pretty economic, if you ask me!

I emphasize the fact that I chose the words economic and pricy over cheap, as “cheap” usually has a more negative connotation. Regarding the versatility of the WristBall it’s rather pricy, respectively more an investment than an expense!

To make a long story short, the WristBall is, as the name describes, a ball, attached to some kind of seat-belt-like material with the possibility to attach a carabiner.

Therefore you can mount it on anything that can hold a carabiner, such as any cable pulley and/or so-called loading pins.

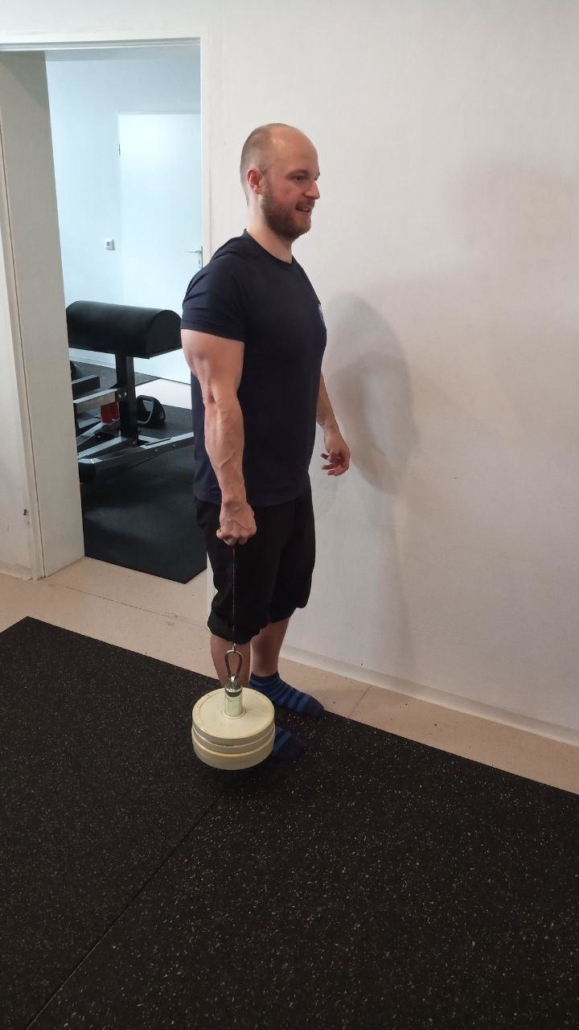
Grip Training with the WristBall, source: own picture.

WristBall – Let’s do some functional anatomy

What makes the WristBall super versatile are its multiple options. You can train:

  • Wrist extension
  • Wrist flexion
  • Hand abduction
  • Hand adduction                    
  • Finger opposition
  • Thumb flexion

Which muscles can be trained? Well, as always, that depends. Literally, on the one HAND on your flexibility (Range of Motion = ROM) restriction and/or on the other HAND other pathologies that might prohibit one or more of the aforementioned functions.

Let’s say you don’t have any issue in the tissue, bones or whatsoever and no problems with structural balance, here’s a list of muscles that can be trained in your hand (and of which you might probably have never heard of):

  • M. abductor pollicis brevis
  • M. opponens  pollicis
  • M. flexor  pollicis brevis Caput superficiale
  • M. flexor  pollicis brevis Caput profundum
  • M. adductor  pollicis  Caput transversum
  • M. adductor  pollicis Caput obliquum
  • Mm. lubrivales I-IV
  • Mm. lubricales III-IV
  • Mm. interossei  palmares  I-III
  • Mm. interossei dorsalis I-IV  
  • M. aductor digit minimi
  • M. flexor digiti minimi brevis
  • M. opponens digiti minimi
  • M. palmaris brevis

That should cover pretty much all of our major hand muscles. If you want to know where all of them are located, you can use this publication as a springboard for your own little research!

Well, wait a second. It is called WRISTBall and not HANDBall, right?! Correct! But all of these muscles do play an important role when it comes to gripping!

According to that, it might be helpful to have at least  heard of them. Of course you can also train your forearm muscles with the WristBall, as mentioned above.

WristBall – Other exercises

Which other exercises, besides the already mentioned, can be performed with the WristBall? Maybe a myriad, but I’ll give you only an impulse of what can be done. You should always use your own fantasy and think outside of the box.

You could perform the following:

  • Single arm standing/seated rows
  • Chin ups (if you have a pair of WristBalls)
  • Biceps curls (you need a loading pin)
  • Triceps extensions in all variations (on cable pulley)
  • Butterflies on a cable machine (pair of WristBalls needed)
  • Spider curls (pair of WristBalls needed)
  • Reverse Flies (single/double handed)
  • Lateral raises (single/double handed)
  • Front raises (single/double handed)
  • Grip help for front squats (pair needed)
  • Internal/external rotation for shoulders/rotator cuff
  • Much more

As you can see, you can use the WristBall for quite a bunch of exercises, and that’s just what I came up so far. There are probably lots of more usabilities to this “cool tool”.

I’d be happy if you share your ideas with me and others in the comment section.

WristBall – Round and round it goes?

We haven’t discussed the most obvious fact of the WristBall, its shape! Compared to other grip tools, which are normally cylindrically shaped, the WristBall, of course, is round…sure, as it’s a ball!

Yet, you must understand that in terms of training/gripping round is actually better than cylindrical! Why? That’s due to its great transfer effect to everyday life. Most things you grip are rather round than cylindrical.

Furthermore, if you train sport specific, for first responders, for self-defense sports (e.g. Krav Maga) and/or law enforcement you need to grab your opponent. Therefore your life literally might depend on a strong grip!

WristBall review Conclusion

In my obligatory conclusion I’ll provide you with my expertise, being a Personal-Trainer, Strength and Conditioning Coach, Consulting Biohacker and Heilpraktiker (Complementary and Alternative Medicine Practitioner), with (2020) over 13 years of professional experience in the Health and Fitness- Industry.

Should you use a WristBall? Well, as mentioned earlier, that depends. Are you a novice lifter with less than two years of “training age” you probably don’t need it yet, as you are trying to build some foundations first. A WristBall could be too specific yet!

I think, besides the fact of its original purpose, you could benefit from incorporating a WristBall in your training, especially in prehab and rehabilitation phases, i.e. if you’re suffering from something called “Tennis- and/or Golfer’s arm”.

If you’re looking for new input for your training for constant progression, you could also benefit from integrating the WristBall and, of course, if you are trying to get a stronger grip!

© HP Bernd Stößlein, Master of Business Administration in Sportmanagement.

If you liked this article please share it with your friends, subscribe to the newsletter and the blog.

If you like to book a professional online/offline consultation please feel free to contact me:

 info@bernd-stoesslein.de

Esports players should train like “normal” professional non-esport related athletes! Every professional gamer should invest in a professional Strength and Conditioning Coach, and there are at least a ton of reasons to do so!

Esports players benefit from strength and conditioning training as it is a sport specific performance coaching, consisting of a special nutrition designed diet, posture improvement, musculoskeletal efficiency enhancement, brain coaching for faster neural processing and so much more!

Regarding how much money pours into esports, it would be simply stupid not to consider, and treat, pro gamers as professional athletes! But just like any other professional athlete they should hire a professional strength and conditioning coach to get a winning edge!

This article is primarily designed for professional esport players, those who want to make a living out of pro gaming and how the collaboration with a professional Strength and Conditioning Coach will enhance their game.

My article is also intended to show Strength and Conditioning Coaches how they can work with professional athletes they might never have thought of and how and where they might start to work with them.

Ok, what does a Strength and Conditioning Coach for professional esports do? Well, pretty much the same he does with all his other professional clients, too. He trains them in a sport specific manner, to make them better athletes in their particular sport.

Esports – The relentless training of professional gaming stars

If you’re reading this because you’re a professional esport gamer, respectively athlete, I won’t have to explain you how relentless and hard you’re training to be(come) one of the world’s best.

For all my other readers I will give a brief overview of how intensive a pro-gamer’s training routine is:

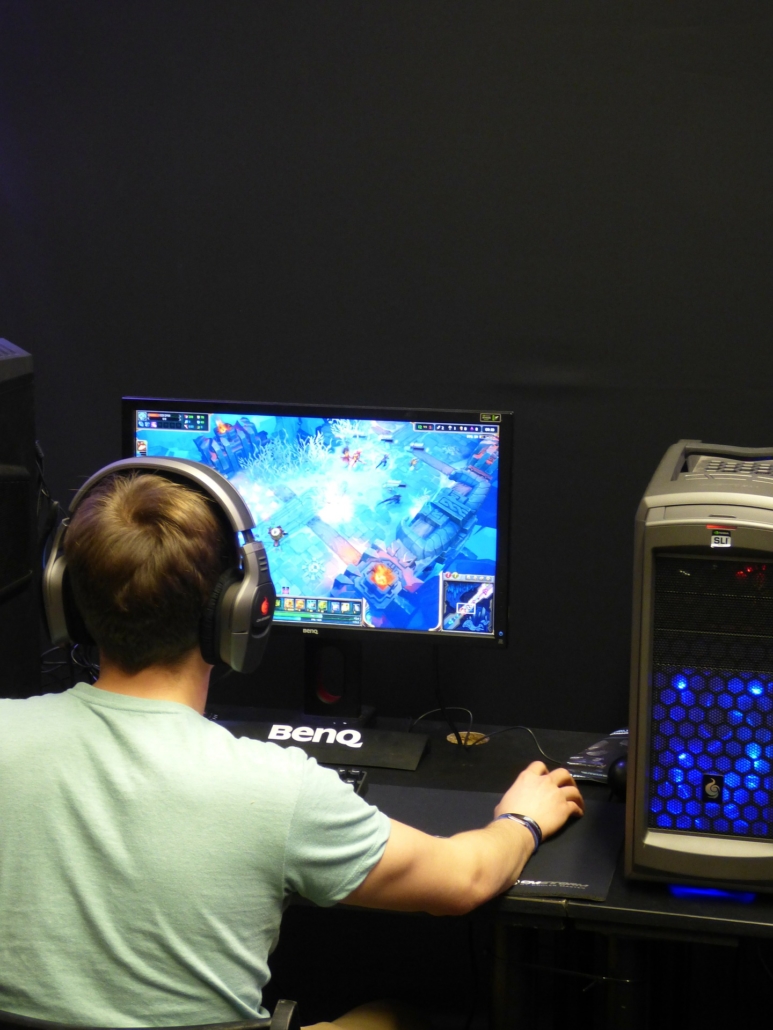
It’s not uncommon for professional esport athletes to perform gaming for more than 12 hours daily, on a regular basis, respectively every day!

In an industry in which the fraction of a second can decide over hundreds of thousands of dollars, the margin for errors is thinkable small!

Esport is not a sport?! That’s probably what lots of non-gamers might think now. What’s the deal? You sit all day long in front of a computer, watching your ass getting bigger and bigger? Everybody can do that…

Something like that is what you usually hear, when you talk about people who are not related to sports of any kind and particularly not to esports!

Esports – the fastest gamer wins!

From a traditional point of view esport gamers/athletes are not what you have in mind when you think of an “athlete”. A bunch of guys sitting in their mom’s basement thriving on junk food and energy drinks to stay awake as long as possible.

You might change your stereotype view!

Esports have evolved in the last decades to a multi-million, respectively multi-billion dollar industry!

Their top athletes have sponsoring contracts, earn hundreds of thousands of prize money and are followed by a huge fanbase. Just like other professional non esport athletes as well!

Being a pro esport gamer requires you being able to process information as fast as possible to make the winning move!

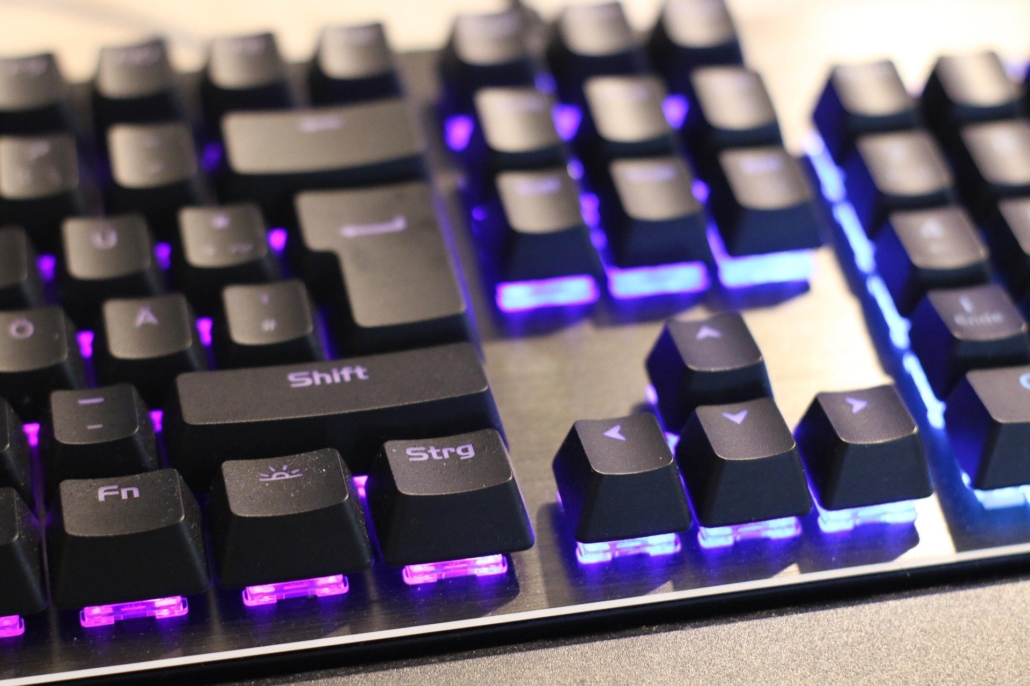
That means that it is not only some typing on a keyboard and scrolling around with the cursor of your mouse. It is about the speed of information<—>reaction time!

How fast can you absorb, realize, interpret your esport related environment (game) AND how fast you can take action!

According to that there are lots of points that have to be taken into consideration:

  • Range of Motion (ROM) improvement
  • Information processing capacity in total
  • Neuromuscular control
  • Fine motor skills
  • Sensory perception (especially visual and auditive)
  • Alignment of musculoskeletal system
  • Neuronal efficiency
  • Motor control efficiency
  • Firing rate of motorneurons
  • Nutrition
  • Supplementation
  • Biochemistry (Neurotransmitter !)
  • Much more
  • Physiology & psychology

As you can see there are lots of things you can optimize with an athlete. Please bear in mind that the list above, by all means, is NOT complete! It’s just to give you a glimpse of what you can work on with a professional Strength and Conditioning Coach!

Esports and brain performance optimization

Of course every pro gamer wants to be the best. A simple yet effective way of improving an esport athlete’s performance is to “rewire” his/her brain!

This does not mean that you haywire some neurons…it’s a metaphorical meaning!

How can you do that? Well, I’ll give you a little glimpse of how I do it, by correcting/improving visual perception.

As I write more in detail in my article about my Brain Coach Performance Certification:

“ (…) it simply has to do with basic human anatomy and how your brain is wired. How you observe and process the world you live in, particularly visually. What you see, in terms of sensory impulses, and HOW this information is perceived and processed in the correspondent part of your brain (visual cortex) determines your motoric actions!

According to that, postural problems are not always and only limited to misalignments of your musculoskeletal system, but most likely due to neuromuscular problems, especially problems with sensory perception through the eyes.” (Stoesslein, 2020).

In a nutshell, this means if an esport athlete receives misaligned information due to eye divergence, this will result in asynchronous visual information procession. This, in turn, will lead to slower information processing which inevitably will lead to slower reaction time.

And we all know that in esports it’s all about speed! You might have the best reaction time on your hardware (super-fast screen and keyboard) but if you are simply not performing on your best due to slow neuromuscular control, bad neurotransmitter distribution, diet issues etc. (the list is long) you will waste a lot of potential optimization!

Esports – Secret to success

Nowadays people are always looking for short-cuts. They don’t want to learn something properly but want to know how something works, explained best in just one sentence.

According to that, and the drastically decreasing attention span I’ll give you (at least some “ingredients”) of my “magic formula”, concerning strength training for esports:

  • Grip strength
  • Neck strength
  • Electromechanical delay

In a nutshell, these are, by far, the most neglected and overlooked factors when it comes to esport performance. Of course an esport athlete doesn’t have to be as “yoked” as Mike Tyson at his prime but a “pencil neck” won’t do the job either.

Especially when we think 20 years ahead, when the average retiring age of professional esport athletes might rise from mid-twenties to, let’s say around 40 or even above.

Considering posture and grip strength might even predict the longevity of an individual, not only in esports. There are countless studies which say that grip strength is a better vital parameter for longevity than blood pressure!

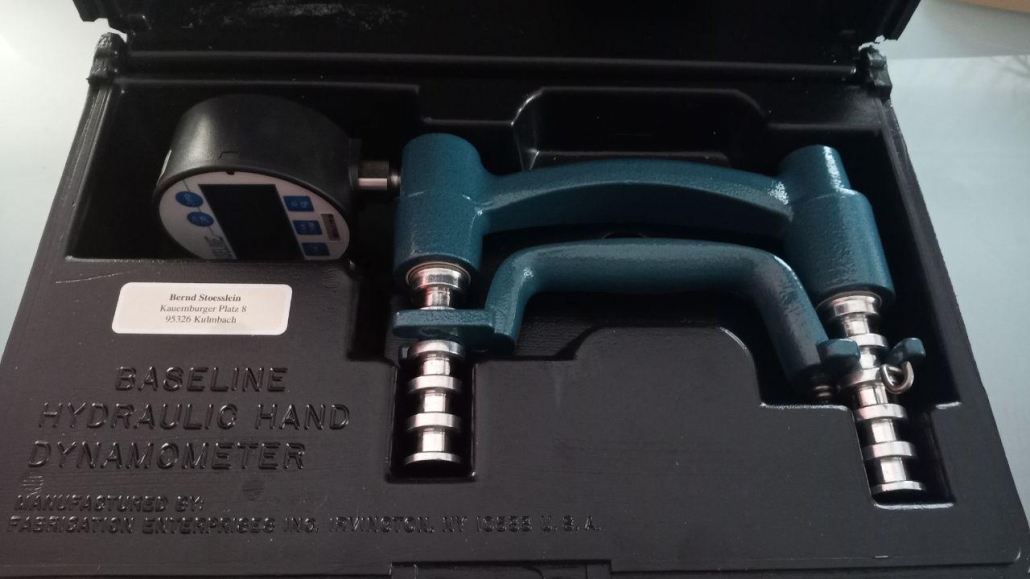
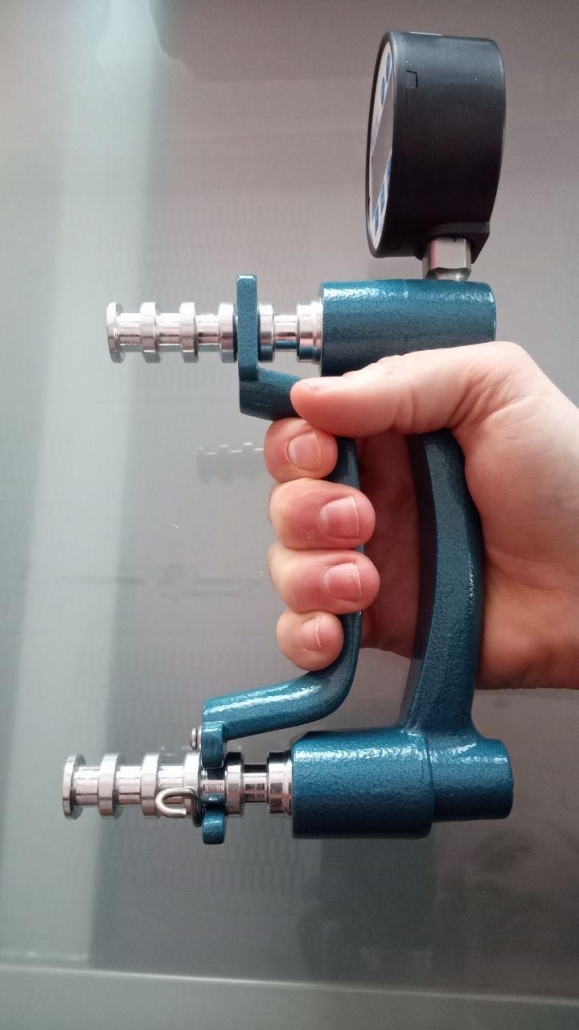
More about the importance of grip strength, how to measure and implement it in a strength and conditioning training (for esports), can be found in my article:

HANDKRAFT MESSEN – HAST DU ALLES IM GRIFF? (German)

If you like to receive an English translation, please email to: info@bernd-stoesslein.de

The third “ingredient” on my list is something called “electromechanical delay”, in human skeletal muscle under concentric and eccentric contractions. Think of the following:

In contraction of skeletal muscle a delay exists between the onset of electrical activity and measurable tension. This delay in electromechanical coupling has been stated to be between 30 and 100 ms.”(Cavanagh & Komi, 1979).

Wouldn’t it make sense to improve/maintain/enhance that speed? Remember, the margin between winning and losing in esports is super small! Therefore optimizing the fracture of a second will determine whether you win or lose a lot of money!

Of course there is a ton more of optimization potential. Lots of more useful tools and techniques, but you will understand that this article is supposed to “whet your appetite” for more!

If you want to get a professional coaching/consulting (online/offline) please feel free to contact me:

info@bernd-stoesslein.de

Esports Performance Continuum

Of course a single blog article is far too short to tell you all about Strength and Conditioning Coaching for esports. Yet, I’d like to give you some input how to start and what the most important things are, from my expertise.

Considering the training of an esport athlete, a very important point comes into play! The periodization of the athlete’s training. What do you train when and how? Is there an in-season, and off-season, how do you schedule strength training etc. etc. etc….

I will give you my basic PERFORMANCE CONTINUUM FOR ESPORTS on which you can build on specific programming:

  1. Assess and Correct
  2. Enable full ROM
  3. Stabilize full ROM
  4. Load full ROM
  5. Load & Link bodily segments
  6. Load segments & start focusing on improving velocity
  7. Load segments + further increase velocity
  8. Unload segments + keep on increasing velocity

Esports and Soft Tissue Treatment

When it comes to esports there is one big issue every professional Strength and Conditioning Coach must pay attention to: How to assess and correct movement restrictions!

This is my Number One on my PERFORMANCE CONTINUUM FOR ESPORTS!If you fail to assess and correct a pro gamers movement restriction all the other listed points cannot be addressed in a proper fashion! Therefore “first things first”!

Remember this blog article is the “finger in the eye approach” of how and where to start if you either want to coach professional esport athletes or you are/want to become a pro gamer and are searching for info how to get coached.

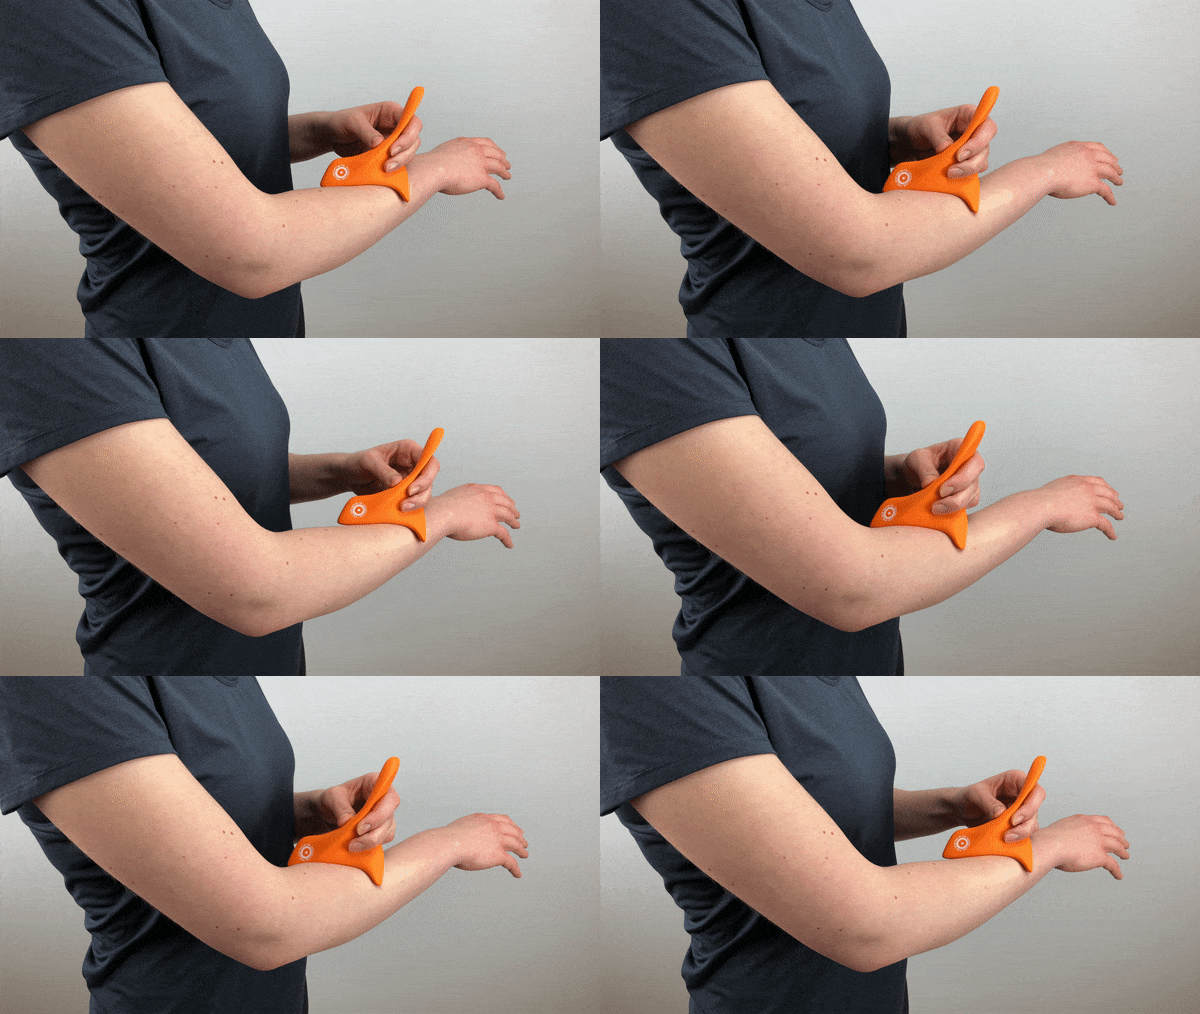
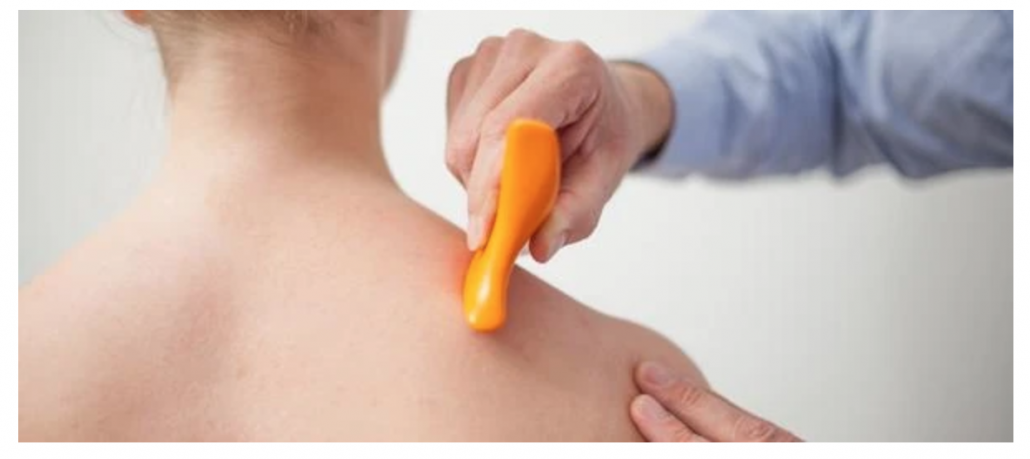
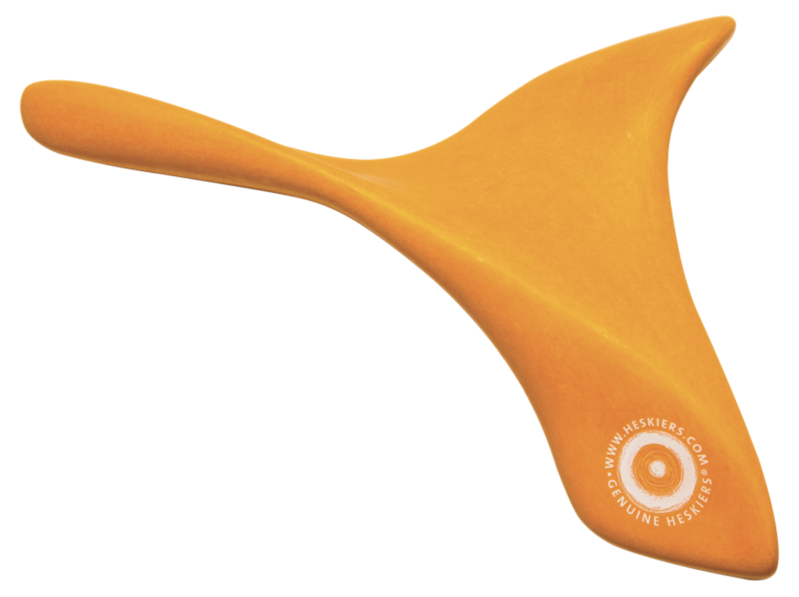
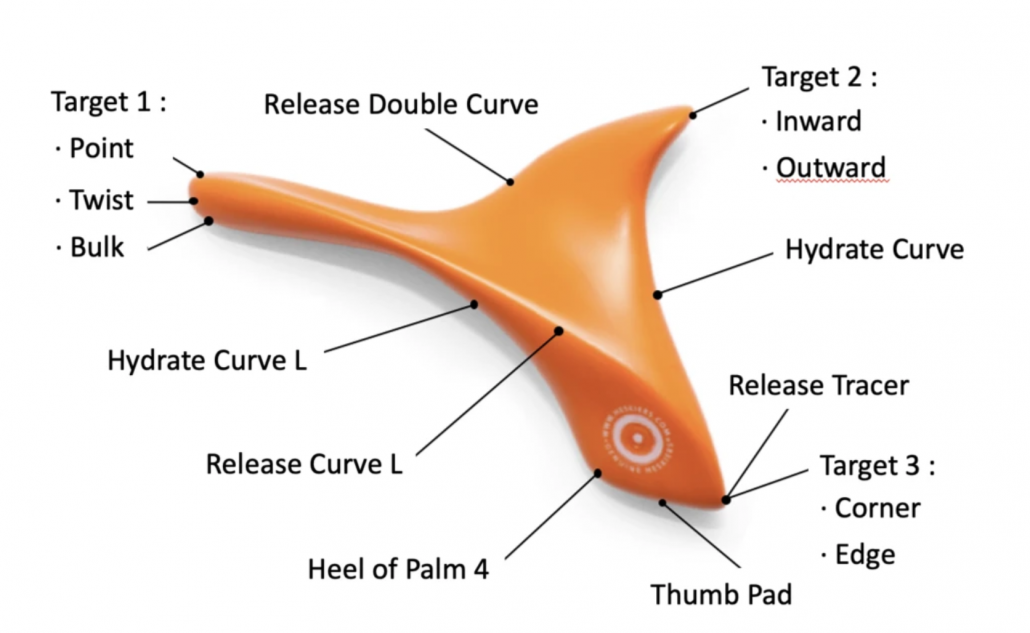
The best, so called Instrument Assisted Soft Tissue Mobilization (IASTM) tool, due to my expertise, is the Heskiers All-In massage tool.

Heskiers All-In-One massage tool + method is a special designed IASTM tool and soft tissue treatment, developed by Danish acupuncturist and designer Martin Heskier.

So, you might wonder if the Heskiers tool is just another IASTM tool out there. To make a long story short: it is, BUT it is one of a kind!

How do I know? Because besides working as a strength coach/personal-trainer, I do also work as something that is called “Heilpraktiker” in Germany. A proper translation in English would be something like “complementary and alternative medicine practitioner”.

It’s a unique profession that, in this constellation, is only available in Germany and in modification in Switzerland. You’re allowed to diagnose and treat patients (with restrictions), even with invasive techniques, i.e. like giving injections, infusions etc.

Therefore, I’m also allowed to treat patients with acupuncture- and of course acupressure-techniques. According to that I’ve been using lots of IASTM tools in all kinds of variations + massage guns and other devices.

I’ve also been certified by my mentor Charles R. Poliquin aka “Strength Sensei” (R.I.P.) as a Certified Kinetic Chain Enhancement Practitioner.

Esports  – The most important task of a Coach

So, with all the info you already received, what do you think is THE most important task of a Strength and Conditioning Coach for esports? It’s to keep the athlete save from injuries and ready to perform at his/her best!

Strength and Conditioning Coaching is different from coaching “joe average”. A coaching that focuses on athletics intents to spare energy instead of trying to burn as much calories as possible!

You must pay attention to the energy system that are used during an esport competition and how you can improve an athlete’s movement economy!

These energy systems have to be considered:

  • Phosphagen
  • Glycolytic
  • Aerobic

Considering the fact that esports are most of the time done while sitting, the aerobic system won’t be competition winning thing to focus on, right? Wrong!

Training the aerobic system will also benefit the anaerobic (phosphagen and glycolytic) systems!

Just by giving you a glimpse of the myriads of things that can be improved in a professional gamer’s life, should open your eyes on how much potential is hidden in this sport.

Both, for the Strength and Conditioning Coach AND the pro gamer! Due to my experience and expertise neither the Coach nor the esport athlete.

Most likely that’s the case as they come from different ends of the continuum of sports, or maybe really from different “worlds”.  

But why not combining the best of two worlds to create something new?

I hope my article lays the foundation for the collaboration of professional Strength and Conditioning Coaches and professional esport players to work together!

Conclusion

Let’s come to a conclusion. Are esports something that can be considered to be a serious “sport”?

Well, that kind of depends on your definition of “serious” and “sport”. From the perspective of economics, esports far surpass lots of “traditional” sports.

From the perspective of a “real” athlete that has a lot more physical involvement some might say: no!

But the same could be said about other sports like horse riding, car driving or chess!

Being a professional means “leaving no stone unturned”! Who cares what other people think? If you want to be a professional game player, respectively esport athlete, go for it!

But you should/could be the one who thinks outside the box! Think of the benefits it would bring to you and your team to hire a professional Strength and Conditioning Coach!

If you like to book an online consulting with me to learn more about strength and conditioning, nutrition, brain coaching, supplements etc. for esports please feel free to send me an E-Mail to:

info@bernd-stoesslein.de

© HP Bernd Stößlein, Master of Business Administration in Sportmanagement.

If you liked this article please share it with your friends, subscribe to the newsletter and the blog.

If you like to book a professional online/offline consultation please feel free to contact me:

info@bernd-stoesslein.de


Literature

Electromechanical delay in human skeletal muscle under concentric and eccentric contractions, P R Cavanagh, P V Komi, Eur J Appl Physiol Occup Physiol . 1979 Nov;42(3):159-63. doi: 10.1007/BF00431022.

Literature

Brain Coach Performance Certification, source: https://www.bernd-stoesslein.de/2020/07/22/posturepro-brain-coach-performance-certification-review/, access from 26.08.2020.

PSO-RITE (affiliate link) is a u-shaped device designed for working on your psoas muscles. In this article I will cover a holistic view on this topic and you will gain information about where the M. psoas is located, why some people consider it to be the “soul muscle” and how you can use the PSO-RITE properly. We will also discuss the PSO-RITE’s “siblings”, the PSO-SPINE and the PSO-MINI! I invite you to join me on this “lovely dance” we’re going to perform on our journey to the “power psoas”. Hopefully, I can help you to unlock your full potential by guiding you through some psoas exercises and some spiritual impulses concerning this “miraculous” muscle.

Let’s begin…

PSO-RITE – hidden like the “dark knight”

I really like to use a little pun here and there, to give the benevolent reader a more sophisticated reading experience. The pun in the header (dark knight) is referred to the “dark knight”, better known as Batman, just in case you wondered 😉

This pun, though, has a particular reason. I chose it as the M. psoas major is really “hidden” deep inside us. It’s a muscle that cannot be seen superficially nor is it easy to be touched!

To be precise it “(…)is a long fusiform muscle located in the lateral lumbar region between the vertebral column and the brim of the lesser pelvis. It joins the iliacus muscle to form the iliopsoas. In animals, this muscle is equivalent to the tenderloin.” (Wikipedia, 2020)

But what does “psoas” actually mean and where does it come from? Well, the term psoas derives from Greek psoa = “meat of the loin”, respectively “muscle of the lumbar region” (Becher et al., 1995).

Now that we know where the medical term originates, we’ll take a look of what the psoas is supposed to do, again from an anatomical/school medical point of view.

Again, our first approach is Mr. “know-it all”, aka Wikipedia. There you will find the following:

The psoas major joins the upper body and the lower body, the axial to the appendicular skeleton, the inside to the outside, and the back to the front. As part of the iliopsoas, psoas major contributes to flexion in the hip joint. On the lumbar spine, unilateral contraction bends the trunk laterally, while bilateral contraction raises the trunk from its supine position. In addition, attachment to the lesser trochanter, located on the postero-medial aspect of the femur, causes lateral rotation and weak adduction of the hip. It forms part of a group of muscles called the hip flexors, whose action is primarily to lift the upper leg towards the body when the body is fixed or to pull the body towards the leg when the leg is fixed.” (Wikipedia).

Sounds fancy, right? But what does it mean? Well, let’s take a closer look and decrypt the most important of these medical terms.

First, ap/pendicular derives from Latin pendere = to hang, to hag, to sag (Becher et al., 1995).

The ilio/psoas is the combination of the  Latin prefix ili(o) = “belonging to the iliac bone” and the aforementioned psoas (Becher et al., 1995). Therefore the ilio/psoas is a more or less grown together of two muscles, the M. iliacus and the M. psoa becoming the: Ili(o)psoas.

How much these muscles are grown together differs from human to human.

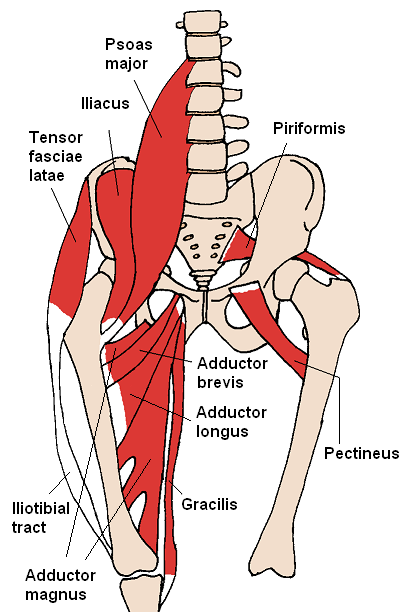
Picture description: Anterior Hip Muscles 2.PGN, Beth ohara, CC BY-SA 3.0, 31 Jan.,2006.

The picture above will give you a quite good example of how tight/narrow the Iliacus and the Psoas Major are located plus that they are often, at least partially, grown together.

Due to reasons of volume we will keep the other displayed anterior hip muscles aside, as we’ll focus on the psoas and keep the anatomical excurse to a minimal effective dosage 😉

Just bear in mind that on top of the displayed muscles in the image above you also have different layers of abdominal muscles. That’s why it is rather hard to “get in touch” with your psoas.

As one of the major anatomical functions of the psoas is to perform a hip flexion it should be no wonder why it is often to be found too tight!

When you enter this realm, which we call earth, respectively reality, you are born into flexion. According to that, you are struggling, literally from day one to work against that. In a physical, as well as in a spiritual and psychological manner.

Just think of the English word “live” spelled backwards…take all the time you need 😉

You have to develop a proper posture, your own conscious mind and you must fight against extensive inward rotation due to prone sitting, driving, “smart phone posture” etc., you get the point.

If you want to learn more about the importance of posture and what a “proper posture” is considered to be, you may read my articles:

·      POSTUREPRO BRAIN COACH PERFORMANCE CERTIFICATION REVIEW

·      ALIGNMENT FROM 🗣️ HEAD TO TOES 👣

·      FREO FOOT CARE SYSTEM REVIEW

It is not uncommon that the Psoas is part of something called: “lower cross syndrome”. An “issue in the tissue”, and posture, that will result in an anterior pelvic tilt, a too tight (ilio)psoas, a crosswise tight erector spinae and, on the other “cross” too weak abdominals and too weak gluteus maximus.

When I write: “it is rather hard to “get in touch” with your psoas”, do you know what a great kind of transition that is?

Well in a couple of minutes I’ll hopefully contribute to your enlightenment.

PSO-RITE – Are you emotionally tight?

Speaking of the psoas you now got a glimpse of what this “bad boy” is capable of doing, at least from an anatomical point of view. Now let’s ascend and experience the psoas from a total different perspective, a spiritual one!

Can you think of muscles in a spiritual sense?! Sure, why not?

According to Liz Koch’s amazing work, the psoas is far more than a core stabilizer and/or a hip flexor muscle!

It is an “organ” of perception composed of bio-intelligent tissue and “literally embodies our deepest urge for survival, and more profoundly, our elemental desire to flourish.”

Furthermore, Koch and others have contributed to the view of the psoas as influencer to your (emotional) health, state of being and vitality.

In Yoga the psoas even is considered to be the “muscle of the soul”. Is it that absurd to think of a too tight (ilio)psoas being the result of a chronically (over) stimulated sympathic nervous system?

I wonder if a tight psoas does not only contribute to faulty posture and restricted movement patterns but ultimately reflects a “tightened” soul? Does the body function as kind of ultra-dense signal transmitter of your soul? 

Would a release of a tight psoas help in “calming” your sympathic nervous system? Resulting in a physical AND psychical/spiritual release?

I keep this open for debate and your constructive comments below this article. Please feel free to share your ideas about that approach!

Apropos, the psoas is, by all means, not the only muscle associated with your soul! The ancient Greek belief was that what we call “the soul” was also to be found within your dia/phragm. That’s what the term schizo/phrenic derives from!

As the belief goes your dia/phragm inheres your soul. Let’s use another brief decryption of those Latin, respectively Greek terms to see what that “fuzz” is all about.

The term dia/phragm is a combination of the Latin prefix dia = through and the suffix phragma, respectively Greek diaphragma = “partion wall” (Becher et al., 1995).

Moreover, diaphragm and phren describe the same muscle, on the one hand you have Latin (diaphragm) and on the other you have the Greek term  = phren (Becher et al., 1995).

In addition to that, you have another Greek term: schizein = to split, to divide (Becher et al., 1995).

Now, let’s connect schizein with phren and, voila you get: schizo/phrenic, which exactly describes what it is supposed to be: a divided/split apart personality, respectively soul!

Concerning the psoas and its “soul connection” I highly recommend you to read the books of Liz Koch, especially:

PSO-RITE – How to use it

Let’s take a look at the PSO-RITE device and how it works. It’s a specially designed, u-shaped device. Simple to describe but not always easy to use!

In the video below I show you a brief demonstration of how the PSO-RITE is supposed to work:

In case you want to skip the video, here’s my short manual:

  • Place the PSO-RITE on a non-slipping surface
  • Locate the location of your (ilio)psoas (take a look at the picture above)
  • Lay on the PSO-RITE, resting on your forearms
  • Just get a gentle feeling of the PSO-RITE “diving” into your tissue
  • Take your time and get used to the feeling, there’s no need to hurry!
  • Breath out and let the PSO-RITE sink in further
  • If you feel any pain immediately stop the exercise!
  • If you feel comfortable you might lower your upper body to the ground (keep your palms besides you, this will help you getting up more easy)
  • Try to gently move up and down as well as side-to-side with your hips
  • Limit the hold of a position to a max of 60 sec. until you get more experienced

PSO-RITE – When to use it?

Now that you have an idea HOW the PSO-RITE is supposed to be used the question arises WHEN do you best use it. Well, of course, this question has to be answered with: “it depends”.

It depends on how severe your “issue in the tissue” is. If you suffer from any pathologies like the aforementioned “upper cross syndrome” i.e. you might use it more frequently than someone with pretty good psoas flexibility.

Please, also keep in mind that a manipulation of the psoas might also contribute to a release of your emotional “traps” or at least might release constant stress by “freeing” you from a chronic state of being in “Fight- or Flight” mode!

This is only my opinion and I did not come up with that, but from a holistical point of view it makes total sense! Just don’t take my words for granted, do your own research and see if all this makes sense to YOU!

PSO-SPINE – Feeling fine?

The PSO-SPINE company didn’t stop with thinking of the psoas, they also came up with another “cool tool”, called the PSO-SPINE!

Basically it’s the opposite approach of the PSO-RITE, as its intention is to work the back muscles, especially those around your spine.

I highly recommend you to invest in the total bundle. The PSO-RITE, the PSO-SPINE and the PSO-MINI. Just because I think that you always have to see the “bigger picture”.

It doesn’t stop with just treating a too “tight” psoas. Not from a physiological, nor from a psychological/spiritual point of view. You should incorporate “the whole thing”.

According to that, it ultimately makes sense for me that “issue in the tissue” (tight erector spinae) can also be some unsolved emotional problems and/or the result of faulty movement patterns.

Therefore having the right “tools” in your “health tool box” will enhance your possibilities of working on your problems.

PSO-MINI – The all-rounder?

The PSO-MINI is not round, but it seems to be the most versatile of the three PSO-RITE products. With the other ones being specialists, the PSO-MINI is the “all-rounder”.

Due to its rather small size, firmness and shape, its strength lies in its miscellaneous usability.

I use it for working on trigger points. That’s where I see the PSO-MINI’s biggest advantage. But, again, that’s only my opinion.

Do you have special issues you could solve with this tool? I’d be happy if you share it with me and the readers of this article!

Hollywood actor Mark Wahlberg also seems to be a fan of the PSO-RITE (see picture), as well as famous Podcast-host Joe Rogan.

Picture description: Copyright PSO-RITE.

PSO-RITE REVIEW CONCLUSION

In the end you always want to know whether something is only an expense or an investment.

To make a long story short: the tools of the PSO-RITE family are a great investment, speaking from my own experience!

By the way, otherwise I would not have taken the time (as time is a kind of “energy-currency”, too) to write a whole article. I’m not that kind of human who invests time in something he doesn’t like and takes even more time telling other people why he dislikes it so much…

Thinking of the psoas as “the soul muscle” is a lovely approach that really fits well into my understanding of what we tend to call “world”, as I also work as a “Heilpraktiker” (complementary and alternative medicine practitioner).

I incorporated the PSO-RITE and the other mentioned tools into my daily routine as well as in the work with my patients and clients.

Hopefully this article contributes to your decision whether to invest in these “cool tools” in a positive manner.

Thanks for taking your precious time and reading my article, much appreciated!

I wish you an energetic time, see you soon!

© HP Bernd Stößlein, Master of Business Administration in Sportmanagement.

If you liked this article please share it with your friends, subscribe to the newsletter and the blog.

If you like to book a professional online/offline consultation please feel free to contact me:

 info@bernd-stoesslein.de


Literature

Psoas major muscle, source: https://en.wikipedia.org/wiki/Psoas_major_muscle, access from 11.8.20.

Lateinisch-griechischer Wortschatz in der Medizin, S. 68.

Lateinisch-griechischer Wortschatz in der Medizin, S. 161.

Lateinisch-griechischer Wortschatz in der Medizin, S. 167.

Lateinisch-griechischer Wortschatz in der Medizin, S. 181.

Lateinisch-griechischer Wortschatz in der Medizin, S. 196.

Optimo Fitness Ergonomics are specially designed grips to enhance your way of gripping. These “cool tools” can be used on pretty much any regular Barbell, Dumbbell and/or cable attachments. They do even work with cambered bars! In this article you will learn about these special grips and why I have them in my “special grip training toolbox”.

Optimo Fitness Ergonomics – the better grip?

Ok, if you follow my blog you will have noticed, that I am kind of obsessed with gripping devices. Why? Because, speaking from the perspective of a Strength and Conditioning Coach,  there are two things that are heavily neglected, Neck- and Grip-Training! 

If you want to learn more about thick grip implements and other special stuff, please feel free to read the following articles:

So why another pair of grips, you ask? Well, why not?! Too much cool grip implements are never enough! Progression is one of the keys to success. For me training must be fun, too, and I get bored very fast.

That’s why I need lots of “cool tools”, especially grip tools to keep my training diversified. Furthermore, having lots of grips in your “gym-toolbox” is very space-saving. You don’t need lots of space and can take your grips, like the Optimo Grips, wherever you go.

They  come in a nice mini-gym bag, really to “hit the road/gym” with you whenever you need a pump.

Optimo grips, source: own picture.

Optimo Fitness Ergonomics – Where’s the difference?

At last, now the question arises what the “fuzz” is all about these particular grips. Well, from my point of view, they’re not intended to be “fat grip” implements. That means, that they’re not designed to thicken the diameter of a bar, but to make the grip more ergonomic!

Ha ha ha, you will probably laugh. Isn’t that obvious? As their name is “Optimo”?! Well, hold your breath as we now dig into the meaning of ergo/nomic and the question WHAT “optimal” is supposed to be!

Let’s start with the etymology (word origin) of the word ergo/nomic. Everybody probably “knows” what the term ergonomic describes but could you give an actual definition?

If not, hang in there. I’ll help you out! The term ergo/nomic derives from Greek ergon = Work, act(ion), activity; and the Greek suffix nomos = custom/rite, law, act, statute (Becher et al., 1995).

Having decrypted this term, we now know that ergonomic, literally translated”, means something like “work that is done according to statutes”.

In the sense of gripping it means that a handle (Optimo Grips) is designed to properly work in “alignment” of the shape of your hands.

To put it in other words: the Optimo Grips are not only cylindrically shaped, but instead have little “wings” in order to enhance your gripping. A proper way of gripping, so to speak.

Optimo Grips on a dumbbell, source: Optimo Fitness Ergonomics.

Optimo Fitness Ergonomics – Let’s do some functional anatomy

To understand the benefit the Optimo Grips might bring to you and your training, we have to do a brief bound in anatomy.

Actually the muscles of the hand are quite numerous. Not a wonder as they have to perform a myriad of functions, especially when it comes to fine-motor skills!

Anyhow, I’d like to stick to the K.I.S.S.-Principle, Keep It Short and Simple. I also work in Germany as a “Heilpraktiker” (Complementary and alternative medicine practitioner).

Quite a unique thing that allows me (with restrictions) to diagnose and treat diseases, do invasive stuff like injections, infusions etc.

I’m writing that to show you that I have extensive knowledge in human anatomy and that this article is not written by a 15 year old “keyboard-hero” who just invested 5 minutes into some internet “copy and paste clickbait” crap.

According to my expertise – and practical implementation of them “out of the trenches”, the Optimo grips give you a cutting edge advantage when it comes to a more…let’s say “stable” grip.

How to use toe Optimo Grips, source: Optimo Fitness Ergonomics.

How does that work, you ask? Well it works by the little “wings” the grips have. These “wings” broaden the grips which results in proper support, especially of these structures, at least according to my point of view:

  • M. palmaris brevis
  • M. adductor digiti minimi
  • M. flexor digiti minimi
  • Aponeurosis palmaris (not sure)

So, according to my expertise that’s the “fuzz” of the Optimo grips and what distinguishes them from other grip implements out there!

To be honest, at first I was really sceptical and my impression was: “wow, they’re really flexible!” (compared to other grip implements, like Cone- and/or Fat Gripz).

After having tested them for quite some extensive time and with several barbells, dumbbells, and different other cable attachments I come to the resume that they do really work great!

Even on a cambered “Buffalo Bar” they perform very well.

Conclusion Optimo Fitness Ergonomics

Of course all my articles  have a conclusion in which I answer the most important question of all: “Are they worth the investment?”, and: “Should you buy a pair?” As you probably know there’s a difference between value and a price so I skip an explanation here.

Due to the fact that I am a huge grip training fan I’d say that these grips were an absolute investment. Moreover, they are very pricy. A pair of Optimos is sold for $39,95.

I highly recommend you to get a pair and enhance your “gym-toolbox” for more variety and to prevent you from stagnation.

In addition to that, as mentioned before, you probably will also experience a better support of your hand muscles, especially during pressing movements.

The muscles that are better supported, in comparison to cylindrical grips, are: M. palmaris brevis, M. adductor digiti minimi and the M. flexor digiti minimi.

If you like to book an online consulting with me to learn more about strength and conditioning, nutrition etc. please feel free to send me an E-Mail to:

 info@bernd-stoesslein.de

© HP Bernd Stößlein, Master of Business Administration in Sportmanagement.

If you liked this article please share it with your friends, subscribe to the newsletter and the blog.

If you like to book a professional online/offline consultation please feel free to contact me:

 info@bernd-stoesslein.de


Literature

Lateinisch-griechischer Wortschatz in der Medizin, S. 76.

Lateinisch-griechischer Wortschatz in der Medizin, S. 147.

YBELL is a 4-in 1 piece of fitness equipment with endless workout possibilities, especially when it comes to functional training/movements. The special design/shape of these dumbbells allows you to perform kettlebell-training, regular dumbbell-work, double grip “med ball”-bouts, push-up stands and much more. The YBell was carefully designed by experts in fitness and industrial design to make it easy and accessible for every Body 😉 No matter if you’re “just” a “weekend-warrior” or a professional athlete, integrating these “cool tools” will add variation to your workouts, which inevitably will lead to more progression!
Learn more about these helpful “tools” for you “training-toolbox”…

This article will also be available in German, soon!

YBELL – Why would you choose’em?

YBEll, why would/should you choose them? (what a pun 😉 ) Well, as always, this question has to be answered with: “it depends”! It depends on what’s your goal right now.

For example: It depends whether you’re new to the world of fitness, respectively a novice lifter or, i.e. if you’re a world class elite athlete.

In both cases you might take benefit out of integrating YBELLs into your workout, but in different ways!

This results to the weights of the YBELLs which, in comparison to ordinary dumbbells, are rather light in weight (up to about 15kg).

So if you are e.g. looking for a “most bang for your buck” approach to equip you own house with a little “home gym”, but lack the space to stuff it with space consuming racks and/or machines, you should definitely consider investing in a set of YBELLs!

Especially in times like we experienced in 2020 where lots of people, due to special circumstances, did not have the chance to visit their regular gym! With a full set of YBELLs at home there is no time for excuses but a lot of access for results!

Having a set of these will give you literally a myriad of training possibilities, especially for metabolic-, respectively anaerobic conditioning work, plus functional movements.

Due to the shape of the YBELLs you can use them as regular dumbbells, as kettlebells and (with some restrictions) as “medicine balls”. The restriction results in the fact that, obviously, you should by all means  not throw them around like a true medicine ball.

Keeping that in mind you can still use them for functional medicine ball-movements, as they can be gripped two-handed and that in a much more convenient way than regular dumbbells!

From my professional perspective/expertise I’d say the YBELL plays its true strength in its versatility for functional movements.

Let me explain…

YBELL and the sagittal plane

Most of power, strength, speed and other weight-training is more or less performed in the sagittal plane. That means, you either move a weight up or lower it down. Rotational exercises are found surprisingly rare, even in top athletes’ training protocols.

Of course you should keep in mind that even if someone is considered to be a world class athlete this doesn’t necessarily mean that he or she is also always performing a structured and sport specific training!

So, the big benefit of YBELLs is for sure the functional training aspect. Movements in which you rather train movement than (isolated) muscles.

If you’re not yet familiar with this training-nomenclature here’s a brief example:

Example 1:

An isolated exercise would be a seated dumbbell biceps curl. An exercise where you are sitting on a bench (with a dumbbell in each hand) and then curling the weight up (concentric phase) and afterwards lowering the weight (eccentric phase).

This would be considered to be an “open kinetic chain” and “open circuit” exercise, but we will leave this apart not to make things too complicated. As you can see, this exercise is intended to (depending on the way of gripping and rotating your wrist)  work different parts of your biceps muscles.

According to that it is, more or less, not training something else.

Seating YBELL-curls as example for an open kinetic chain excercise with open circuit, source: own picture.

Example 2:

In this example we think of an exercise named: “Medicine Ball (MB) Pull-over to stand”. A rather complex exercise, that focuses on movement, rather than isolated muscle work!

Performing this exercise requires you to stand upright (with a YBELL) in front of your belly (arms bent approximately 90° in the elbows), after that you squat down to a full squat (“ass to grass” or deep enough to leave a stain on the floor 😉 ).

Having reached this position you will move your upper body backwards until it is lying on the floor, while simultaneously extending your arms over your head (keep arms straight).

Then you’re going to do the same movement as described above but just in reverse, performed in an explosive manner.

This is an exercise in which you train a complete movement, with extensions and flexions of almost all joints and by activating all primary movers in your body.

Too see the described excercise, “Medicine Ball (MB) Pull-over to stand”, please watch the video below.

As you can see, the YBELLs are designed not to be used for super heavy hypertrophy work, like traditional bodybuilding work as they eventually will become too light, nor for something like powerlifting.

YBELL – Form follows function

So, what’s so special about the YBELL? Of course, it’s the design, but it also resembles a function. When it comes to designing products there is a rule: “form follows function”.

That means that, first of all, the product must be usable to solve a certain “problem”. Afterwards you can give it a nice appearance (design).

The YBELL does both. It looks really nice and has a very good workmanship + offers a vast versatility for exercises (as you can use it as dumbbell, kettlebell and “medicine ball”) while simultaneously saving a lot of space.

YBELL describes the evolution of the YBELL’s product development as followes:

The development of the YBell has been a labor of love for inventor and personal trainer Aaron Laurence. Over the last 15 years Aaron has trained thousands of people on Australia’s famous Bondi Beach.He was using traditional training tools, dumbbells, kettlebells and medicine balls, to create his own brand of High Intensity Resistance training. With his member numbers growing it became impossible to keep incorporating multiple pieces of equipment into his sessions. The solution to the problem was the YBell. One piece of equipment that did everything he was already doing and more!” (YBELL, 2020).

The YBELL’s name perfectly describes its appearance. It looks roughly like the letter Y with a triangle “around” it.

The YBELL-Family is available from XS up to XL and are sold individually.

YBELLs, from XS to XL, source: YBELL.

They star with 9,5 lb which is approximately 4,3 kg and move up to 26,4 lb, which is about 12kg.

Of course the YBELLs increase in size and weight from extra small to extra large.

YBELL – Get a Grip

The cool thing about the YBELLs are the grips. You have four on each YBELL and it gives you quite a lot of grip options. Either for a double handed grip or a single handed one.

Moreover, you can grip “inside” the bar. That differs the YBELLs from traditional dumbbells where the weight equals the center of mass. Meaning, that while gripping an ordinary dumbbell you find the weights aligned with the grip.

When you use the inner grip of the YBELL, the weight distribution differs from those of normal dumbbells. Using a YBELL the weight is not aligned with the grip but “molded” around your hand!

This will result in a different weight distribution and a total different feeling while moving the weights around.

Is this “better”? This would consider a definition of the term “better” in our case here but I would say: Not better, but different!

Keep in mind that constant training variation is one of the keys to continuing progression. Therefore it’s not as important of HOW much progression you do but to ensure ongoing progression.

You should also keep in mind that it’s about proficiency and not perfection. If you try to do something perfect it will never be done.

To give you a better understanding of how you can use the grips of the YBELL please take a look at the images below:

YBELL Inner Grip:

Choosing where to grip is essential! By changing the grip positions you can change the center of mass. Meaning, it’s a difference for your joints/muscles e.g. if you perform a YBELL bench press movement with your hand IN the YBELL or ON the YBELL!

YBELL inner grip, source: own picture.

Having your hand ON the YBELL, the weight will drag your hand more to the outside, whereas keeping your grip IN the YBELL will keep the weight in a line with your arms, respectively your elbow and shoulder-line (depending on which part of the movement you’re looking at).

Inner vs outer grip position, source: own picture.

YBELLS outer grips (“medicine ball”)

When gripping two-handed you can use the YBELLs to simulate a kind of “medicine ball-training”, at least to point where you don’t have to throw the ball. Therefore it’s not a true ballistic movement, e.g. like pushing a MB away from you with maximal force output!

But, as I mentioned earlier in the text, you can use any other exercises that you could perform with a regular MB! This will give you a vast possibility of exercise performances in all three planes (sagittal, frontal, transversal).

Especially useful for metabolic conditioning (where you don’t need super heavy weights) and other functional oriented movements.

YBELL “medicine ball” grip, source: own picture

YBELL Kettlebell-stile grip

The triumvirate of usage will also give you the opportunity to use the YBELLs like a conventional kettlebell.

YBELL kettlebell-stile grip, source: own picture.

This will expand your exercise repertoire to exercises like kettlebell swings or even Olympic Weightlifting inspired ones, like i.e. single-arm YBELL snatches, from different positions (hang/from the ground).  

Again the outcome of the exercise will differ from your grip position (e.g. kettlebell style = on the top grip of the YBELL)!

In this video I give you a brief example of exercises that can be performed using different grip variation on the YBELLs. Some exercises are performed with a closed kinetic chain and closed circuit, or an open kinetic chain with open circuit.

YBELL – price vs. investment

Well, when it comes to fitness equipment it’s inevitable to talk about the costs, the price and if something is considered to be a true investment.

So, what does a full set (10 YBELLS) cost? A 10-piece kit will cost you 599,90$ exclusively packing & shipping. This is an approximate price of 60$ per YBELL.

If you’d like to have them stored in a SUPER COOL vertical rack (see photo)  for an extra of 315,99$.

YBELL Combo 10-Piece Kit + Rack, source: YBELL.

You can either pick a YBELL Combo 10 Piece Kit + Rack or the Vertical Rack alone or each YBELL solely (not sold as pair).

Therefore you have plenty of options available suiting your demands, space and budget. I’ve being using the YBELLs quite some time now, very extensively with my own training and with clients and patients.

I consider the YBELLs as a very useful equipment. No matter if you have a professional facility in which you work with clients or if you want to equip your own home-gym.

Whether you’re working 1:1, alone or in groups, the YBELLs will give you a time and equipment-saving solution, the famous “most bang for your buck”!

I’m happy to have them in my gym!

YBELL Review Conclusion

So, what else can I say about the YBELLS that I haven’t said before? To be honest, quite a lot and one single article is surely not enough to show every possible usage, any kind of exercise or movement that can be applied with a set of YBELLs.

That’s not at all my intension nor my desire. This article is written to introduce you to this “cool tool”. To address you that there is more out there than the regular stuff.

Of course the fitness industry has the burden that almost every day something new “pops up”, but it is not necessarily useful! As my mentor Charles R. Poliquin, aka “Strength Sensei” (R.I.P.) once used to say:

I could wear my underpants above my jeans, that would be new. But it would be useless” (Poliquin 2018).

You get the point. Just because it’s new does not mean it’ll apply any real benefit. In the case of the YBELLs that’s the opposite. They are new AND useful!

I like the approach YBELL uses, it’s according to the “pareto principle” or 80:20 rule. You search for the minimum effective dosage to achieve maximum output. In the case of the YBELLS that’s the same.

They offer you the possibility to have different equipment all “molded” together in one piece. According to that it’s economic in terms of budget and equipment!

YBELLs have a non-slippery surface, a non-rust neoprene coating, are ideal for training almost everywhere and will expand your “training tool-box”. As you know: if you only have a hammer, everything looks like a nail!

Bonus Option:

YBELL offers quite extensive options of workout and education! You can, e.g. book an online introduction workshop, use the YBELL Workout-APP and/or apply either to their Coaching- and Master Trainer Courses.

Additionally there are lots of YBELL-Events available, to be found all here: https://ybellfitness.com/workouts-education/training-calendar-events/

My Final Conclusion:

I strongly recommend you to invest in these special barbells!

© HP Bernd Stößlein, Master of Business Administration in Sportmanagement.

If you liked this article please share it with your friends, subscribe to the newsletter and the blog.

If you like to book a professional online/offline consultation please feel free to contact me:

 info@bernd-stoesslein.de


Literature

YBELL about us, source: https://ybellfitness.com/about-us/, access: 5.8.20.

National Councilof Strengthand Fitness (NCSF) is a USA based institution that offers different certification, i.e. “Personal-Trainer”, in “Sport Nutrition” and in “Strength Training”. NCSF Certified Strength Coach: I took the last mentioned course (Certified Strength Coach), which is approved by the National Commission for Certifying Agencies (NCCA).

NCSF Certified Strength CoachThis course is packed with the highest standards in the industry. It will boost your knowledge not only in strength training but also in performance assessment and evaluation, biomechanics, sport metabolism, nutrition and ergogenic aids, training techniques for athletic performance, advanced programming for sport, injury prevention and return to competition, an exercise (online) library and much more.

Stay tuned and read my review about this investment!

NCSF Certified Strength Coach – What’s on the schedule?

So, you’re planning to become a certified Strength and Conditioning Coach? Great! Congratulations to your decision as this is a very interesting, varied and exciting profession.

If you want to know where to start your journey search no more. You have found your tribe!

I’ve been doing the Certified Strength Coach by NCSF and I will tell you exactly what you can expect and give you my honest feedback.

To make a long story short I’ll start right away and will answer your most desirable question:

“Is this course worth the investment?”

To be honest: YES, IT IS! You will get the “most bang for your buck”. But hold on, I’ll tell you more about that in a minute. First, let’s try with what this elaborate course is made of.

At first you can choose your options. There are numerous “package prices” available. Ranging from as low as 299$ up to fair 599$ for the “Workshop Plus Package”. 

The 299$ is for the “Exam Only” (499$). Besides that, you’re given the option to choose between the  “Home Study Course & Exam” (549$), the “Home Study Plus Package”(549$), The “Workshop Course & Exam”(599$) and the “Workshop Plus Package”.

Where’s the difference? Good question. It mostly differs if you wish to receive a hard copy of the “Advanced Concepts of Strength & Conditioning Textbook” and whether you’d like to take the physical 2-day workshop instruction (16 hours) or prefer studying (online) at home.

Due to the fact that I’m from Germany, the most convenient thing for me was to take the “Home Study Course & Exam” and enjoy the digital edition of the “Advanced Concepts of Strength & Conditioning Textbook”.

NCSF Certified Strength Coach – Course Breakdown

In this part of the article I’ll give you a sneak peek of the separate units of the Certified Strength Coach (CSC) Program. Of course, due to the sheer amount of material and Copyright, I cannot provide you with every little detail of this marvelous course!

But, I’ll try to give you a delightful input as possible to wipe out all your doubts whether to take/invest in this course or not.

Unit 1 Performance Assessment and Evaluation

NCSF Certified Strength Coach: All the Units are structured the same. They are divided in sub-categories and  always start with an overview of the Unit’s learning goals.

These are followed by lesson notes, a “Questions & Answers” section, a Quiz, the recommended textbook review and  the Unit’s little Practice Exam.

Unit 1 logically commences with an introduction to strength and conditioning. In addition, you will make your first steps in sports analysis for program development as well as in performance assessment for elite athletes.

Unit 2 Biomechanics

NCSF Certified Strength Coach: Trying to be a good strength and conditioning coach you will also have the need of fundamental understanding of which muscle does what…and, if that might be the case, why it does not what it is  supposed to do.

According to that, you will learn about the body’s biomechanics, respectively sport biomechanics in Unit 2 as well as how to integrate corrective exercises.

You will learn for example about concepts related to a functional skeletal system, principles of stability and balance, anatomy and function of the sling systems, concepts related to common upper and lower body postural distortions, postural assessments and much more.

Unit 3 Sport Metabolism

NCSF Certified Strength Coach: This unit will turn your view to the inside. Your inner world creates your outer! Not only in a spiritual sense but also in a biological.

Unit 3 acknowledges you in bioenergetics (the role of free energy in the body), energy sources used to meet immediate, intermediate and prolonged metabolic needs, how the metabolic systems complement each other during sport performance and training etc.

Furthermore will gain knowledge on how to “tailor” programs for specific motor unit adaptations including improved firing rates, increased recruitment and enhanced firing synchronicity.

Other examples are the primary physical/metabolic factors that result in muscle strain or damage as well as rhabdomyolysis, the ventilatory and lactate thresholds and applications for metabolic conditioning or the concepts of central and peripheral fatigue as well as factors related to fatigue prevention.

Unit 4 Nutrition and Ergogenic Aids

NCSF Certified Strength Coach:The term ergo/genic derives from Greek ergon = work, act, action, occupation; and Latin genus, respectively old Greek genos = root, gender, species (Becher et al., 1995). Therefore ergo/genic or “ergogenic aids” describes: “that what supports the action of human action”, respectively supplements.

You will learn how to maintain energy balance while competing as an elite athlete, about the various functions and types of dietary macronutrients and micronutrients, as well as guidelines for carbohydrate, protein, lipid, water, and micronutrient intake among elite athletes.

Other examples of this courses content are e.g.: nutrient timing for maximizing performance, protein synthesis, weight loss and/or recovery, effects of carbohydrate intake on sport performance or how to identify heat-related illnesses, body composition assessment and weight management among athletes.

Besides sport nutrition unit 4 will “nurture” (great pun, isn’t it? J ) you with ergogenic aids for sport performance.

You’ll be able to feed your brain for example with the potential risks associated with taking dietary supplements, the potential usefulness and dangers associated with the various ergogenic aids purported to be effective for improving performance and supplementation options for athletes with special needs (e.g., vegetarians).

Unit 5 Training Techniques for Athletic Performance

NCSF Certified Strength Coach: In Unit 5 you will really learn a lot about a solid foundation in:

  • Performance Preparation
  • Foundations and Technique for Olympic Weightlifting
  • Theories and Concepts for Speed, Agility and Quickness Training
  • Technique and Instruction for Speed, Agility and Quickness Training

Sounds a lot? Well, it is. But the cool thing is you don’t have to rely on pictures alone, when it comes to exercise explanations.

The old saying goes: “A picture is more worth than thousand words”. But I tell you what, a video might be worth a billion words! With pictures you can see a starting and a finishing point but you do not see what happens in between!

The Certified Strength Coach Course will provide you with an extensive and surplus excursive library with lots of explanatory videos, filmed from different angles.

But we’ll save that one for later (Unit 8). 

In the first chapter of unit 5 you will learn e.g. the performance-related benefits of a warm-up, how to select warm-up activities that match the specific goals of participating athletes or  how to properly apply self-myofascial release techniques to reduce movement restriction.

The learning goals of chapter 2 ( Foundation of Techniques for Olympic Weightlifting) of unit 5 will enhance your knowledge about proper form technique, spotting, teaching cues and common errors for the back squat, front squat, split squat and overhead squat.

Furthermore, you will learn about other proper techniques including exercises like the power snatch, and other Olympic lifts.

Theories and concepts  for Speed, Agility and Quickness Training (Chapter 3) of Unit 5 deals for example with the biomechanical, neuromuscular and metabolic factors associated with speed and agility performance or concepts related to proper sprinting mechanics/form and common sprinting technique errors etc.

In “Technique and Instruction for Speed, Agility and Quickness Training” (chapter 4) of Unit 5 you will further learn i.e.:

  • The primary categorical drills that can be used for speed, agility and quickness training
  • How to differentiate between ballistic and plyometric drills for SAQ improvements
  • How to differentiate between change of direction (COD) and agility drills

Unit 6 Advanced Programming for Sport

NCSF Certified Strength Coach: Like the chapter before, Unit 6 is “armed” with a myriad of “knowledge bombs”, ready to “blockbuster-bomb your brain”…with strength and conditioning knowledge.

Your gun cabinet is loaded with the following:

  • Considerations for Programming
  • Programming for Sport Performance
  • Periodization Methods for Sport
  • Conditioning for Intermittent Sports
  • Training Methods for endurance Sports

Remember: “power is nothing without control”, that’s why you need to learn the basics first. And nothing ever beats the basics!

Unit 7 Injury prevention and Return to Competition

NCSF Certified Strength Coach: The most important task of a Strength and Conditioning Coach is to guarantee that an athlete stays injury free!

Therefore, Unit 7 deals with the primary focus during each phase of rehab (acute, intermediate, transition back to sport).

In addition, you will learn different types of exercises employed during physical therapy and sport rehab programs.

For each common sport injury you will be given examples of treatment options, sports associated with the highest prevalence, the mechanism of injury, risk factors and necessary training modifications and much more.

There will be suggestions of how to return-to-sport parameters (positive prognostic indicators) following rehab for each injury, which symptoms indicate a need for surgery or withdrawal from sport participation and a bunch of other useful stuff “out of the trenches”.

Unit 8 the Exercise Library

NCSF Certified Strength Coach: As already mentioned, Unit 8 is, as we say in German,: “das Herzstück” which means “the heart-piece” of the NCSF’s Strength and Conditioning Certification. At least from my point of view.

In this Unit you will be granted access to all the exercises that are mentioned throughout the course. These are well structured and really well shot.

You can see every exercise from different angles and Olympic weightlifting exercises are filled with “see through plates”, to give you the most information of proper execution as possible.

All these exercises say the most, by using the least amount of time. They are simply efficient!

The exercise library is listed in alphabetical order, starting with numbers. Here you will learn about drills, like:

  • 30 Yard T-Drill
  • 40 Yard Square Drill
  • 5-Cone Star Drill
  • 6-Cone Z-Drill
  • others

If you’re from a country (like me) that uses the metric system you can easily convert the US system into meters instead of yards, so don’t worry J

In sum you will be able to watch over 300 videos!

Unit 9 Final Practice Exam

NCSF Certified Strength Coach: Unit 9 will give you the option to practice for your final exam. In this unit you can answer 100 multiple choice questions, all mixed together from all the other units.

In the real exam, though, you will have to answer 150 randomly selected multiple choice questions and your time limit is 3 hours.

How to study for Strength and Conditioning Certification

After having received my review about NCSF’s course material I’d like to give you my best technique of how to study for this certification.

There might be an uncountable number of learning techniques but here is the one I’ve been using over the years now, for all sorts of certifications.

It’s called “The Pomodoro- Technique” and I got to know it from my mentor, the most successful Strength Coach in history, Charles R. Poliquin (R.I.P.), also known as “Strength Sensei”.

What is this technique about? Let’s have a look at Wikipedia, aka “Mr. Know it all”.

The Pomodoro Technique is a time management method developed by Francesco Cirillo in the late 1980s. The technique uses a timer to break down work into intervals, traditionally 25 minutes in length, separated by short breaks. Each interval is known as a pomodoro, from the Italian word for ‘tomato’, after the tomato-shaped kitchen timer that Cirillo used as a university student.”

Between each blocks, respectively “pomodoro” I’ll stand up and do some mobility exercises, like deep squatting etc. for a break of 5 minutes before returning to concentration.

Recently I merged to incorporate a standing desk while working in my office and while learning. This is a very cool tool to prevent e.g. upper- and lower crossed syndrome!

How to master learning for Strength and Conditioning Certification?

If you have to learn lots of stuff in a relatively short amount of time you can’t simply learn everything by heart. Due to the overwhelming amount of information it is simply impossible to recall everything and anytime.

Anyway, I’d never recommend only learning things by heart! I propose you to start thinking in principles! Try to understand HOW things work instead of simply trying to memorize them!

Another great tip is learning how to decrypt Latin and (old) Greek vocabulary. No, of course you do not have to learn both of these languages to take a Strength and Conditioning Certificate.

However, once you have gained proper knowledge in related nomenclature you will find everything more easy to learn and understand. Plus you will strongly benefit from it while working in the field of medical professionals!

I speak out of experience as I’m also a “Heilpraktiker” (“heal practitioner”). A profession that is – in this form – only available in Germany and (with restrictions) in Switzerland. A proper translation would be something like “Complementary and alternative medicine practitioner”.

We are allowed to diagnose and treat diseases (with restrictions) and do invasive treatments, e.g. infusions or injections, without being a medical doctor. For this profession I studied for years and I found it extremely beneficial to learn Latin and Greek terms!

NCSF Certified Strength Coach – Conclusion

I don’t want to sound like a broken record but I’ll say it again: The NCSF Certified Strength Coach is a total investment!

You’ll probably have noticed that I wrote “investment” instead of “cost”. That’s not just to sound fancy but to tell you the difference between investment and expenses.

Sure, at first you will have to spend money but in the long run you will learn more, to earn more! Therefore the NCSF Certified Strength Coach is something that will be a return on investment for you.

So, to sum it all up, if you’re looking for a profound start to your career in the field of Strength and Conditioning you definitely should take this course.

On top of the online learning material you’ll either receive the digital version of the “Advanced Concepts of Strength & Conditioning Textbook “ and/or the print version. Keep in mind that that’s an additional 650+ page “knowledge bomb”!

Take a look for yourself, under: http://www.ncsf.org/

© HP Bernd Stößlein, Master of Business Administration in Sportmanagement.

If you liked this article please share it with your friends, subscribe to the newsletter and the blog.

If you like to book a professional online/offline consultation please feel free to contact me:

 info@bernd-stoesslein.de


Literature

Griechisch-lateinischer Wortschatz in der Medizin, S. 76.

Griechisch-lateinischer Wortschatz in der Medizin, S. 88.

Pomodoro Technique, source: https://en.wikipedia.org/wiki/Pomodoro_Technique, acces from 24.7.2020.

Rehabilitation of the Spine is an almost 1300 pages thick masterpiece book of resource by Dr. Craig Liebenson D.C., the founder of the “First Principles of Movement”. This stronghold book can be considered as the gold standard resource in the field. It provides a very practical overview of all aspects of spinal rehabilitation from a patient-centered approach. As a “Heilpraktiker” (Complementary and Alternative Medicine-Practitioner), Strength-Coach and Personal-Trainer I strongly recommend Dr. Liebensons’s book to anyone working in this field! Furthermore, I believe it to be an investment to all other professionals in familiar fields, like i.e. chiropractors and physical therapists, even spine surgeons, physician assistants, etc. Simply everyone who is more or less involved in the care of patients with spine problems!

Rehabilitation of the Spine Review?

Can you review an almost 1300 pages strong book in one single blog article? Sure, you can but I’d like to emphasize that it will only suit you to sneak a peak of a glimpse of an overview!

According to that this article should be considered being a nudge to you. To see the benefit of investing in it!

What can you expect? Well, nothing less than 43 chapters, packed with “spine twisting” knowledge for you to digest!

This article deals with the 3rd edition of Liebenson’s book. If you purchase it you’ll also gain access to an enhanced eBook version, for iOS, Android, PC and MAC!

Here’s just a little summary of the contents:

  • Part I Overview
  • Part II Basic Science
  • Part III Patient Assessment
  • Part IV Sustainable Recovery
  • Part V High-Value Recovery Options for Return to Participation
  • Part VI Building Robustness for Return to Sport and Activity
  • Part VII Multimodal Options for Recovery
  • Part VIII First Principles of Movement: A Systematic Approach
  • Part IX Interdisciplinary Management

The Kabuki Strength Connection

If you are from the field of strength and conditioning you might wonder which connection Liebenson has to the more “hardcore lifting crowd”. Well, let me tell you that he’s on the advisory board of World Elite Strength Coaches, gathered around Kabuki Strength founder Chris Duffin!

Find out about my Kabuki Strengh Scholderök-review –> here.

Part I – An overview

Chapter one of this almost 1300 “manifesto” will give you a basic overview of the modern activity crisis. Like all of the chapters in the book you will get an introduction and an extra field of so called “learning objectives”.

These will answer you in advance what you should have understood after reading a certain chapter. At the end of each chapter you will find a corresponding “self-check”. An audit process that questions/challenges you to rethink what you might have learned.

A great target-performance comparison/variance analysis. You will see which information you receive…and in which new formation it will bring you…from a physical as well as an educational point of view!

Part I is divided into 3 Chapters. Your biggest takeaway will probably be the so called “Bio-Psycho-Social Factors” in disabling back pain.

But, there’s a lot more to explore!

Part II Basic Science

As this chapter’s headline says it’ll provide you with “basic science”. Of course in regards of rehabilitation of the spine! Otherwise “basic science” could mean everything.

Part II is divided into two separate chapters.

Part III- Patient Assessment

What is the most important thing in treating patients? Correct treatment you’d say? No, it’s the patient! It’s all about finding a cure for the “root of the evil” and not just about treating symptoms! Therefore an adequate patient assessment is the foundation for real help!

In Part III of Liebenson’s book you will learn a lot about a patient centered approach.

What’s a “diagnose triage”, assessment of psychosocial risk factors (so called “yellow flags”) quantification of physical performance ability, evaluation of muscular imbalances and proper movement assessment (screening, performance and injury prevention).

Part IV Sustainable Recovery

This part of the book commences with educating the reader about a new understanding of the term “pain”. According to that it will give you ideas how to approach patients and give them reassurance plus reactivation advice (after having been injured).

The chapter emphasizes the treatment of sensitivity in rehabilitation, provides you with a cognitive behavioral therapy program for spinal pain and on top of that will discuss a method of mechanical diagnosis and therapy. 

Part V High-Value Recovery Options for Return to Participation

Disaggregated into 5 chapters, part IV will start with programming from rehabilitation to performance. You will gain knowledge of dynamic variable resistance training, rotational sports and the spine, sparing the spine in barbell training as well as in High Intensity Training (HIT).

Besides Dr. Liebenson you will find a myriad of other contributors in each chapter. Alike in Part IV. Among them i.e. David Joye, Josh Henkin, Max Prokopy, Michael A. Rintala, Joshua Wideman, Brett Wnchester, Michael Hartle and David Whitty.

Part VII Multimodal Options for Recovery

This Part of the book is the most comprehensive one. It offers 9 subitems. Here’s what you will learn about:

  • How to manipulate key joints of the body
  • Manual resistance techniques
  • An approach to postural function
  • Dynamic neuromuscular stabilization
  • Pilates therapy: Exercise for spinal stability
  • Pelvic floor, respectively the integration vs. isolation
  • Treatment of spinal pain in the context of clinical hypnosis and mindfulness-based interventions
  • Yoga exercise respecting dynamic neuromuscular stability principles in senior populations
  • Nutritional considerations for inflammation, pain, and rehabilitation

Part VIII First Principles of Movement: A Systematic Approach

In Part VIII you will learn from Dr. Liebenson and others about an integrated approach to regional disorders, the “Resilience Model” and a clinical framework utilizing a precision approach.

Part IX Interdisciplinary Management

Last but not least the final part will teach you the role of the interventionist, a nonsurgical management of the spine pain patient. Furthermore, you’ll read about lumbopelvic pain in pregnancy, the role and safety of activity in the elderly and  more.

“Rehabilitation of the spine” can be found on amazon for about 100€ (or about 126$). This doesn’t sound cheap at the first glance but if you want to be one of the best, you should definitely invest!

Furthermore, if you narrow it down that’s about 0,077€ (0,097$) per page! Just think of that!

I highly recommend you buying this book and better start studying and applying it. The sooner the better 🙂

Functional Training Handbook Review

Stunning 1300 pages of mind blowing information is not enough for you? Well, then hang in there! I’ll give you a blast of another 450 pages review, of Liebenson’s “Functional Training Handbook”!

If you’re working in the field of strength and conditioning and/or personal-training this book won’t get dusty on your shelf as it’s a practical handbook for everyday use. It comes packed with 450 pages, divided into 5 parts, with 35 separate chapters.

You’ll find Sport-Specific Training Considerations for Basketball, Cycling, Dance, Football, Golf, Hockey, Mixed Martial Arts (MMA), Olympic Weight Lifting, Skiing, Soccer, Swimming, Surfing and Tennis.

Here’s just a little summary of the contents:

  • Fundamentals
  • Sport-Specific Training Considerations
  • Strength and Conditioning Considerations
  • Region-Specific Considerations
  • Motor Control and Athletic Development

Just like “Rehabilitation of the Spine” the “Functional Training Handbook” comes with a code to unlock your free e-book version. Think of the following:

The broader the base, the higher the pyramid”.

The more you know, the more you can apply. So try to be a “learn-it-all” instead of a “know-it-all”.

With Dr. Liebenson’s book you could reach a whole new level of physical training. His practical guide delivers clear, how-to-information, an array of sport-specific guidelines, and key principles that will keep your clients at peak performance.


Join the revolution to improve sports performance, treat injury, and re-train patterns with this comprehensive guide to the body and its movement. I strongly recommend you buying this book as a bundle with “Rehabilitation of the Spine”.

You invest once and profit for a lifetime! But let’s have a closer look to the book:

Part I – Fundamentals

This Handbook commences with “The functional approach”. It continues with “The role of musculoskeletal fitness in injury prevention in sport. Furthermore, you’ll learn how to bridge the gap between from rehabilitation to performance.

In addition to that the book provides you with input about dynamic neuromuscular stabilization, exercise based on developmental kinesiology models.

Moreover, the book stresses the clinical audit process and determines the key link, gives ideas about functional evaluation of faulty movement patterns and closes with fundamentals of training the locomotor system.

And that’s just Part I 😉

Part II Sport-Specific Training

Part II is the centerpiece of this book. It’ll provide you with a “big picture” of sport-specific training considerations. What is there to be found?

Anything, from individual sports like i.e. Golf, Olympic Weight Lifting, Skiing to team sports like e.g. Baseball, Basketball, Football, Hockey etc.

Even Dancing is covered, as well as Surfing, MMA and Tennis.

Part III Strength and Conditioning Considerations

The third part of the “Functional Training Handbook” starts by establishing functional baselines and appropriate training recommendations for off-season conditioning and injury prevention.

It continues with the topic “Running in Sports” and “the Dead Lift”. Off-season considerations are proceeded in terms of Baseball, Basketball, Hockey as well as Soccer.

Surplus you’ll get training strategies for developing explosive power in MMA and other sports!

Part IV Regions-Specific Considerations

The penultimate part deals with region-specific considerations, respectively injury prevention in certain body parts.

Four chapters in part 4 will give you ideas about how to prevent clients from injuries in running sports, knee injuries (in women), rehabilitate shoulder joints in a nonoperative way and how you might treat and prevent injury in the “Overhead Athlete”.

Part V Motor Control and Athletic Development

Last but again not least, the final part will provide you with two trivia chapters, about the principles of athletic development and coaching fundamentals, a skill acquisition perspective!

You can find the latest edition of the Functional Training Handbook i.e. on amazon for just 47€ (49$).

Conclusion

To be honest, it’s an insurmountable task to summarize two books with a total amount of almost 1750 pages in just one blog article. But that wasn’t my intent. I cannot save you from investing time into these books.

If you want to be better in your profession you simply must read AND apply the knowledge from these books on your own!

What I want to emphasize with this little article is what you might learn from these great books and that they are, from my perspective as a “Heilpraktiker” (complementary and alternative medicine practitioner) and Strength Coach/Personal-Trainer, a great investment!

Of course you also have the chance to get only the e-book version of both of Dr. Liebenson’s books. I, for myself, am more “old-school” and prefer the printed version, though.

Plus, as aforementioned, you’ll get the completed contents as e-book on top if you purchase the printed versions.

If you’d like to know why a proper alignment is so crucial you can read my articles:

ALIGNMENT FROM 🗣️ HEAD TO TOES 👣

POSTUREPRO BRAIN COACH PERFORMANCE CERTIFICATION REVIEW

© HP Bernd Stößlein, Master of Business Administration in Sportmanagement.

If you liked this article please share it with your friends, subscribe to the newsletter and/or send me an E-Mail to:

info@bernd-stoesslein.de

Brain Coach Performance Certification is an (online) certification by Annette Verpillot, respectively her Canada-based company named Posturepro. This course is co-hosted by Director of Strength and Conditioning for Basketball, Golf & Tennis, Preston Greene (Florida Gators) and Assistant Athletic Performance Coach, Blake Bender (California Golden Bears).

This knowledgeable triumvirate will tell you how to “rewire” you brain and how to bring a simple and practical understanding of neurology to fitness providers of all levels. An online certification that will equip you with the health and fitness-tools to immediately improve your practice and change the way you work with clients/patients by working with a brain-based approach. 

In this article I’ll give you a glimpse of what I’ve learned and why you also should invest in this education…

Brain Coach Performance Certification – A brain- based approach

What makes this course unique you might ask? Well, it’s definitely the brain- based approach!

The Brain Coach Performance Certification(BCPC) is divided into 6 modules. It includes more than 30 lessons and over five hours of video content! On top you will also have access to all of the updates that will be added by Posturepro while improving the model content based on the users’ feedback!

There is also a private Facebook-Group where you can exchange problems and discuss solutions with other trainers/practitioners.

The BCPC is a brain-based approach on how to better train your clients and athletes. Addressing the brain to build a better foundation is key; if you are not addressing the postural foundation, you are adding more symptoms to what the root cause is. 

Brain Coach Performance Certification – The inner world creates the outer world

If you want to train your clients better you will have to gain insight! That doesn’t mean that you have to be a mysterious esoteric troglodyte wizard with a crystal ball!

It simply has to do with basic human anatomy and how your brain is wired. How you observe and process the world you live in, particularly visually.

What you see, in terms of sensory impulses, and HOW this information is perceived and processed in the correspondent part of your brain (visual cortex) determines your motoric actions!

According to that, postural problems are not always and only limited to misalignments of your musculoskeletal system, but most likely due to neuromuscular problems, especially problems with sensory perception through the eyes.

But before we dig deeper into basic anatomy we’ll start with some word definitions.

If you follow my blog you will have noticed that I’m a huge fan of defining all the used terms. Just to make sure that there are no questions left.

So, let’s start with the company’s name: Posture(pro).

What actually IS a posture? Posture – unlike most of medical terms (who derive from Latin, respectively old Greek) “posture” etymologically most likely derives from Italian postura = posture (Wikipedia, 2020). The suffix -pro is an abbreviation for professional.

Due to that, Posturepro claim to be  professionals in postural issues. Is that true? To make a long story short, I think it is! Just my opinion, but I could be right 😉

Furthermore, my mentor Charles R. Poliquin (R.I.P.) was a big advocate of Posturepro and anyone who knew Charles (aka “Strength Sensei”) also knew, that he didn’t endorse anything he didn’t like! According to that, consider Posturepro to be Strength Sensei approved!

Posturepro Brain Coach Performance Certification – What you will learn

As mentioned in the summary the BCPC is divided into six modules.

  • Module 1: Welcome
  • Module 2: Brain Coach
  • Module 3: Your Feet and Posture
  • Module 4: Your Eyes and Posture
  • Module 5: The Postural Assessment
  • Module 6: Quiz & Certification

A single blog article is sheer too short to address all the modules with their extensive lessons. Lesson 3 & 4, for example, each have 9 sub-lessons you can dig through.

But I’d like to give you a short summary of each modules just to show you a little teaser what you can expect by enrolling/investing in this course.

Module 2: Brain Coach

In Module 2, Lesson one, you will learn about the „missing link”.

According to the BCPC the missing link in most therapy treatments is “(…) the lack of knowledge in the comprehension of how primitive movement patterns are the foundation of all human movement.” (Posturepro, 2020).

The rest of Module 2 will take you step by step through the structural built of your brain. You will learn about the most important brain areas and their functions. These are:

  • The Sensory Cortex
  • How to use sensory input
  • The Motor Cortex
  • The Vestibulospinal Tract
  • The Reticulospinal Tract
  • The Pontomedullary Reticular Formation (PMRF) 

I want to emphasize that the Brain Coach Performance Certification by all means is not an accumulation of foreign words to suggest pseudo competency!

In case you’re not (yet) familiar with the mentioned above here’s a brief etymological explanation:

Cortex derives from Latin and means cortex of the brain (Becher et al., 1995).

Vestibulo/spinal is a composition of Latin vestibular = belonging to the vestibule and Latin spina = thorn, spike, spine/backbone (Becher et al., 1995).

Reticulo/spinal is another compound. Made out of the Latin prefix rete = net, and the aforementioned suffix spina (Becher et al., 1995).

Ponto/medullary Reticular Formation is a construction of Latin pons = bridge, Latin medulla = bone marrow and the already decrypted rete = net (Becher et al., 1995).

In Module 2 of the Brain Coach Performance Certification you will learn more in detail about the built up and function of these terms.

Module 3: Your Feet and Posture

The alignment of the feet is of uttermost importance! You can also read about that in my article: “Alignment from head to toes” and in the “Freo Foot Care System Review”.

Module 3 is divided in 9 sub-categories, respectively 9 lessons. In these you will learn about:

  • The neurophysiology of the feet
  • How to find out if you suffer from an foot imbalance
  • The pathology of flat feet
  • The movement efficiency of the ankle
  • How to fix feet imbalances
  • About ankle force production
  • Movement efficiency of the knee
  • Force production for the knee

Module 3 will also back up the recommendations with studies. Therefore you can dig even deeper into a particular topic.

Module 4: Your Eyes and Posture

The role of the eyes, respectively the conscious processing of visual stimuli plays an extreme important, yet all too often neglected role in postural problems, respectively sports performance!

In the Brain Coach Performance Certification you will learn about how divergent sensory input might negatively affect the visual information processed in your occiput, which is Latin occiput = back of the head (Becher et al., 1995).

Module 4 is divided in 9 sub-categories, respectively 9 lessons. In these you will learn about:

  • Neurophysiology of the eyes
  • How to test for an eye imbalance
  • Eye Exercises  à check spelling error in module 4 exCercises
  • Movement efficiency of the back
  • The lox back fixing imbalances
  • Low back force production
  • Movement efficiency of the shoulder
  • Fixing shoulder imbalances
  • Shoulder force production

Module 4 is the most practical oriented module. By the way I’m aware of the irony of saying “practical” in an online seminar 😉 But let’s put it this way. It’s the module with the most exercises in the program.

Preston Greene and Blake Bender will guide you through efficient exercises that are (not only) useful if you work in the strength and conditioning profession.

Module 5: The Postural Assessment

The Brain Coach Performance Certification is more of an advanced course as it challenges you with a lot of (new) input. In chapter 5 you will find the longest videos of the course, up to about 30 minutes for a single lesson.

Module 5 is divided in 4 sub-categories, respectively 4 lessons. In these you will learn about:

  • Recap of the Brain Coach
  • The sensory receptors
  • The postural assessment
  • More about Brain Coach Posturepro

Module 6: Certification

In order to accomplish the Brain Coach Performance Certification this course finishes with a quiz. To successfully pass, you’ll have to answer the questions correctly to demonstrate what you have learned.

The course closes with a “Thank You” by Annette Verpillot.

What will you get as a bonus?

As if the course wouldn’t be enough you also get a cornucopia of extras, including:

  • BONUS 1: 30 mins One-on-One Business Development Call with Annette Verpillot (value: $500)
  • BONUS 2: FREE Access to our Facebook Practitioner Group (value: $500)
  • BONUS 3: Get listed on the Posturepro Website as a Provider (value: $850)
  • BONUS 4: Gain Access to Peer-Reviewed Studies (value: $250)

Posturepro Proprioceptive Insoles

A proprioceptive insole? What’s that I can hear you ask… Well it’s a “cool tool” you will learn more in depth in the Brain Coach Performance Certification. I’ll give you a short summery though.

The guys from Posturepro describe it this way:

The Proprioceptive Insoles excite the hundreds of thousands of nerve cells loaded in the soles of your feet. Studies show that a textured insole is optimal to arouse postural muscles and elicit benefits ranging from improved balance to improved gait patterns.” (Posturepro, 2020).

Different kinds of Posturepro Proprioceptive Insoles.

As you will learn in the course, numerous  studies have confirmed that the feet are part of how your brain manages movement.

According to this, your body utilizes information from your feet to create the proper postural strategy to stand upright, which is quite an energy-consuming task if you suffer from (structural) imbalances!

The postural insoles are designed and supposed for the purpose to correct foot misalignments.

They work by activating your skin’s mechanoreceptors, by changing the way that the motor cortex is projecting onto your muscles, allowing each foot to send the same (and propper) information to the brain.

Mechano/receptor derives from Greek mechan(o) = “with the help of tools”, “caused by mechanic action” (Becher et al., 1995); and Latin recipere = “to take back” (Frag Cäsar).

So, literally translated, mechanoreceptor means: “with the help of tools (something is) taken back”.

With the help of these insoles you’re supposed to have an enhanced coordination of movement and furthermore improved via several motor tracts (reticulospinal and vestibulospinal).

Posturepro states that:

Because the insoles work with the movement center of the brain, we can see changes in alignment, stability, and pain reduction in a very short amount of time.” (Posturepro, 2020).

Brain Coach Performance Certification Conclusion

In the end of each blog article I like to draw a conclusion. Likewise with the BCPC-course. To make a long story short, you probably just want to hear my answer to one simple question:

Would I recommend taking this course?

And the answer is: yes! From my point of view it was definitely an investment. Sure, it will take you time, not only to work through the extensive video material but also to have all the information settle and digested.

Having absorbed all the new information you are, as the word says, in a new formation. This will give you new tools for your “health tool box” while treating patients and/or clients.

Remember, if you only have a hammer, everything looks like a nail!

Let’s have a brief talk about the investment. In EUR it’s 390 € (429 US $). You’ll probably have noticed that I wrote “investment” instead of “cost”.

If you invest, you will get a so called “return on investment”. Which means at first you “spend” some money, but in the long run you will profit from the knowledge you have gained.

Therefore I address you to learn more, to earn more! And please rather be a “learn it all” than a “know it all”. The only thing I know for sure, is that I don’t know anything for sure!

© HP Bernd Stößlein, Master of Business Administration in Sportmanagement.

If you liked this article please share it with your friends, subscribe to the newsletter and the blog.

If you like to book a professional online/offline consultation please feel free to contact me:

 info@bernd-stoesslein.de


Literature

Posture, source: https://fr.wiktionary.org/wiki/posture, access from 13.7.20.

Posturepro, Module 2, Lesson 1, The missing link, 2020.
Lateinisch-griechischer Wortschatz in der Medizin, p. 53.

Lateinisch-griechischer Wortschatz in der Medizin, p. 62.

Lateinisch-griechischer Wortschatz in der Medizin, p. 131.

Lateinisch-griechischer Wortschatz in der Medizin, p. 132.

Lateinisch-griechischer Wortschatz in der Medizin, p. 176.

Lateinisch-griechischer Wortschatz in der Medizin, p. 207.

Lateinisch-griechischer Wortschatz in der Medizin, p. 207.

Lateinisch-griechischer Wortschatz in der Medizin, p. 246.

Recipare, Quelle: https://www.frag-caesar.de/lateinwoerterbuch/recipere-uebersetzung-1.html, acces from 13.7.2020.

Conegrip Forearm and Finger Trainer (affilate link) are – as the name suggests – cone-shaped grip strengthening tools. Nothing new under the sun you might think, but it is! As most tools designed for enhancing grip strength are cylinder- shaped! Well, Bernd, “no big deal” I can hear you say. But think again! In this article I’ll tell you more about the importance of gripping power in strength training, how you might benefit from it (in Team-Sports i.e. like Basketball, Football, Soccer, etc.) and what distinguishes the Conegrips (affiliate link) from cylinder-shaped grip tools.

How to recruit more muscle fibers in your hand, like the abductor digiti minimi and much more.

Get a grip…

How to become a Conehead

Ok I cannot resist to make this joke about the Coneheads…come on, it’s too good not to make it! For those of you who are old enough to remember, “Coneheads” is a 1993 movie, starring Dan Aykroyd, about cone-headed aliens who try to live a normal people’s life on earth 🙂  

But, what I’d like to stress with the sentence “how to become a Conehead” is actually that you should start to think about the benefits of a cone-shaped grip strength tool!

Cone Grips, sourcet © 2016–2020 ConeGrip.

Let’s start with the basics. What actually is a cone? Well, according to Wikipedia a cone is:

“(…) a three-dimensional geometric shape that tapers smoothly from a flat base (frequently, though not necessarily, circular) to a point called the apex or vertex.

A cone is formed by a set of line segments, half-lines, or lines connecting a common point, the apex, to all of the points on a base that is in a plane that does not contain the apex. Depending on the author, the base may be restricted to be a circle, any one-dimensional quadratic form in the plane, any closed one-dimensional figure, or any of the above plus all the enclosed points. If the enclosed points are included in the base, the cone is a solid object; otherwise it is a two-dimensional object in three-dimensional space. In the case of a solid object, the boundary formed by these lines or partial lines is called the lateral surface; if the lateral surface is unbounded, it is a conical surface.” (Wikipedia, 2020).

Why are you telling me that, you might wonder? Well, it will make sense within a second when we switch from basic geometry to basic human anatomy.

The Art of Grapping and punching

In martial arts, self-defense techniques (like Krav Maga and others) or law enforcement you have to grab i.e. forearms, which are more like cone- shaped instead of a cylinder….

That’s where a strong grip comes into play and how you can transfer your efforts in the gym to “the real deal”. You apply what you have strengthened “in the trenches”.

The more you train with thicker grip implements, like the cone grip, the more motor units you might recruit. This will inevitably lead to improved overall upper body strength and useful skills, both in you specific sport and profession.

It’s not like simple “show off” muscles, but something you can really use!

If you want to know more about grip training you can read my article about the “Gripedo”.

So, what does all that have to do with cone-shaped grip devices? Well, if you have ever been engaged in any kind of martial arts and/or self-defense technique you might have realized that if you clench a fist and strike an object, the toughest knuckles are the first two ones.

The  third finger and the pinky (see image below) are commonly the lesser reliable “strike-buddies”.

The third (ring finger) and the pinky are commonly week(er) fingers for gripping and/or striking with a clenched fist. Source, own picture.

Why is that so? We will see in a minute.

First, think of another similar phenomenon…if you have ever trained with Barbells/Dumbbells or any kind of grips that are above 30 mm of diameter (50mm and above) you probably will have realized, that you most likely develop the most gripping power (fist clenched) with the thumb, the index- and the middle-finger.

The ring finger and the pinky can be closed too, but are normally not that involved in gripping (a cylinder-shaped) object, like the rest of the hand!

According to my anecdotal experience with myself and lots of patients and clients that might be due to our “cone-shaped” hand.

Cylinder-shaped grip-tools in different sizes, source: own picture.

If you take a look at the comparison of the cylinder-shaped gripping tools and the cone grips the difference is obvious. Whereas it’s troublesome to create a “gripping-equilibrium” in all five fingers using cylindric tools,  it is much easier using the cone-shaped ones.

The extra load, respectively the stress you put on the hand muscles should also create a greater training effect, especially on the abductor digiti minimi. “

It is  “(…) a skeletal muscle situated on the ulnar border of the palm of the hand. It forms the ulnar border of the palm and its spindle-like shape defines the hypothenar eminence of the palm together with the skin, connective tissue, and fat surrounding it. Its main function is to pull the little finger away from the other fingers (i.e. abduction).” (Wikipedia, 2020).

Well, aductor digiti minimi? Sounds funny…but I have never heard of that one, you might think. Is it important? Well…if you ask me, when it comes to gripping strength, it definitely is. That’s just simply the fact as in gripping strength the more equals the better!

Ad/ductor derives from Latin ad = after, to; and Latin ducere = to draw/pull sth. (Becher et al., 1995).

Digiti derives from Latin digitus = Finger (Becher et al., 1995).

Minimi comes from Latin minor = smaller (Becher et al., 1995).

To set the record straight: gripping strength is an absolute necessity when it comes to professional strength training/coaching, no matter which sport or profession you’re into!

It clearly isn’t limited to arm wrestling or gripping competitions!

Unfortunately the development of proper grip strength is still one of the most overlooked and neglected issues -not only- in sports performance. At least to my experience.

How to usefully implement Cone Grips?

The next question is how you can usefully integrate these cone-shaped training devices in your workout.

Well, as always, the answer to that question is: “it depends”. It clearly depends on your training age and the experience you have gained in the gym.

Let’s say you’re a novice lifter with training age of zero years. Would it be useful to jump start training with thick implements? I’d say: no.

You wouldn’t lend a novice driver your new Porsche GT 2 RS, would you?  The answer to this rhetorical question is obvious: “hell no!”.

Same with special thick gripping implements like the Cone Grips (affiliate link)! But, if you have a training age of, let’s says, two continuous years with regular strength training (4 times a week) you should absolutely consider using them.

By the way, your training age has nothing to do with your biological age! You can be comparatively young (i.e. 18 years of biological age) and have a higher training age as someone being (biological) age 50.

Training age depends on how many consecutive years you have spent with PROPER training!

According to this, an 18- year- old with 3 years of consecutive, structured and regular strength training can have a higher training age as the 50 year old who just started working out!

The variation in grip diameter will bring more progression and stimuli to your workout and your body! This will result in new neuromuscular adaptations, increased strength and hypertrophy!

Just switch from your regular 30mm diameter grips to the cone grips. They can be implemented on almost any regular Barbell and/or Dumbbell, gripping devices, machines etc.

In this picture i.e. you can see me in my Personal-Training Gym, using the Cone Grips while performing bench press, using other special tools, like my BambooBench®, weight releasers and a monolift.

Me useing the Cone Grips while performing bench press, source: own picture.

By the way, look at the time of the screenshot (22:22) that’s synchronicity! If you’d like to know more about this interesting phenomenon I highly recommend you reading the works of Carl Gustav Jung (affiliate link)!

Back to the thick implements, respectively the Cone Grips. If you start using them don’t be surprised that you might experience a slight drop off in your weights. As you cannot close your hands as much as you were used to, gripping starts get harder.

That’s clearly not a disadvantage but you should be aware of that obvious fact.

Which exercises are predestinated for using Cone Grips (affiliate link)? Well, essentially all exercises!

I’d highly recommend using these special grip tools on all kinds of arm exercises, for different variations of pull ups, bench press and other back exercises.

You just have to ask yourself whether it’s an exercise you want to improve your grip strength on or if you don’t want your grip to be the “limiting factor”. That might be the case on deadlifts for example.

If you want to challenge yourself by deadlifting with a thicker grip you’re good to go. But if you want to emphasize other muscles more, skip the Cone Grips for that workout. Just start playing with the use of them.

Cone Grips are a useful variation in a structured periodical and goal oriented training regime.

If you’re unsure how to usefully integrate such devices in your workout, please feel free to contact me for a professional Strength-Coach/Personal-Training (Online)-Consultation :

info@bernd-stoesslein.de

Conclusion ConeGrip

Let’s draw the mandatory conclusion of the implementation of Cone Grips (affiliate link). To make a long story short: should you use them? From my point of view that’s a “Hell yes!”. But you should take in consideration when and how!

Being a novice lifter you should start with basic stuff to gain lifting experience. After having gained a proper lifting age of two years or above, I think you’re good to go using the Cone Grips!

There are lots of thick grip implement tools which have a cylindrical shape. The Cone Grips are superior in design, as the cone-shape structure has a higher transfer effect to sports and professions (i.e. law enforcement, first responders etc.).

In addition to that, a cylinder will give you the chance to further recruit muscle fibers in your fingers and hand, like the aductor digiti minimi.

Something with the surname “minor” doesn’t seem to be something being of consideration when it comes to strength training but in terms of grip strength every muscle fiber counts!

But of course Cone Grips are not the “magic pill”. If you fail to proper plan your workouts you plan to fail, as the saying goes!

Or, if you put it this way, if you don’t know how to design your training program for your specific needs the Cone Grips won’t do the “magic” for you either!

Cone Grips are an investment in your strength training, they are affordable, portable, versatile and easy to use and clean.

Conclusion: go and get a pair!

© HP Bernd Stößlein, Master of Business Administration in Sportmanagement.

If you liked this article please share it with your friends, subscribe to the newsletter and the blog.

If you like to book a professional online/offline consultation please feel free to contact me: info@bernd-stoesslein.de


Literature

Cone, source: https://en.wikipedia.org/wiki/Cone, date of access: 6.7.20.

Abductor digiti minimi muscle of hand, source: https://en.wikipedia.org/wiki/Abductor_digiti_minimi_muscle_of_hand, date of access: 6.7.20.

Lateinisch-griechischer Wortschatz in der Medizin, S. 3

Lateinisch-griechischer Wortschatz in der Medizin, S. 31.

Lateinisch-griechischer Wortschatz in der Medizin, S. 69.

Lateinisch-griechischer Wortschatz in der Medizin, S. 137.  

Fight Flex ist ein Spagat-Trainer der gleichnamigen Manufaktur. Mithilfe dieses hochwertigen Trainingsgerätes „Made in Germany“ lässt sich der Längs- und Querspagat bis hin zum Überspagat mit 200Grad Dehnwinkel trainieren! Auf Anfrage fertigt der Hersteller sogar Modelle an, bei denen die Dehnung über 200Grad hinaus ermöglicht wird. In diesem Artikel gehe ich auf die – aus meiner Sicht – überlegenen Vorteile des Fight Flex ein, erkläre die Vorteile des Dehnen an sich und gebe Infos, wie ich mit Tipps und Tricks  meine Dehnfähigkeit schnell steigern konnte. Außerdem zeige ich dir, für welche Dehnübungen ich den Fight Flex auch noch anwende!

Fight Flex in unterschiedlichen Positionen, Quelle: © FightFlex.

Was passiert beim Dehnen?

Bevor wir uns dem fantastischen Fight Flex zuwenden, müssen wir uns erst einmal mit dem Thema des Dehnens an sich befassen und uns folgende Fragen dazu stellen:

  1. Was ist Dehnen überhaupt?
  2. Gibt es unterschiedliche Dehnungsmethoden?
  3. Welchen Sinn ergibt es, sich zu dehnen?
  4. Was hat körperliches Dehnen mit geistiger Flexibilität zu tun?
  5. Welche Tipps & Tricks gibt es, um den Dehnerfolg zu beschleunigen?
  6. Was kann die Dehnfähigkeit behindern?
  7. Was kann man durch Dehnen über  das Leben lernen?

Definitionen über das Dehnen

Wer meine Blogartikel regelmäßig liest, der weiß, dass ich ein großer Fan der deutschen Sprache, respektive ihrer Exaktheit und Präzision in Sachen Begriffsdefinition, bin.

Ebenso gerne lege ich aber auch größten Wert auf die Dekodierung genutzter Begrifflichkeiten, insbesondere Lateinisch-Griechischer Wörter aus der Medizin.

Im Kontext des Dehnens werden allzu oft viele Begrifflichkeiten in einen Topf geworfen und – aus meiner Sicht – fälschlicherweise synonym gebraucht.

Diese sind:

  • Beweglichkeit
  • Flexibilität
  • Mobilität
  • Dehnbarkeit

Der geneigte Leser soll dies bitte nicht als „Erbsenfilletiererei“ auffassen, sondern den Wert exakter Begriffsdefinitionen kennen und schätzen lernen. Denn sonst ist das Gesagte/Geschriebene oft nicht das Gemeinte und Missverständnisse sind vorprogrammiert.

Der Begriff Beweglichkeit stammt von: „(…) mobilitas, veränderlichkeit, regsamkeit (…)“ (Grimm 1854).

Das von mir sehr geschätzte Althochdeutsche Wörterbuch der Gebrüder Grimm (ja, diejenigen die auch die Märchen geschrieben haben) führt den Begriff der Beweglichkeit also auf Veränderlichkeit und Regsamkeit zurück, sowie den lateinischen Begriff mobilitas.

Wenn sich etwas regt, dann bewegt es sich, was sich bewegt, das ver-ändert seine Stellung. Demnach ist Beweglichkeit also anscheinend die (willentliche?) Fähigkeit, eine (Körper)Position zu variieren.

Die willentliche und unwillentliche Fähigkeit, Körperpositionen zu ändern, klammere ich an dieser Stelle erst einmal noch aus.

Wie man sieht, werfen die Gebrüder Grimm auch schon den nächsten, häufig genutzten Begriff in den Raum, die Mobilität.

Mobilität kommt von Lateinisch mobilitas, mobilitatis = Beweglichkeit, Bewegungsvermögen. Eine Mobilisation ist demnach die „Beweglichmachung von Körpergelenken“ (Becher et al., 1995).

Somit ist Mobilität mit Beweglichkeit tatsächlich synonym zu gebrauchen, also gleichbedeutend. Doch kennzeichnet die Beweglichmachung/Beweglichkeit eines Gelenkes gleichzeitig die Dehnfähigkeit/Dehnbarkeit?

Aus anatomischer Sicht würde ich sagen: grundsätzlich ja, denn die Beschaffenheit eines Gelenkes (knöcherner Aufbau, Art des Gelenkes, Sehnen- und Bandstrukturen, Faszien, Ablagerungen, Adhäsionen etc.) bestimmen dessen Funktion.

Das bedeutet aber nicht, dass jeder diese Beweglichkeit/Mobilität auch in vollem Umfang jederzeit, untrainiert und willentlich abrufen kann!

Flexibilität stammt von Lateinisch flectere = biegen, beugen, krümmen bzw. flexibilitas = Biegsamkeit (Becher et al., 1995).

Ist man also besonders flexibel, wenn man sich besonders biegen, beugen und krümmen kann? Wie steht es dann um die „Streckbarkeit“ ? Den schließlich kann man seine Gliedmaßen ja nicht nur beugen, biegen und krümmen, sondern auch strecken!

Mein Ziel: Stärke und Flexibilität! Quelle: Eigenes Foto.

Was geschieht beim Dehnen?

Nachdem wir einen kleinen Exkurs in Sachen Begriffsbestimmung absolviert haben, wollen wir uns nun in aller Kürze einmal damit beschäftigen, was beim Dehnen überhaupt passiert.

An dieser Stelle zitiere ich aus einem der wohl besten Bücher aller Zeiten über das Training, das den schlichten Titel „Trainingslehre“ (affiliate link)  trägt.

Beweglichkeit ist die Fähigkeit des Menschen, Bewegungen mit einer großen Schwingungsweite (Amplitude) auszuführen. Die maximale Bewegungsamplitude ist demzufolge Maßstab der Beweglichkeit. Bei wissenschaftlichen Untersuchungen drückt man sie oft in Winkelgraden oder Zentimetern aus (…). Die Beweglichkeit ist eine elementare Voraussetzung einer qualitativ und quantitativ guten Bewegungsausführung.“ (Harre, 1986).

Nun wissen wir also, dass Beweglichkeit kennzeichnet WIE VIEL ich von meinem grundsätzlichen anatomisch gegebenem Bewegungsradius tatsächlich auch (willentlich) abrufen kann.

Wie „gut“ oder „schlecht“ eine Bewegung, wie z.B. das Laufen vollzogen werden kann, hängt also auch davon ab, ob und wie beweglich jemand zur Zeit ist.

An dieser Stelle sollte sich jeder (Therapeut) auch einmal Gedanken darüber machen, ob Gewichtstraining alleine immer eine geeignete/ausreichende Lösung für Störungen des aktiven (Muskeln und andere Weichteilgewebe) und passiven (Skelett) Bewegungsapparates darstellt, oder ob zuerst nicht eine optimierte Beweglichkeit gewährleistet werden sollte/muss!

Eine professionelle Anamnese eines zertifizierten, erfahrenen und für die jeweilige Sportart geeigneten Strength-Coaches/Personal-Trainers ist vor Aufnahme jedes Trainingsprogramms hier anzuraten!

Auch gilt es, den Zusammenhang zwischen dem Gehirn und dessen Einfluss auf Fehlhaltungen und damit letztlich auch zusammenhängende mangelnde Dehnbarkeiten zu berücksichtigen!

Der Leser darf meine eigenen Qualifikationen, die hinter diesen Aussagen stecken, jederzeit gerne einsehen, unter: https://www.bernd-stoesslein.de/qualifikationen/

Aktives und passives Dehnen

Wie bereits erwähnt, wird im Kontext des Dehnens oft mit vielen Begrifflichkeiten um sich geworfen und gerne das ein oder andere fabuliert. So auch in Bezug auf die unterschiedlichen Dehnungszustände.

Denn man kann sich nicht nur eigenständig dehnen, sondern kann selbstverständlich auch gedehnt werden. Entweder unter Zuhilfenahme von Gerätschaften, wie dem Fight Flex oder auch einem Trainingspartner.

An dieser Stelle sei wieder aus dem Buch „Trainingslehre“ zitiert:

Unter passiver Beweglichkeit verstehen wir die größtmögliche Beweglichkeit in einem Gelenk, die der Sportler mit Nachhilfe (Partner, Gerät, eigenes Körpergewicht) erreichen kann (…). Durch die Veränderung der passiven Beweglichkeit kann also im Wesentlichen der Dehnbarkeitsgrad solcher Muskeln bestimmt werden, die die Amplitude der Bewegung einschränken. Unter aktiver Beweglichkeit verstehen wir die größtmögliche Beweglichkeit in einem Gelenk, die der Sportler selbstständig, ohne andere Nachhilfe, alleine durch die Tätigkeit seiner Muskeln bewerkstelligen kann“ (Harre, 1986).

Der „richtige“ Zeitpunkt zum Dehnen?

Nun, wann ist der richtige Zeitpunkt, um sich zu dehnen? Vor dem Training, nach dem Training, zwischen den Trainings-Sätzen oder gar an einem separaten Tag?

Mit dem Dehnen ist es so eine Sache.

Die unterschiedlichen Anschauungen gleichen diesbezüglich fast schon einem Religionskrieg, in dem jeder Anhänger mit dogmatischem Eifer probiert, die „Ketzer“ zu verfolgen und auf dem „Scheiterhaufen“ zu verbrennen, die einer anderen Ansicht „huldigen als man selbst.

Vielleicht wäre ein besserer Ansatz zunächst einmal überhaupt den Wert des Dehnen zu erkennen und dann die für sich beste Dehnmethode und den besten Zeitpunkt zu wählen.

Anschließend gebe ich MEINE 7 Empfehlung für optimales Dehnen:

  1. Bewegungsanalyse durchführen lassen (Gangbild, Haltung, Augenkoordination etc.)
  2. Möglichst bereits im Kindes- oder Jugendalter damit beginnen
  3. Vor dem eigentlichen (Gewichts)Training und/oder an einem separaten Tag
  4. Wenn mögliche 2x/Tag (Morgens und Abends)
  5. Dehnposition einnehmen und mind. 20 Sek. halten
  6. Maximale Dehnposition serienmäßig* hintereinander einnehmen (10-15 Mal pro Serie), um Höchstgrenze der aktuellen Bewegungsamplitude mehrmals zu erreichen und so schrittweise erhöhen zu können
  7. Weichgewebe-Tool (Heskiers-Tool) nutzen, um Bewegungsamplitude („range of motion“) zu vergrößern

*Mit Serie ist hier ein Dehnungs-Satz gemeint. Man absolviere also z.B. 5 Sätze a 10-15 Wdh, in denen man darauf abzielt, die aktuell maximale Dehnposition/Bewegungsamplitude zu erreichen und diese ggf. ein wenig zu erhöhen.

Mehr Tipps & Tricks zur schnelleren Erhöhung der Dehnfähigkeit erfährst du in meinem Artikel über Posture Pro Brain Coach Performance (erscheint in Kürze) und in meinem Artikel über das Heskiers-Tool.

Des Weiteren empfehle ich, nicht nur in diesem Zusammenhang, ebenfalls meinen Artikel über das Inversions- bzw. Dekompressionstraining der Wirbelsäule.

Statisches vs. dynamisches Dehnen

Statisches versus dynamisches Dehnen wird ebenso kontrovers diskutiert wie alle anderen Parameter des Dehnens. Deshalb sei an dieser Stelle, und zur Vollständigkeit, nur kurz der Unterschied erläutert.

Dynamisches Dehnen bedeutet, dass eine Dehnposition eingenommen und sich dann in diese „hinein“ und wieder „hinausbewegt“ wird. Der Begriff stammt von Griechisch dynamis = Vermögen, Kraft, Fähigkeit, Geschicklichkeit bzw. dem Adjektiv dynamikos = bewegungsbedingt, kraftvoll, wirksam, mächtig (Becher et al., 1995).

Beim statischen Dehnen agiert man dann genau entgegengesetzt zum dynamischen, denn man nimmt eine Dehnposition ein und hält diese für eine gewisse Zeit, ohne zu „federn“ oder sich hin- und her zu bewegen.

Der Begriff stammt von Lateinisch stare = stehen bzw. Griechisch statikos = zum Stehen bringend, das Stehen (Becher et al., 1995).

Was kann die Dehnfähigkeit behindern?

Ein Grund für eingeschränkte Beweglichkeit sind aus meiner Sicht definitiv sogenannte Adhäsionen.

Wie bereits in meinem Artikel über das Heskiers-Tool beschrieben, leitet sich der Begriff Adhäsion  vom lateinischen Präfix ad- = zu, für; und Lateinisch haerere = an etw. festhalten, stecken bleiben ab (Stößlein 2020).


Wer mehr über dieses Thema wissen will, dem empfehle ich, die bereits mehrfach genannten und verlinkten Artikel zu lesen.

Ein flexibler Geist wohnt in einem flexiblen Körper

Was hat eine flexible Geisteshaltung mit einem flexiblen Körper zu tun? Nun, wenn man der Redensart „Ein starker Geist wohnt in einem starken Körper“ Glauben schenken darf, dann sollte es in Sachen Flexibilität, respektive Beweglichkeit ebenso sein, oder?

Wer also eine eingefahrene, rigide Sichtweise auf die Dinge hat, der ist auch meist körperlich relativ starr?!

Könnte man, durch gesteigerte körperliche Flexibilität, zu mehr geistiger Dehnbarkeit gelangen?

Kann Flexibilitätstraining/Dehntraining, wie es z.B. auch bei Pilates und oder Yoga gemacht wird, einer Art Meditation gleichkommen? Meditation durch Mobilität – Mobilität durch Meditation?

Durch die Fähigkeit, eine steife, starre „Komfortzone“ zu verlassen und so durch gesteigerte Beweglichkeit zu mehr geistiger Geschmeidigkeit zu gelangen?

Ein interessanter Aspekt, der in vielen Kulturen, wie z.B. Asien oder Indien sicher mehr Bedeutung zugemessen wird als bei uns in Mitteleuropa.

Warum du Meditieren solltest, kannst du in meinem Artikel nachlesen:

Warum du Meditieren solltest – Deine Gedanken erschaffen deine Realität

Man denke zudem an das Reich der Tiere. Wer kennt es nicht, wenn sich der Stubentiger  nach dem Aufstehen reckt und streckt. Jeder Hund, jede Großkatze oder z.B. auch Vögel strecken sich regelmäßig. Denn wer (zu lange) rastet, der „rostet“ nun mal!

Loslassen – Was man durch Dehnen über das Leben lernen kann

Was ich beim Dehnen über das Leben an sich lernen konnte, ist das Loslassen. Für mich geht es beim Dehntraining – wie bereits erwähnt – nicht nur um den physischen (körperlichen) Aspekt, sondern auch um die Fähigkeit der geistigen Flexibilität, die auch bedeutet, Loslassen zu lernen.

Denn Dehnen ist, aus meiner Sicht, weniger das Aushalten eines Schmerzes über eine bestimmte Dauer als mehr die Fähigkeit, zum Erlernen Spannungen Schritt für Schritt loslassen zu können, um das eigene Wesen zu erweitern.

Dies resultiert dann, ganz physisch, darin, dass man flexibler wird und sich die Bewegungsamplituden erhöhen. Spirituell gesehen bietet es die Möglichkeit, durch das „Loslassen“ der Muskulatur auch emotional Hass, Wut, Ärger, Missgunst, Neid und andere negative Gedanken loszuwerden.

Vielleicht ergeht es dem Leser ebenfalls so? Dies darf in den Kommentaren gerne zur Diskussion gestellt werden!

Fight Flex – der beste Spagat Trainer?

Fight Flex, mit unterschiedlichen Polsterfarben, Quelle: © FightFlex.

Kommen wir nun zum Fight Flex an sich. Ich habe mit dem Erfinder Martin Öxle korrespondiert und er beschreibt seine geniale Erfindung folgendermaßen:

FightFlex setzt als erster mechanischer Spagattrainer auf „geführte Dehnung in senkrechter Körperhaltung“. Dehnen mit FightFlex ist – beginnend ab dem Dehnwinkel von 80Grad bis zum maximalen Dehnwinkel von 200Grad – komplett stufenlos! Kein mechanisches Rastsystem zwingt (…)zu ruckartigen und schmerzhaften Bewegungen. Stretching mit FightFlex steht für stufenloses, dynamisches, effektives und hierbei überdurchschnittlich schmerzfreies Dehnen! Während der Dehnung kann – durch einfaches Drehen der Hüfte –zwischen dem Querspagat und dem Längsspagat gewechselt werden! Dies vollkommen unabhängig vom eingestellten Dehnwinkel. Steigerung der Beweglichkeit „aus der Hüfte heraus“ ist äußert effektiv. Hier liegt der besondere Innovationsstatus von FightFlex!“ (Oexle, 2020).

Aus meiner Sicht kann der Fight Flex allerdings noch weit mehr. Denn ich nutze Ihn nicht nur zum Training der unterschiedlichen Spagat-Arten (Längs- und Querspagat bzw. „Damenspagat“ und „Herrenspagat“, oder auch als Grätsche und Spagat bezeichnet), sondern ebenfalls für andere Dehnpositionen. Doch dazu später mehr.

Auf meine Anfrage, wie genau der Fight Flex funktioniert, schreibt Martin:

Angetrieben durch ein paar einfache Drehungen am Handrad, wechselt der FightFlex automatisch von der platzsparenden Transportstellung (in dieser Stellung wird der FightFlex angeliefert) in die Dehnstellung. FightFlex ist jetzt einsatzbereit (…)! Der Sportler nimmt hierzu auf den gepolsterten Beinauflagen und der Sitzfläche Platz. Die Beine und der Oberkörper bilden während dem Stretching eine Linie. Das Körpergewicht verteilt sich hierbei zum Großteil auf die beiden Beinauflagen. Die Sitzfläche wird hautsächlich beim dynamischen Dehnen (Wechsel zwischen Längs- und Querspagat) belastet. Sobald Ihr auf dem FightFlex Patz genommen habt, lässt sich der FightFlex durch Drehung am Handrad sanft und stufenlos auf jeden Dehnwinkel zwischen 80Grad und 200Grad einstellen. Mit FightFlex ist „Grad für Grad“ und somit „step by step“ eine Steigerung Ihrer persönlichen Dehngrenze möglich.“ (Öxle, 2020).

Ganz abgesehen von den Funktionen des Fight Flex, ist das Gerät eine Ingenieurs-Meisterleistung und für mich wirklich ein modernes Kunstwerk. Der Fight Flex strahlt durch seine bloße Präsenz seine unglaubliche Qualität „Made in Germany“ aus!

Fight Flex, in Endstellung, Quelle: © FightFlex.

Ein echtes Design-Highlight, das die Blicke, nicht nur in jedem Fitnessstudio, auf sich zieht!

Neben dem Design besticht das Gerät, meiner Meinung nach, auch durch seine absolut hochwertige Qualität. Alles hält bombenfest, ist stabil, nichts quietscht, nichts knarzt.

Jede Schraube hält, jedes Rad sitzt, die Polster sind mit ihren Nähten unglaublich schön und sauber verarbeitet!

Ich habe selten so ein extrem hochwertiges Fitness-Produkt gesehen! Jede Feder, der Knauf, das Drehrad, die gesamte Konstruktion sieht einfach unglaublich solide und hochwertig aus!

Nettes „Gimmick“, auf Wunsch kann man sich von der Firma Fight Flex auch sein eigenes Logo in den Fight Flex fräsen lassen! Des Weiteren kann man zwischen unterschiedlichen Polsterfarben wählen.

Die Manufaktur FightFlex bietet einem die Möglichkeit, das eigene Firmenlogo ins Gerät fräsen zu lassen, sehr cool! Quelle: Eigenes Foto.

Jeder Strengt-Coach/Personal-Trainer, Kampfsportler etc., der nicht nur gute, sondern großartige Leistungen anbietet und professionelles Equipment sein Eigen nennt, der sollte dies durch die Investition  in einen  Fight Flex unterstreichen!

Das Training mit dem FightFlex macht Spaß…und sieht toll aus 😉 Quelle: Eigenes Foto.

Fight Flex – mehr als nur ein Spagat-Trainer?

Vom Hersteller wird der Fight Flex als Spagat-Trainer beworben. Doch meiner Meinung nach ist das Gerät in der Lage, noch viel mehr Potential zu entfalten. So kann es auch für eine Vielzahl weiterer Dehnmöglichkeiten eingesetzt werden.

So z.B. für die Dehnung der Oberschenkel, Rück- und Vorderseite, was den Einsatzbereich dieses Gerätes deutlich erhöht!

Folgende Bilder zeigen einige der möglichen Einsatzbereiche des Fight Flex:

Bilder folgen in Kürze!

Fight Flex – Eine Investition!

Natürlich stellt sich für viele das leidliche Thema eines „Preises“. Bevor nach einem Wert gefragt wird, erhält man all zu oft die Frage nach einem „Preis“. Ich habe „Preis“ bewusst in Anführungszeichen gesetzt, um zu zeigen, dass ein Gerät aus einer Manufaktur natürlich auch Geld kostet.

Wer erwartet, er bekäme ein so EXTREM HOCHWERTIGES Trainingsgerät zum „Preis“ eines China-Billigproduktes, der lebt aus meiner Sicht in einer total verquerten Welt!

Fight Flex (mit blauer Polsterung), Quelle: © FightFlex.

Wer den Wert hinter diesem Produkt erkannt hat, und für sich und/oder seine Klienten/Patienten etc. in ein solches investieren möchte, dem bietet Fight Flex grundsätzlich zwei Optionen.

Zum einen den Kauf und zum anderen eine Miete.

Letztere liegt regulär bei 79€/netto je Monat (94,-€/Monat inkl. MwSt.) Weitere Infos diesbezüglich findet man auf der Webseite des Herstellers.

Den „Preis“ zum Kauf gibt der Hersteller mit 2.237,20€/ab Werk (inkl.19% MwSt.) an (Stand 2020). Weitere Informationen können ebenfalls auf der Homepage des Herstellers entnommen werden.

Fazit/Conclusio

Fight Flex, die beste Art zu Dehnen? Aus meiner Sicht, ja! Insbesondere, wenn es sich um das Erlernen des Längs- und Querspagates geht! Ganz salopp gesagt, „stinken“ diesbezüglich alle anderen Trainingsgeräte auf dem Markt ab!

Trainingsgeräte, die den Spagat erlernen sollen, sind meist sehr minderwertige China-Waren, die mehrere hundert Euro kosten und nach ein paar Einsätzen bereits auseinanderfallen.

Außerdem ist mir kein anderer Spagat-Trainer bekannt, der eine vergleichbar hochwertige Verarbeitung und stufenlose Einstellung bietet.

Es existieren zwar vergleichbare Geräte, bei diesen handelt es sich aber, laut Aussage von Fight Flex, um Kopien des Originals! Hier ist also Vorsicht geboten!

Das Original ist aber bekanntlich immer besser als die Kopie!

Fight Flex, meiner Meinung nach, das beste Spagat-Trainingsgerät,
Quelle: © FightFlex.

Wer auf der Suche nach dem besten Spagat-Trainer (in Bezug auf Preis und Leistung) ist, dem empfehle ich ,in den Fight Flex zu investieren!

Wer den Fight Flex gerne einmal ausprobieren möchte, kann dies gerne bei mir im Personal-Training-Studio, in 95326 Kulmbach (Oberhacken 5) tun. Nach vorheriger Terminvereinbarung.

Für jeden Kampfsportler und jeden, der Selbstverteidigungstechniken lernt, ist das Training des Längs- und Querspagates aus meiner Sicht eine sinnvolle Sache. Dies gelingt wohl auf keine Art und Weise so einfach, bequem und fortschrittlich wie mittels Fight Flex!

Wenn dir dieser Artikel gefallen hat, dann teile ihn mit deinen Freunden, abonniere den Blog/Newsletter und hinterlasse einen Kommentar.

© HP Bernd Stößlein MBA in Sportmanagement


In diesem und anderen Artikeln findest du den ein oder anderen „Affiliate Link“, zu amazon. Wenn du über diesen Link etwas erwirbst, dann unterstützt du damit meine Blogartikel und schaffst Ressourcen für weitere qualitativ hochwertige Recherchen und Artikel wie diesen. Es entstehen für dich dadurch keine Mehrkosten! Alle meine grundsätzlichen Empfehlungen findest du unter: https://www.amazon.de/shop/bernd_stoesslein

Literatur

Deutsches Wörterbuch von Jacob und Wilhelm Grimm. 16 Bde. in 32 Teilbänden. Leipzig 1854-1961. Quellenverzeichnis Leipzig 1971. Online-Version vom 27.05.2020.

Lateinische-griechischer Wortschatz in der Medizin, S. 72.

Lateinische-griechischer Wortschatz in der Medizin, S. 82.

Lateinische-griechischer Wortschatz in der Medizin, S. 138.

Lateinische-griechischer Wortschatz in der Medizin, S. 209 & 210.

Trainingslehre, Grundlagen und Methodik zur Entwicklung der Beweglichkeit, Charakteristik der Beweglichkeit, S. 180 f.

Martin Oexle, FightFlex, 2020.
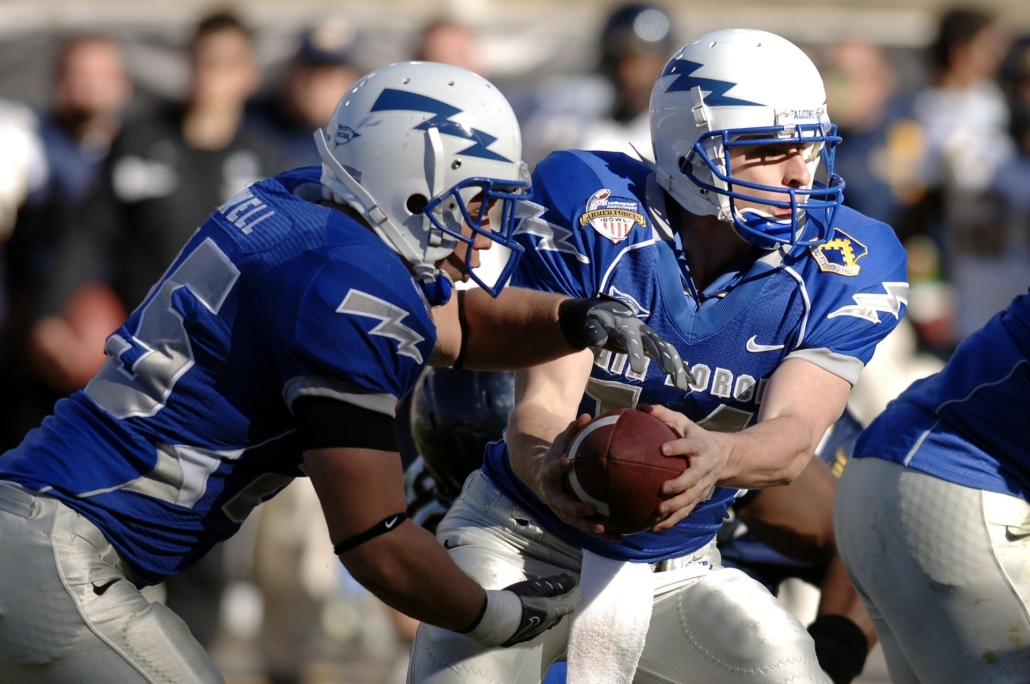
ShouldeRök™️ is a mace, respectively gada-like mobility and strength-tool, developed by Chris Duffin, from Kabuki Strength. I emphasize mace/gada-like, as it is one of a kind when it comes to usability, design, and quality!

To ShouldeRök™️ or not to ShouldeRök™️ ? That’s your question? In this article I‘ll tell you why you definitely should ShouldeRök™️ and how it may benefit you in different ways and sports!

All the info in this article focuses on the use of the ShouldeRök™️ by Kabuki Strength, no matter if you either like to use the tactical version or the standard one!

What is a (Tactical) ShouldeRök™️? – An unusual deconstructing approach!

I really do have a big liking for Latin and Greek terms in medicine. Maybe that‘s because I  also work as what is called a “Heilpraktiker” in Germany.

A literal translation would be “heal practitioner”, but a more appropriate could be “complementary and alternative medicine practitioner” (CAM practitioner).

To get a deeper understanding for what a “Tactical ShouldeRök™️”actually is we should dive a little bit into the meaning of the term itself.

As well as the (Tactical) ShouldeRök™️” is a strength and mobility tool, language is a tool, too. So what both things share in common is, that they can be deconstructed and that you should better know how to use them properly!

Due to that we’re going to start with an actual definition of the term “Tactical Shoulde(r)|Rök”.

The adjective “tactical”, which derives from Greek tattein = to deploy, to erect, to mount sth., in file; respectively the adjective tactical comes from Greek taktikos = to arrange something, skilled, to collocate(Becher et al., 1995).

The Tactical-ShouldeRök™️ comes in a nice carrying case.

The term “shoulder” – of course – describes the lateral parts of your upper body which connect your arms with your trunk.

The shoulder is one of the most agile joints in your body. It is composed of several joints between the bony parts of the shoulder blade, the upper arm and the clavicle. The shoulder’s characteristic shape is above all conferred by the muscle parts of the deltoid muscle.

Being one of the most flexible joints in the human body it is kept in shape and moved by a complex system of different muscles (including the rotator cuff). Due to the large range of motion and the small bony joint surfaces, the shoulder joint is also very vulnerable to injuries.

Since all nerves and blood vessels of the arms run through the shoulder area, shoulder injuries can also lead to pain and functional restrictions (i.e. adhesions, trigger points etc.) of the upper extremity that can lead to structural imbalances and so on.

That’s where proper shoulder training comes into play! Not only whether you are performing on a world elite level of strength training or if you simply want to be a strong mind living in a strong and healthy body!

After having deconstructed the origins of “tactical” and “shoulder” there is only one missing “stone”, the “Rök”. According to Wikipedia:

The Rök runestone (Swedish: Rökstenen (…) is one of the most famous runestones, featuring the longest known runic inscription in stone. (…) It is considered the first piece of written Swedish literature and thus it marks the beginning of the history of Swedish literature”.

The benevolent reader may forgive me my supreme attention to detail but I mentioned earlier being in love with Latin and Greek terms in medicine. Furthermore, when it comes to such an outstanding product like the ShouldeRök™️ I like to pay attention to every little detail!

ShouldeRök™️ – Painkiller or Vitamin?

Now that we have verbally deconstructed all the parts of the ShouldeRök™️ we get a first but already good intention what it was designed for. It‘s not an ancient wizardry but – from my holistic point of view as a strength coach and CAM practitioner –  a true cornerstone for proper shoulder health.

Is it THE best tool for healthy shoulders? Will it cure all your preexisting shoulder issues/injuries? Of course not, don‘t be foolish! There is no such thing as THE best tool, nor will it cure al your shoulder problems, especially if used willy-nilly.

If you ask me, and you kind of do so as you‘re reading my article, I would state that the ShouldeRök™️ acts rather like a “Vitamin” than a “Painkiller”. If you are suffering from serious shoulder pain due to wear and tear, trauma etc. you should first consult a physician before using even the best tool!

When you are looking for a way to build “bullet proof” shoulders, if you are in a rehabilitation/prehab-phase, if you want to efficiently train muscles of your rotator cuffs and shoulders you have never heard and thought of, well THEN you should use a tactical approach, with the ShouldeRök™️!

Deconstructing the use of the ShouldeRök™️!

Where do I see the big benefits of this “cool tool”?

In a nutshell: I use it with patients, clients and athletes to build/increase proper muscular balance and strength in the shoulder girdle, as well as all the muscles that are involved in the movement, too. These are foremost the upper pectoralis muscles, rotator cuff, the arms and the upper back.

Of course there is always the debate concerning a certain exercise to be “sport specific” and/or if it is useful to integrate it in an athletes routine. After having worked not only with a special crowd of self-defense (Krav Maga) practitioners I can tell you that the ShouldeRök™️ definitely IS sport specific but can also be applied in general physical preparation (GPP)!

Now you might ask: “Why is that the case?”. Well on the one side it‘s the unique and transferable movement itself (that makes it sport specific), which we will look at in detail in a moment and on the other hand it is the ability to holistically strengthen your shoulder girdle.

Here you can see a rear view of the swinging movement using the ShouldeRök™️.

You might also wonder: “Cool, Bernd but when in real life do I need to swing a rod with a weight around my head?”. Well, actually you don’t but what you need to do, when it comes to self-defense techniques is the strength and power to release you i.e. from an attack from behind!

That’s where the sport specific component of the ShouldeRök™️ comes into play! Think of this scenario, you are getting attacked from behind, i.e. being chocked, by a taller, much stronger opponent. What are you going to do? Stand there and wait for being faded out?!

Well of course you must have a plan how to react in this special scenario but what you also must have is some decent strength to reach besides or over your head and defend yourself!

So that is exactly a “real life” scenario where you have to apply force, strength and power while reaching over/behind your head and simultaneously gripping and pulling something. And you should better be fast…and strong!

If you deconstruct such movements you surely can train all your muscles that are involved in such a movement. You can do i.e. pull-overs or reverse flies, rows, whatsoever.

But you also need to train a dynamic swinging movement, involving all kinds of weighted rotations. Boom, that‘s where you get a tactical approach with the ShouldeRök™️, regardless if you use the Tactical Rök or the normal one.

Having worked with Krav Maga people for a couple of years now and being a Krav Maga student myself I can tell you how much I see a benefit of introducing the Rök to our training.

There are tons of techniques that involve deflecting attacks from various stands. Whether being already in a fighting position or form a standing position. It‘s grabbing, deflecting, punching on so one.

Literally everything that involves defending and/or attacking with your upper extremities also involves a body defense. That means moving your trunk AND moving your arms.

Strength is never a weakness! So in order to defend yourself you‘d better be strong. Not necessarily big, but strong!

Of course the use of the Rök is by all means not limited to Krav Maga. I’d say that you can apply it to probably any kind of self-defense technique, Martial Art and for all people working in law enforcement!

Should “Average Joe” use a ShouldeRök™️?

To make a long story short: yes, but with some restrictions! Ok, having told you about my example of how to implement the ShouldeRök™️ into Sport Specific Training I will also give you my view how I use it with non-athletes in general physical preparation (GPP).

Living in a society that has to deal with a more and more monotonous lifestyle the ShouldeRök™️ is – from my point of view – a really helpful tool to break free!

What is weak and rigid, that breaks or how we say in German: “wer rastet, der rostet” which means: “the one who rests, gets rusty”!

ShouldeRök™️, use it or lose it. Invest in healthy shoulders.

Let‘s face it, people nowadays are doing jobs where they are sitting all day long. They are sitting while having breakfast, while driving to work, being at work, sitting at lunch, sitting while driving home….just to sit again, while having dinner and while doing “Netflix and Chill”.

Well, don’t get me wrong, there is nothing bad with sitting itself, but it is that overstressed “sterno-symphysial” posture people tend to perform all day long. Holding a steering wheel, typing on a computer keyboard, watching down on a cellphone/tablet etc.

All sorts of things that will not only give you bad posture but also make you “bow to your phone”, enslaving you to “helpful” gadgets.

You bow down to social media etc. While doing that you give away your inner strength. I mean, how can you supposed to be a strong character if you look like the hunchback Quasimodo?!

Unless you don‘t want to get casted as the Hunchback of Notre Dame, you better start working on a strong posture. That‘s where I apply the ShouldeRök™️ with my non athletes clients/patients. The classical office worker, clerk and so one.

First of all the huge benefit of working out with the Rök is that you must perform the exercise while standing. As mentioned above people are simply sitting too much, resulting them in weak gluteus muscles and weak shoulder girdles with especially shi**y external rotation capabilities.

So, if those “average clients/patients” go to a gym, what do they tend to do? Sure, they choose exercises where they can sit! The cool thing though about the Rök is, that you cannot perform the exercise while sitting…well I have learned to never say never as I have seen lots of stupidity in the gym. But, at least you should not perform the exercise while sitting.

That leads us back to an important point, no matter if athlete or not, posture! Just being an elite athlete doesn‘t mean you do an elite training!

While performing the Rök-Swings you have to stand in an upright position, while keeping your core as stable as possible. I also highly recommend my students to only work out with the ShouldeRök™️ while either being barefoot or wearing proper shoes with flat soles.

From my expertise wearing modern training shoes will decrease the efficiency of the work with the Rök to quite some extend!

If you want to learn more about how to strengthen your posture you can check out my articles on one of my blogs (www.bernd-stoesslein.de)

As mentioned above, I also use the ShouldeRök™️ with my rehabilitation patients. The only restriction I would make is if someone has severe contraindications of doing weighted rotations with his shoulders.

So to speak these are (from my expertise): acute/silent trauma (physical/psychological), rupture or partly ruptured tissues in the shoulder girdle, severe shoulder pain of unknown origin, severe cartilage damage, short post operation time and inadequate post operation recovery time and too much scar tissue that has to be removed/softened to enhance flexibility.

If someone hast inappropriate flexibility in the shoulders/rotator cuffs I would recommend integrating the ShouldeRök™️ AFTER having done appropriate soft tissue work, like using Gua Sha, a Heskiers Tool, Acupressure/Acupuncture, Frequency Specific Microcurrent or whatever technique you are skilled in or have access to. Consult a good therapist if you need such treatment!

The ShouldeRök™️ is built to last!

Let’s finally talk about the quality of this piece of equipment. It was my first training tool I got from Kabuki Strength so I was a bit curious if it really puts into practice what it “preaches” online.

Let me tell you, it definitely does! Just like the Rök Runestone, the ShouldeRök™️ is built to last!

I chose the Tactical SholdeRökÔ as I like to travel to clients from time to time and with the cool carry case the 2,5lbs plate and the parts of the Rök are nicely stored and ready to hit the road.

Besides the fact, that the tactical version can be deconstructed in two pieces there is no difference to the “one piece version”.

What I like is that you can use 50mm Olympic Plates with the Rök (a Kabuki Strength labeled 2,5lbs plate already comes with the Tactical Rök) and that you can also use its one end as kind of fascia/soft tissue tool for either working on your own trigger points or on those of clients.  

What else can I say concerning the quality? Well, the finish looks really “bad a**”, (I do have a black oxide version), the knurling is pretty strong to ensure a good grip. You just can feel the love and, like we say in German, “Herzblut” (“heart blood”) they put into this unique piece of equipment!

Conclusion – ShouldeRök™️, the Master of the Universe?(h2)

The ShouldeRök™️ is so much more than an ordinary Macebell or Gada. It’s much more like He-Man‘s sword that metaphorically might help you transform from the cheesy Prinz Adam from Eternia into He-Man, the most powerful man in the universe…just in case you are willing to protect castle Grey Skull form the evil forces of Skeletor 😉

Working out with the ShouldeRök™️ brings back my childhood memory of watching epic Filmation Cartoons, like He-Man!

Unlike He-Man, who only shared his secret with the Sorceress, Man at Arms and Orko, I’m sharing my experience working with the Rök on myself, athletes as well as non-athletes with you all.

Unless clients/patients suffer from some severe condition (see mentioned examples above) I strongly believe that the integration of the ShouldeRök™️ will improve strength, enhance flexibility, strengthen your core and (if done properly) even might enhance your breathing patterns.

More about breathing can be read in my article: “The Oxygen Advantage®”.

With the purchase of a ShouldeRök™️ you do not only get what you pay for (obviously a ShouldeRök™️) but also get granted access to some extra in depth training videos that are not available for public!

Furthermore you have the option to “upgrade” your Rök by purchasing a so called “MyoRök”. An “Instrument Assisted Soft Tissue Mobilization-Tool” (IASTM).

This IASTM tool is made of high-quality surgical steel (stainless steel) and is used (not only) by professional therapists to loosen fascial structures. The fascial “soft tissue” tissue is mobilized.

I’m really keen on getting this cool upgrade for my own Rök!

I’d like to finish my article with my opening and once again answer the question:

“Should you ShouldeRök™️ ?” Yes, you should, as it’s an investment in yourself! As well as for general physical preparation and for specialized physical prepation. Think of it: you invest once, and profit for a lifetime! Get tactical!

The Tactical-Shoulderök™️ comes with a 2,5 lbs (1m25kg) plate form Kabuki Strength.

© HP Bernd Stößlein, Master of Business Administration in Sportmanagement.

If you liked this article please share it with your friends, subscribe to the newsletter and the blog.

If you like to book a professional online/offline consultation please feel free to contact me: info@bernd-stoesslein.de


Literature

Lateinisch-griechischer Wortschatz in der Medizin, S. 220.

Gustafson, Alrik, Svenska litteraturens historia, 2 volums (Stockholm, 1963). First published as A History of Swedish Literature (American-Scandinavian Foundation, 1961). Chapter 1. Forntid och medeltid, Lönnroth, in Lönnroth, Göransson, Delblanc, Den svenska litteraturen, vol 1.Rök runestone, source: https://en.wikipedia.org/wiki/R%C3%B6k_runestone#cite_note-Gustafson1-1, access: 09.02.20.

Inversionstisch bzw. -bank, Schwerkrafttrainer, Hängestreckbank oder Überkopftrainer alle- samt Wörter, die ein und dasselbe Gerät beschreiben. Nämlich eines, das dazu gedacht ist, Druck von den Bandscheiben der Wirbelsäule zu nehmen bzw. diese zu dekompressieren.

In diesem Artikel erkläre ich, warum ich eine solche Inversionsbank nutze und wie & wann ich diese, aus meiner Sicht, sinnvoll in mein Training einbaue.

Nach (m)einem kurzen anatomischen Exkurs über den Aufbau der Wirbelsäule, kannst du dir dann dein eigenes Bild über dieses Trainingsgerät bilden und entscheiden, ob du ebenfalls einen Sinn in dessen Einsatz erkennst.

In diesem Fall könnte man durchaus sagen: „Lass den Kopf hängen“ 😉

Update: Wie ich meine Halswirbelsäule dekompressiere erkläre ich separat, im gleichnamigen Artikel.

Schwerkrafttrainer – Die schwere Kraft ?

Was macht also ein Schwerkrafttrainer? Zugegeben, ein etwas ungeeigneter Begriff. Etwas besser gefällt mir da schon: Inversionstisch oder -bank. Bevor wir uns aber im wahrsten Sinne des Wortes kopfüber ins „Getümmel“ stürzen, klären wir kurz die Wortherkunft der Inversion.

In/versio setzt sich zusammen aus der lateinischen Vorsilbe (Präfix) in = i.S.v. ein-, hinein-, in- hinein, an- ; und lateinisch vertere = -vertieren, wenden, drehen, kehren, ändern (Becher et al., 1995).

Ein Inversionstisch/eine Inversionsbankist wörtlich also „ein Tisch/eine Bank, die sich hineinwendet bzw. sich eindreht“.

Das beschreibt den Vorgang, aus meiner Sicht, allerdings nicht ganz exakt, da man sich auf diesem Gerät nicht nach innen dreht, sondern bis auf 90° umdrehen kann, gemessen am waagerechten Untergrund (siehe Foto).

Die Wirbelsäule – 33 Wirbel

Um uns, metaphorisch, besser drehen und wenden zu können, werfen wir nun einen kurzen Blick auf die menschliche Wirbelsäule (WS). Diese bildet den zentralen Bestandteil des sogenannten Achsenskeletts.

Die Wirbelsäule ist aus 33 Wirbeln aufgebaut, zwischen denen sich die Bandscheiben befinden (siehe Darstellung). Außerdem wird alles durch eine Vielzahl an Bändern und kleinen Gelenken schön straff „verzurrt“ und an Ort und Stelle gehalten.

Die Wirbelsäule ist fast ein wenig wie Bambus…stabil, aber trotzdem flexibel! Man teilt die Wirbelsäule in drei große Bereiche, die Halswirbelsäule (HWS), die Brustwirbelsäule (BWS) und die Lendenwirbelsäule (LWS).

Unterhalb der LWS schließen sich das Kreuz- und Steißbein an. Die einzelnen Wirbel der WS sehen dabei nicht alle gleich aus, sondern bestehen aus einem Wirbelkörper und -bögen, deren Form und Funktion sich (insbesondere hinsichtlich Beweglichkeit) unterscheiden!

Besondere Hervorhebung bedarf der ersten beiden Wirbel der HWS, dem Atlas (1. Halswirbel) und der Axis (2. Halswirbel). Deren besondere Gelenkverbindung ermöglicht erst die extreme Mobilität unseres Kopfes.

Die Wirbelsäule ist von der Seite aus betrachtet ähnlich einem S-geformt. Für die Krümmungsformen im jeweiligen WS-Abschnitt existieren unterschiedliche Fachausdrücke, die aus Gründen der Verständlichkeit, kurz erläutert werden (siehe Darstellung).

Die HWS mit ihren 7 Wirbeln besitzt eine Zervikal Lordose, die BWS mit ihren 12 Wirbelkörpern eine Thorakal Kyphose und die LWS mit ihren 5 Wirbeln eine sog. Lumbal Lordose.

Auch diese Begrifflichkeiten sind schnell erklärt:

Lordose stammt von Griechisch Lordosis = Krümmung der Wirbelsäule nach vorn (Becher et al., 1995). Die Kyphose bildet dann das Gegenstück und der Begriff stammt von Griechisch Kyphosis = Krümmung des Rückgrats, Buckel (Becher et al., 1995).

Zervikal (C) leitet sich ab, von Lateinisch cervix  = Hals (Becher et al.,1995).

Thorakal (Th) stammt von Griechisch thorax = Brustkorb (Becher et al., 1995).

Lumbal (L) wiederum ist Latein (Lumbus) und bedeutet Lende (Becher et al., 1995).

In diesem Artikel möchte ich es mit der anatomischen Exkursion in Sachen Wirbelkörper auf sich beruhen lassen, da es in erster Linie um die Dekompression der Zwischenwirbelkörper, respektive der Bandscheiben geht und ein noch detaillierterer Aufbau der unterschiedlichen Wirbelkörper für das Verständnis nicht unbedingt vonnöten ist.

Warum nutze ich die Inversion ?

Gleich vorweg, ich leide nicht an Rückenschmerzen. Nichtsdestotrotz betreibe ich regelmäßig und intensiv (Kraft)Sport- und Selbstverteidigungs-Training (Krav Maga).

Insbesondere das Stemmen von Gewichten führt zwangsläufig, durch die Natur der Sache, zu einer Stauchung/Kompression der Bandscheiben. Dieser Effekt tritt nämlich auch auf, wenn man mit Sinn und Verstand trainiert.

Dies wird dem Effekt des zusätzlich bewegten Gewichtes geschuldet. So findet eine Bandscheibenkompression so gut wie bei allen stehenden Übungen statt, wie z.B. bei Formen des Überkopfdrückens, Kniebeugens, beim Kreuzheben usw.

Meines Wissens nach ist die einzige Übung, bei der man während des Muskel-Krafttrainings ebenfalls eine Dekompression der Wirbel und Bandscheiben erzielen kann, der sogenannte „Reverse Hyper“.

Ein solcher sollte übrigens in jedem hervorragenden Fitnessstudio zur Einrichtung zählen! Für mich ein Qualitätskriterium und eine Demonstration, dass sich der Betreiber selbst mit der Materie beschäftigt und ihm seine Klienten am Herzen liegen!

Die Bandscheibe/Zwischenwirbelscheibe

Die Bandscheibe, auch Zwischenwirbelscheibe oder discus intervertebralis genannt, ist, wie die deutsche Bezeichnung schon eindeutig darstellt, eine Scheibe (aus bestimmtem Gewebe), die sich jeweils zwischen zwei Wirbelkörpern befindet.

Die lateinisch-griechische Bezeichnung ist in diesem Fall äquivalent präzise zur Deutschen, denn Griechisch diskos = Scheibe; und inter/vertebralis setzt sich zusammen aus der lateinischen Vorsilbe inter- = zwischen; und Lateinisch vertebralis = zu den Wirbeln gehörend (Becher et al., 1995).

Wenn du (nicht nur als Personal-Trainer, Therapeut, Heilpraktiker etc.) mehr über das einfache Dechiffrieren von lateinisch-griechischen Begriffen in der Medizin wissen willst, dann empfehle ich dir meinen fast gleichnamigen Artikel:

Lateinisch-griechischer Wortschatz für Personal-Trainer

In diesem Artikel gehe ich auch auf mein bevorzugtes „Dechiffriergerät“ ein, das Lexikon namens „Latenisch-griechischer Wortschatz in der Medizin“ (affiliate link).

Zurück zur Bandscheibe. Diese besteht, in aller Kürze erklärt, aus sogenannten Faserknorpeln, einem kollagenreichen Bindegewebe, in dessen Mitte sich ein gallertartiger Kern befindet.

Kolla/gen setzt sich, sprachlich betrachtet, zusammen aus Griechisch kolla = Leim, Gelatine und der griechischen Nachsilbe (Suffix) -genes = …hervorbringend,…erzeugend (Becher et al., 1995).

Wörtlich übersetzt bedeutet kollagen also so viel wie „hervorgebracht aus Leim/Gelatine“.

Das Adjektiv „gallertartig“ stammt von Lateinisch gallinaceus = den Hühnern gehörig (Becher et al., 1995).

Die Hauptfunktion der Bandscheiben besteht in der Stoßdämpfung.

Sie fungieren als Puffer zwischen den Wirbelkörpern, um auf den Körper einwirkende, axiale  Lasten zu reduzieren und, um damit die auf das passive Bewegungssystem (Skelett) einwirkenden mechanischen Belastungen und eventuelle Beschädigungen zu reduzieren/verhindern.  

Man stelle sich die Bandscheibe sinnbildlich als eine Art biologischen Stoßdämpfer vor. Wie das mechanische Ebenbild, das in Automobilen zur Anwendung  kommt.

Da die Bandscheiben ein gallertartiges, flüssigkeitsgefülltes Inneres besitzen, kann es bei andauernden (axialen) Belastungen zu einem Verlust dieser Flüssigkeit kommen. Das erklärt das Phänomen, wieso man im Laufe des Tages 1-2 cm an Körpergröße einbüßen kann.

Während des Schlafes, der in der Regel im Liegen stattfindet, wird dieser Flüssigkeitsverlust wieder ausgeglichen. Dieser Vorgang lässt sich anschaulich mit einem Schwamm veranschaulichen.

Dieser kann eine bestimmte Menge an Flüssigkeit aufnehmen und bei entsprechender Kompression wieder abgeben und umgekehrt. Ebenso, ganz einfach erklärt, verhält es sich auch mit den Bandscheiben des Körpers.

Diese „leben“ also von ihrer Dekompression, die nach andauernder Kompression (Druckbelastung) also zwangsläufig erfolgen sollte!

Meist findet aber genau dies nicht, oder nur unzureichend statt, weil nicht für eine entsprechend ausreichende Entlastung der Bandscheiben gesorgt wird.

Genau hier schließt sich der sprichwörtliche Kreis und hierin sehe ICH auch den Nutzen eines Inversionstrainers!

Wie ich mich hängen lasse

Nach unserem kurzen, aber notwendigen, anatomischen Exkurs, habe ich einige meiner Gründe aufgezählt, wieso ich mich, im wahrsten Sinne des Wortes, regelmäßig „hängen lasse“.

Im Anschluss zeige ich dir, wie ICH die Inversion in meinen Alltag integriere.

  • Dekompression an trainingsfreien Tagen 2-3 Mal/Tag
  • Dekompression nach einer Trainingseinheit

Einfach, und aufgrund dessen effektiv! Nach jeder Trainingseinheit, die, wie bereits erläutert, eine Kompression der Bandscheiben hervorruft, sollte aus meiner Sicht auch für eine ausreichende Dekompression der Bandscheiben gesorgt werden.

Man rufe sich das Bild des Schwammes ins Gedächtnis. Druck- und Sog! Oder aus Sicht der Traditionellen Chinesischen Medizin (TCM), Yin und Yang. Das Prinzip ist allgegenwärtig, Auf jede Anspannung sollte auch ausreichende Entspannung erfolgen!

So wird ein Gleichgewicht angestrebt, eine sogenannte Homöostase!

Beim „Abhängen“ drehe ich mich übrigens immer um 180°, sodass ich tatsächlich komplett kopfüber hänge.

Zu Anfang war es ein sehr ungewohntes und, zugegeben, auch ein sehr unangenehmes Gefühl, kopfüber zu hängen und zu spüren, wie einem das Blut aus den Beinen bis in den Kopf „rauscht“.

Doch bereits nach einigen Tagen Inversionstraining, hatte ich mich an das Gefühl gewöhnt, welches nun kein Problem mehr für mich darstellt.

Es bleibt die Frage nach einer sinnvollen Dauer der Inversion. Dies lässt sich, wie so oft, nicht pauschal beantworten.

Mein Ansatz wäre aber auch in diesem Fall die „80-zu-20-Regel“ (Pareto-Prinzip) bzw. die minimal effektive Dosis. Ganz einfach ausgedrückt also, so kurz wie möglich, so lange wie nötig.

Mehr darüber, wie WENIG man, aus meiner Sicht, tatsächlich machen muss, um nennenswerte Erfolge zu erzielen, kannst du dir in meinem Video anschauen:

Dabei kann die Dauer der Inversion wohl auch in Intervalle aufgeteilt werden. Sprich, wenn das „Abhängen“ (noch) nicht lange toleriert wird, könnte man auch mit einer schrittweisen Inversion beginnen und sich dann zur vollständigen 90°-Inversion hinarbeiten.  

Gleiches gilt für die Dauer. Ist die vollständige Inversion erreicht und es besteht (noch) ein unangenehmes Gefühl, würde ICH auch die Dauer in Etappen aufteilen.

Hier muss aber jeder selbst entscheiden, ob und wie er mit dem Thema der Inversion umgeht.

Bei Rückenbeschwerden ist eine Vorab-Konsultation eines Arztes/Heilpraktikers und oder Therapeuten sicher sinnvoll.

Ein sehr zu empfehlendes Buch, mit über 1200 Seiten, das sich mit der praktischen Umsetzung der „Rehabilitation“ der Wirbelsäule beschäftigt ist: „Rehabilitation of the Spine“ – A patient centered approach“, von Craig Liebenson.

Welchen Inversionstrainer nutze ich?

Inversionstrainer gibt es wie Sand am Meer, in allen Preisklassen. Von super-billig, bis extrem teuer.

Sicher bekommt man hier, mehr oder weniger, auch das, was man bezahlt. Nach langer Recherche habe ich ein Modell gefunden, das für den vergleichsweise sehr günstigen Preis von unter 120€ in dieser Preisklasse den stabilsten Eindruck erweckt hatte (siehe Bilder).

Bis dato hat mich das Preis-Leistungsverhältnis überzeugt und das Gerät verrichtet nach wie vor solide seine Dienste!

Meine Inversionsbank ist bis 136kg belastbar, was mir ausreicht. Geräte, die mehr Benutzergewicht erlauben, schlagen dann gerne auch schon mal mit über 600€ zu Buche!

Eine günstigere Alternative zu Inversionstischen, sind sogenannte „Gravity Boots“, mit denen man sich kopfüber in eine (Klimmzug)Stange einhängen kann, um den gleichen Effekt zu erzielen.

Größter Nachteil dieser „Stiefel“ ist, aus meiner Sicht, die eingeschränkte Einsetzbarkeit für Menschen, die (noch) nicht über die nötige Flexibilität verfügen, um sich kopfüber einzuhängen, UND sich vor allem eigenständig wieder aus dieser Position zu „befreien“!

Fazit/Conclusio

Wie lautet also mein Fazit über den Einsatz eines Inversionstrainers? Bin von dem Nutzen eines solchen überzeugt, weshalb er ein fester Bestandteil meines Trainings bzw. meiner Regenerationsmaßnahmen ist.

Jede Kompression erfordert, aus meiner Sicht, eine entsprechende Dekompression. Sicher kann man sich auch an einer Stange etc. „aushängen“. Doch dies hat lediglich einen beschränkten Effekt auf die unteren Extremitäten bzw. in eine Richtung.

Für die Dekompression meiner Wirbelsäule auch in die andere (kopfseitige) Richtung nutze ich meinen Inversionstisch.

Der Einsatz dauert dabei nur wenige Minuten pro Tag und ist somit ganz einfach, z.B. nach einem Training, umsetzbar.

Wenn dir dieser Artikel gefallen hat, dann teile ihn mit deinen Freunden, abonniere den Blog/Newsletter und hinterlasse einen Kommentar.

© HP Bernd Stößlein MBA in Sportmanagement


In diesem und anderen Artikeln findest du den ein oder anderen „Affiliate Link“, zu amazon. Wenn du über diesen Link etwas erwirbst, dann unterstützt du damit meine Blogartikel und schaffst Ressourcen für weitere qualitativ hochwertige Recherchen und Artikel wie diesen. Es entstehen für dich dadurch keine Mehrkosten! Alle meine grundsätzlichen Empfehlungen findest du unter: https://www.amazon.de/shop/bernd_stoesslein


Literatur

Lateinisch-griechischer Wortschatz in der Medizin, S 55.

Lateinisch-griechischer Wortschatz in der Medizin, S 86.

Lateinisch-griechischer Wortschatz in der Medizin, S 89.

Lateinisch-griechischer Wortschatz in der Medizin, S 103.

Lateinisch-griechischer Wortschatz in der Medizin, S 104.

Lateinisch-griechischer Wortschatz in der Medizin, S 117.

Lateinisch-griechischer Wortschatz in der Medizin, S 126.

Lateinisch-griechischer Wortschatz in der Medizin, S 226.

Lateinisch-griechischer Wortschatz in der Medizin, S 244.

Handkraft messen – sinnvoller Vitalparameter oder nur spinnerte Spielerei? Dieser Artikel widmet sich der Frage nach der Sinnhaftigkeit einer Erhebung und Interpretation von Daten mittels Handdynamometer.

Wir werfen einen Blick auf meine Messergebnisse aus der täglichen Praxis und auf Ergebnisse der internationaler Studienlage.

Des Weiteren zeige ich eine ganz praktische Messmethode zur Ermittlung der Griffkraft mittels hydraulischem Handdynamometer (Handkraftmesser) von Baseline® bzw. 3B Scientific und Interpretationsmöglichkeiten dieser gewonnenen Daten für die eigene Trainingsplanung.

Warum man seine Griffkraft messen sollte

Natürlich drängt sich einem sofort die Frage auf, warum man denn überhaupt seine Griffkraft bzw. Handkraft messen sollte. Aus Jux und Tollerei oder gibt es dafür auch wissenschaftlich fundierte Hintergründe? Meine ganz eigene Antwort lautet: sowohl als auch!

Viele Sportler, die regelmäßig „ans Eisen“ gehen, haben sicher keine Ahnung, wie stark ihre Griffkraft ist, geschweige denn, ob eine Diskrepanz zwischen dem starken und dem schwächeren Arm sich auch auf die Handkraft auswirkt.

Jetzt höre ich wieder viele „Eisenbeißer“ argumentieren, dass die Messung der Griffkraft/Handkraft unerheblich sei…doch ist dem wirklich so?

Betrachten wir einmal, was Griffkraft/Handkraft denn überhaupt ist. Der Begrifflichkeit nach die Menge an Kraft, die eine Hand bzw. der dadurch entstehende Griff aufbringen kann.

Klingt nicht besonders spannend? Mitnichten!

Aus meiner Sicht, ist dies sogar DER alles entscheidende Faktor, wenn es um das Training mit Gewichten geht. DER Parameter, der immer wichtiger wird, je höher die zu bewegende Last wird, respektive je höher die Trainingsintensität ist (in Relation zum 1RM).

Das 1 RM = „one repetition maximum“, also ein Gewicht, welches mit korrekter Übungsausführung einmal über einen vollen Bewegungsradius bewegt werden kann.

Die Griffkraft/Handkraft ist also der „Ort“, an dem die Hand mit der zu bewegenden Last in Kontakt kommt. Demnach entscheidet die Stärke des „Zupackens“ also darüber, ob z.B. eine Hantelstange vom Boden aufgehoben werden kann oder nicht.

Hand- respektive Griffkraft ist das „Nadelöhr“ bzw. die berühmte „schwächste Kette im Kraft-Glied“. Man stelle sich vor, man hätte eine starke Rückenmuskulatur, mit der man in der Lage wäre, sein komplettes Körpergewicht hochzuziehen (z.B. für einen Klimmzug).

Die Kraft der Rückenmuskulatur muss sich aber der Griffkraft unterordnen. Denn wer nicht in der Lage ist, seine Hände ausreichend lange schließen zu können, um sich für einen Klimmzug hochzuziehen, dem nützt auch eine starke Rückenmuskulatur wenig!

Worüber gibt die Handkraft Aussage?

Interessanterweise ist die Griffkraft nicht nur für Kraftsportler von Interesse! Denn die Studienlage ist in Bezug auf die Nützlichkeit der Handkraft sehr einheitlich.

So kommt eine Studie aus dem Jahr 2018 zu dem Ergebnis, dass:

Eine höhere Griffstärke war mit einer Reihe von Gesundheitsergebnissen und einer verbesserten Vorhersage eines bürobasierten Risikoscores verbunden“ (Celis-Morales et al., 2018)

In dieser Studie (Associations of grip strength with cardiovascular, respiratory, and cancer outcomes and all cause mortality: prospective cohort study of half a million UK Biobank participants) wurde der Zusammenhang der Griffstärke mit der krankheitsspezifischen Inzidenz und Mortalität untersucht, sowie der Frage nachgegangen, ob die Griffstärke die Vorhersagefähigkeit eines etablierten bürobasierten Risikoscores verbessert. Untersucht wurden 502293 Probanden!

Eine andere Untersuchung (Grip Strength: An Indespensible  Biomarker for Older Adults) widmete sich der Frage, inwiefern die Griffkraft sich als aussagekräftiger Parameter über die allgemeine „Gesundheit“ älterer Menschen erweisen könnte.

Das Ergebnis:

Folglich kann die routinemäßige Verwendung der Griffstärke als eigenständige Messung oder als Bestandteil einer kleinen Messbatterie zur Identifizierung älterer Erwachsener empfohlen werden, bei denen das Risiko eines schlechten Gesundheitszustands besteht“ (Bohannon, 2019).

Dieser Studie zufolge eignet sich die Ermittlung der Handkraft also, um den Gesundheitszustand älterer Erwachsener einzuschätzen!

Ist die Griffstärke ein Prädiktor für die Gesamtmuskelkraft bei gesunden Kindern, Jugendlichen und jungen Erwachsenen? Diese gleichnamige Studie kam zu folgendem Ergebnis:

Die Griffstärke hängt mit der Gesamtmuskelkraft zusammen. Dies weist im klinischen Umfeld darauf hin, dass die Griffstärke als Hilfsmittel verwendet werden kann, um schnell einen Hinweis auf die allgemeine Muskelkraft einer Person zu erhalten. Die entwickelten Referenzdiagramme eignen sich zur Bewertung der Muskelkraft bei Kindern, Jugendlichen und jungen Erwachsenen in klinischen und Forschungsumgebungen.“ (Wind et al., 2010).

Doch damit nicht genug! Studien, die sich mit der Messung und Aussagekraft der Griffkraft geben gibt es zu Hauf!

So ergab eine Studie aus dem Jahr 2016 z.B.:

„(…) handgrip strength, may be a better tool to capture conceptual concomitant health, which may be a simple, inexpensive, and easy-to-use tool when targeting cardiovascular health in public health level” (Lee et al., 2016).

Zu Deutsch „ Die Stärke des Handgriffs kann ein besseres Instrument zur Erfassung der konzeptionellen Begleitgesundheit sein. Dies kann ein einfaches, kostengünstiges und benutzerfreundliches Instrument sein, wenn es um die kardiovaskuläre Gesundheit im Bereich der öffentlichen Gesundheit geht“

Diese Studie aus Taiwan trug den Titel: „Die relative Handgriffstärke ist ein einfacher Indikator für das kardiometabolische Risiko bei Menschen mittleren Alters und älteren Menschen: Eine landesweite bevölkerungsbezogene Studie in Taiwan

Eine weitere Studie zu diesem Thema (Grip Strength Is Associated with Longitudinal Health Maintenance and Improvement in Adolescents) kam zu der Erkenntnis:

Greater NGS is associated with longitudinal health maintenance and health improvements in adolescents. Low NGS could be used as a prognostic indicator of cardiometabolic risk and to identify adolescents who would benefit most from lifestyle interventions to improve muscular fitness.“ (Peterson et al., 2018).

Die in dieser Studie genutzte Abkürzung „NGS“ steht für „ normalized grip strength“, also auf Deutsch: „normalisierte Griffkraft“.  Das Ergebnis dieser recht aktuellen Studie aus dem Jahr 2018 lautet also:

Ein größerer NGS-Wert ist mit der Erhaltung der Gesundheit in Längsrichtung und der Verbesserung der Gesundheit bei Jugendlichen verbunden. Ein niedriger NGS-Wert könnte als prognostischer Indikator für das kardiometabolische Risiko und zur Identifizierung von Jugendlichen verwendet werden, die am meisten von Lebensstilinterventionen zur Verbesserung der Muskelfitness profitieren würden.“

Die Ergebnisse all dieser Studien sind relativ aktuell. So kommt eine weitere Studie aus dem Jahr 2017 (Initial level and rate of change in grip strength predict all-cause mortality in very old adults) zu folgendem Resultat:

Ein höherer GS-Ausgangswert und ein Anstieg der GS um 5 Jahre schützten die Mortalität, während ein Rückgang der GS mit einem erhöhten Mortalitätsrisiko im Alter von über 9,6 Jahren, insbesondere bei Frauen, verbunden war. Diese Ergebnisse tragen zur biologischen und klinischen Bedeutung von GS als starker Prädiktor für das langfristige Überleben im späten Leben bei.“ (Granic et al., 2017).

Aus dem Englisch übersetzt: „(…) higher baseline GS and 5-year increase in GS were protective of mortality, whilst GS decline was associated with an increased risk of mortality in the very old over 9.6 years, especially in women. These results add to the biological and clinical importance of GS as a powerful predictor of long-term survival in late life.“ (Granic et al., 2017).

GS steht in dieser Studie für „grip strength“ also „Griffkraft“.

Diesen Studien zufolge kann die Griffkraft also als Indikator herangezogen werden, um Aussagen über den Gesundheitszustand zu treffen. Kann die Handkraft vielleicht auch mit der Gesundheit des Gehirns zusammenhängen?

Genau dieser Frage ging ein Neurobiologe 2018 nach! Titel der Studie: Get a grip: individual variations in grip strength are a marker of brain health.

Carson kam zu dem Ergebnis, dass:

Die engen und allgegenwärtigen Beziehungen zwischen altersbedingten Rückgängen der maximalen Griffstärke und Ausdruck kognitiver Dysfunktion können daher im Hinblick auf die konvergente funktionelle und strukturelle Vermittlung kognitiver und motorischer Prozesse durch das menschliche Gehirn verstanden werden. Im Zusammenhang mit dem Altern ist die maximale Griffstärke ein diskriminierendes Maß für die neurologische Funktion und die Gesundheit des Gehirns.“ (Carson, 2018).

Eine weitere Studie aus dem Jahr 2018, die den Zusammenhang von Griffkraft (GS = grip strength), Herzkreislauf-Fitness (CRF = cardiorespiratory fitness) und der allgemeinen Sterblichkeitsrisiko (mortality risk) untersuchte, fand Folgendes heraus:

CRF und GS sind beide unabhängige Prädiktoren für die Mortalität. Die Verbesserung von CRF und Muskelkraft gemeinsam, im Gegensatz zur einzelnen Optimierung allein kann die effektivste Verhaltensstrategie sein, um das Gesamtmortalitäts- und kardiovaskuläre Mortalitätsrisiko zu verringern.“ (Youngwon, 2018).

Ist Griffkraft ein sinnvoller Marker für Gebrechlichkeit/Schwäche? Dieser Frage ging die gleichnamige Studie aus dem Jahr 2003 nach.

Syddal et al. kamen zu der Erkenntnis, dass: „Die Griffstärke war mit mehr Gebrechlichkeitsmarkern als dem chronologischen Alter innerhalb des untersuchten engen Altersbereichs verbunden. Die Griffstärke kann sich für ältere Menschen ähnlichen Alters als nützlicher als die alleinige chronologische Gebrechlichkeit erweisen. Die Gültigkeit in einer klinischen Umgebung muss getestet werden.“ (Syddal et al., 2003).

Man sieht also, dass zahlreiche Studien zum Thema der Sinnhaftigkeit und Aussagekräftigkeit der Griffkraftmessung existieren.

Dieser Artikel erhebt natürlich keinen Anspruch auf Vollständigkeit! Wer mehr Studien lesen möchte, sollte einfach im Internet z.B. nach den Schlagworten: Griffkraftmessung, Handkraftmessung, grip strength measurement etc. suchen.

Womit kann man Griffkraft messen?

Die Griffkraft misst man am besten mit einem sogenannten Handdynamometer, respektive einem Handkraftmesser. Doch Achtung! Hier gibt es billige und Profimodelle!

Ich empfehle nur den Gebrauch von hydraulischen Messinstrumenten, wie denen von Baseline®! Hier würde ich auch die Modelle mit digitaler Anzeige bevorzugen, weil ich diese für exakter erachte als Analoge.

Diese Messinstrumente findet man bei 3B Scientific (Werbung).

Wer sich selbst kein Messgerät zulegen will, der kann gerne bei mir einen Termin zur professionellen Ermittlung seiner Griffkraft vereinbaren.

Dies kann im Rahmen meiner Tätigkeit als Heilpraktiker oder Personal-Trainer/Strength Coach stattfinden (info@bernd-stoesslein.de).

Der Begriff Dynamo/meter setzt sich übrigens zusammen aus Griechisch dynamis = Vermögen, Kraft, Fähigkeit, Geschicklichkeit, Macht; und Griechisch metron = Maß, Maßstab; respektive dem Suffix -meter = -messer, -messgerät (Becher et al., 1995).

Ein Hand/dynamo/meter ist also wörtlich übersetzt ein „Hand/kraft/messer“.

Ein sehr gutes Buch, das sich ausschließlich dem Thema der Griffkraft widmet ist “Mastery of Hand Strength”:

Wie messe ich meine Griffkraft?

Wie man seine Griffkraft am besten misst, habe ich von meinem Mentor Charles R. Poliquin (R.I.P.) alias „Strength Sensei“ gelernt. Charles empfahl, dass man zuerst einen Durchschnittswert seiner aktuellen Griffkraft ermitteln sollte. Für die linke und rechte Hand.

Dazu empfahl er, gleich morgens, nach dem Aufstehen (wenn man noch vergleichsweise schwach ist) mit dem Messen zu beginnen.

Dafür stellt man sich hin (da das zentrale Nervensystem [ZNS] im Stehen mehr Kraft abrufen kann als im Sitzen) und beginnt mit der dominanten (stärkeren) Hand.

Wer mit Rechts beginnt, der stellt sein rechtes Bein leicht zurück und hält den Handdynamometer mit ausgestrecktem Arm senkrecht in einer Linie über den Kopf.

Anschließen drückt man den Griff des Messgerätes so fest zusammen, wie irgend möglich und senkt dabei den Arm langsam, bis er wieder neben der Hüfte hängt. Die Griffkraft sollte (laut Charles) am größten sein, wenn der Arm sich in einem 90°-Winkel/parallel zum Boden befindet.

Im Anschluss wiederholt man den Vorgang mit dem anderen Arm. Dies kann man nun für ein oder zwei Wochen täglich ausführen, am besten, wenn man sich in einer Trainingsphase in der man keine maximalen oder submaximalen Gewichte bewegt.

Wie sind die ermittelten Ergebnisse zu interpretieren?

Nun, Charles war der Meinung, dass bei Überlastung und unzureichender Erholung sowie in der Anfangsphase des Übertrainings die Werte einer morgendlichen Handkraftmessung sinken würden.

Insbesondere, wenn das Messergebnis um zwei Kilo oder mehr pro Hand sinkt, wäre eine ausreichende Erholung vom letzten Training nicht in ausreichender Form gegeben!

Unter dem Gesichtspunkt des gesamten Energiehaushaltes geht es einem vielleicht ganz gut, das ZNS hingegen ist dann (noch) nicht ausreichend erholt.

Wenn die morgendliche Messung hingegen 2 oder gar 4 kg mehr anzeigt, dann ist das ZNS ausreichend erholt und (im Falle von + 4kg) ein gutes Anzeichen, um an diesem Tag eine neue Bestleistung im Training zu erzielen!

Wer mal unter seinem Durchschnittswert liegt, der braucht sein Training an diesem Tag nicht komplett abzubrechen, sollte dann aber überlegen, mit wie viel Intensität und Volumen er trainieren möchte, um nicht noch weiter in einen Zustand des Übertrainings zu geraten!

Ermittelte Vergleichswerte für Alter und Geschlecht?

Ergänzend zu Charles Ansatz möchte ich erwähnen, dass die Griffkraft, aus meiner Sicht, insbesondere durch den Faktor Schlaf beeinflusst werden kann. Der Schlaf, aber auch andere Einflussfaktoren können sich auf die Regeneration und damit letztlich natürlich auch die Griffkraft auswirken.

Hierzu gehören z.B. die Ernährung, der Konsum von Nahrungsergänzungsmitteln, der allgemeine Gesundheitszustand, Stresslevel des Alltags, aber auch die Uhrzeit, zu der die Griffkraft ermittelt wird (siehe Messprotokoll) sowie andere Faktoren.

So ist meine Griffkraft am Nachmittag (gegen 15 Uhr) z.B. deutlich höher (bis zu +10kg) als direkt nach dem Aufstehen. Zur Ermittlung eines Durchschnittswertes, anhand dessen man dann, wie oben beschrieben, ableiten kann, ob man an diesem Tag trainiert oder nicht, spielt dies eine untergeordnete Rollen.

Es kann aber ein Indikator dafür sein, zu welcher Uhrzeit man idealerweise trainieren sollte. So ergänze ich weiterhin zu Charles Empfehlungen, dass – aus meiner Sicht – das ZNS auch erstmal „erwachen“ muss.

Wer in der ersten Stunde nach dem Aufstehen direkt trainieren geht, der bringt sich also womöglich um Kraft und damit um neue Rekorde beim Training. Sinnvoller wäre es demnach z.B. direkt nach dem Aufwachen die Griffkraft zu ermitteln und dann eine Stunde später und erneut eine Stunde später usw.

Dies kann beliebig oft am Tag durchgeführt werden, um zu ermitteln, wann man (im Durchschnitt) tendenziell die stärkste Griffkraft besitzt. Zu jener Zeit ist das ZNS dann höchstwahrscheinlich maximal leistungsfähig.

Diese, nennen wir sie spaßeshalber mal „magische Uhrzeit“, ist dann natürlich wieder abhängig von der Anzahl an geschlafenen Stunden (+ Qualität des Schlafes!) und wann man am Vortag zu Bett gegangen ist.

Es geht also nicht um eine absolute Uhrzeit, sondern vielmehr um die Zeit, die individuell, nach dem Aufstehen vergangen ist.

So kann jeder für sich ermitteln, wie viele Stunden nach dem Aufstehen er nun am stärksten ist und, sofern es sein (Berufs)Alltag erlaubt, zu jener Stunde trainieren.

Nachfolgende Tabelle zeigt (m)ein Messprotokoll über 15 Tage hinweg.

Wenn du deine eigene Griffkraft ermittelt hast, kannst du diese einordnen, indem du einen Blick auf die Richtwerte der Handkraft wirfst. Diese stammen aus einer Studie, die von Nadia Steiber durchgeführt wurde.

Hier wurden über 30 Jahre hinweg knapp 12.000 (11.790) Probanden getestet und deren Ergebnisse ausgewertet. Das Alter der Teilnehmer lag zwischen 17 und 90 Jahren!

Der Titel: „Strong or Weak Handgrip? Normative Reference Values for the German Population across the Life Course Stratified by Sex, Age, and Body Height

Dort heißt es u.a.:

Handgrip strength is an important biomarker of healthy ageing and a powerful predictor of future morbidity and mortality both in younger and older populations. Therefore, the measurement of handgrip strength is increasingly used as a simple but efficient screening tool for health vulnerability.“ (Steiber, 2016).

Zu Deutsch:

Die Handgriffstärke ist ein wichtiger Biomarker für gesundes Altern und ein starker Prädiktor für die zukünftige Morbidität und Mortalität sowohl in jüngeren als auch in älteren Populationen. Daher wird die Messung der Handgriffstärke zunehmend als einfaches, aber effizientes Screening-Tool für gesundheitliche Anfälligkeiten eingesetzt.“

Mehr Griffkraft durch Rotlicht?

Eine recht aktuelle Studie aus dem Jahr 2017 an 54 Probanden, die vor dem Griffkrafttraining eine Rotlichtanwendung erhielten, zeigte, dass nach vier Wochen ein Griffkraftzuwachs verzeichnet werden konnte.

Mehr dazu erfährst du in meinem Artikel: Was kann das NorahLux® Lumnia?

Fazit/Conclusio

Es bleibt stets die Frage nach der Sinnhaftigkeit einer Unternehmung/Tätigkeit. Gleiches gilt natürlich auch für das Erfassen der Griffkraft/Handkraft.

Für wen ist die Messung, aus meiner Sicht, sinnvoll? Definitiv für alle, die mindestens „professionelle Hobbyathleten“ sind.

Die Griffkraftanalyse mittels Handdynamometer bietet die Möglichkeit, einer schnellen und einfachen Messmethode, um zu ermitteln, ob man sich bereits ausreichend vom Training regeneriert hat oder Gefahr läuft, in einen Zustand des Übertrainings zu geraten.

Mittels hochwertigem Messgerät erlangt man also in Sekundenschnelle reproduzierbare und valide Messergebnisse. Hierzu empfehle ich ein digitales Handdynamometer von Baseline® zu nutzen. Dieses kann bei 3B Scientific (Werbung) bezogen werden.

Die internationale Studienlage in Bezug auf den Einsatz der Handkraftmessung ist relativ einseitig, und zwar recht einseitig positiv!

So scheint die Evaluierung der Griffkraft bei weitem nicht nur im Bereich des Sportes Anwendung zu finden, sondern greift, im wahrsten Sinne des Wortes, auch zu, bei der Beurteilung von allgemeinen gesundheitsbezogenen Parametern.

Es darf die Griffkraft, aus meiner Sicht, durchaus als aussagekräftiger Vitalparameter genannt werden, eventuell in einem „Atemzug“ mit Blutdruck, Puls oder z.B. der peripheren Sauerstoffsättigung.

Ich nutze die Griffkraftmessung sowohl im Rahmen meiner Tätigkeit als Heilpraktiker als auch zur Trainingssteuerung meiner Personal-Training Klienten.

Wenn du dich für eine hochprofessionelle Trainingsbetreuung interessierst oder einen (Sport)Heilpraktiker suchst, der deine „Sport-Sprache“ spricht, dann schreibe mir eine E-Mail an:

info@heilpraktiker-stoesslein.de

oder

info@bernd-stoesslein.de

Wenn dir dieser Artikel gefallen hat, dann teile ihn mit deinen Freunden, abonniere den Blog/Newsletter und hinterlasse einen Kommentar.

© HP Bernd Stößlein MBA in Sportmanagement


In diesem und anderen Artikeln findest du den ein oder anderen „Affiliate Link“, zu amazon. Wenn du über diesen Link etwas erwirbst, dann unterstützt du damit meine Blogartikel und schaffst Ressourcen für weitere qualitativ hochwertige Recherchen und Artikel wie diesen. Es entstehen für dich dadurch keine Mehrkosten! Alle meine grundsätzlichen Empfehlungen findest du unter: https://www.amazon.de/shop/bernd_stoesslein

Literatur

Bohannon RW. Grip Strength: An Indispensable Biomarker for Older Adults. Clinical Interventions in Aging 201914, 1681–1691.

Carson, R. G. Get a Grip: Individual Variations in Grip Strength Are a Marker of Brain Health. Neurobiology of Aging 201871, 189–222 DOI: 10.1016/j.neurobiolaging.2018.07.023.

Celis-Morales CA; Welsh P; Lyall DM; Steell L; Petermann F; Anderson J; Iliodromiti S; Sillars A; Graham N; Mackay DF; et al. Associations of Grip Strength with Cardiovascular, Respiratory, and Cancer Outcomes and All Cause Mortality: Prospective Cohort Study of Half a Million Uk Biobank Participants. Bmj (clinical Research Ed.) 2018361, 1651 DOI: 10.1136/bmj.k1651.

Granic A; Davies K; Jagger C; M Dodds R; Kirkwood TBL; Sayer AA. Initial Level and Rate of Change in Grip Strength Predict All-Cause Mortality in Very Old Adults. Age and Ageing 201746 (6), 970–976 DOI: 10.1093/ageing/afx087.

Kim, Y.; White, T.; Wijndaele, K.; Westgate, K.; Sharp, S. J.; Helge, J. W.; Wareham, N. J.; Brage, S. The Combination of Cardiorespiratory Fitness and Muscle Strength, and Mortality Risk. European Journal of Epidemiology : The Official Journal of the European Epidemiology Federation 201833 (10), 953–964 DOI: 10.1007/s10654-018-0384-x.

Lateinisch-griechischer Wortschatz in der Medizin, S. 135.

Lateinisch-griechischer Wortschatz in der Medizin, S. 72.

Lee WJ; Peng LN; Chiou ST; Chen LK. Relative Handgrip Strength Is a Simple Indicator of Cardiometabolic Risk among Middle-Aged and Older People: A Nationwide Population-Based Study in Taiwan. Plos One 201611 (8), 0160876 DOI: 10.1371/journal.pone.0160876.

Nadia Steiber. Strong or Weak Handgrip? Normative Reference Values for the German Population Across the Life Course Stratified by Sex, Age, and Body Height. Plos One 201611 (10) DOI: 10.1371/journal.pone.0163917.

Peterson MD; Gordon PM; Smeding S; Visich P. Grip Strength Is Associated with Longitudinal Health Maintenance and Improvement in Adolescents. The Journal of Pediatrics 2018202, 226–230 DOI: 10.1016/j.jpeds.2018.07.020.

Syddall, H.; Cooper, C.; Martin, F.; Briggs, R.; Aihie Sayer, A. Is Grip Strength a Useful Single Marker of Frailty? Age and Ageing 200332 (6), 650–656.

Wind, A. E.; Takken, T.; Helders, P. J.; Engelbert, R. H. Is Grip Strength a Predictor for Total Muscle Strength in Healthy Children, Adolescents, and Young Adults? European Journal of Pediatrics 2010169 (3), 281–287.

Weiß-orange Männchen: Pixabay.

Das Heskiers All-In-One-Massagetool + -Methode ist ein speziell entwickeltes, sogenanntes „IASTM-Tool“ und eine spezielle Art der Behandlung von Weichteilgewebe, die vom dänischen Akupunkteur und Designer Martin Heskier entwickelt wurde.

Das einzigartige Gestaltung dieses Werkzeugs kann aufgrund seines ergonomischen Designs an nahezu jede Körperstruktur angepasst werden.

Hierdurch unterscheidet es sich von anderen IASTM-Tools, wie z.B. gängige Gua Sha-tools.

Mit einem Heskiers-tool erhält man mehrere „Massage-tools“ in einem und schont seine Finger und Hände.

Es wird mit einem „Daumenpolster“, einem „Handballen“ und Kanten für die Behandlung nach innen/außen sowie einer Kante geliefert, die den menschlichen Zeigefinger imitiert. So kann man das tool vielseitig anwenden.

Etwas zum Schaben, für Akupressur-Techniken und sonstige Weichteilgewebsmassagen.

In diesem Artikel lernen Sie:

• mehr über die Einzigartigkeit des Heskiers-Tools und der Methode.

• von Martin Heskier und seinem „Heskiers-Tool“ in einem Interview zwischen Martin & mir

• die neuesten Forschungsergebnisse zur Wirksamkeit von IASTM-Tools

• mehr über ein neu entdecktes „Organ“ in Ihrem Körper

• wie wichtig es ist, Gewebe mit Feuchtigkeit zu versorgen

• Lösungsansätze zur Besserung von „issue in the tissue“

• Vieles mehr…

Heskiers All-In-One-Massagegerät

Nun fragt man sich vielleicht, ob das Heskiers-Tool nur ein weiteres IASTM-Tool ist. Um es kurz zu machen: Ist es, ABER es ist einzigartig!

Heskiers Tool und Methode, Quelle: © Heskiers

Woher ich das weiß? Neben meiner Tätigkeit als Strength Coach/Personal Trainer arbeite ich auch als Heilpraktiker in Deutschland.

Es ist ein einzigartiger Beruf, der in dieser Konstellation nur in Deutschland und in der Schweiz in Modifikation verfügbar ist. Man darf Patienten (mit Einschränkungen) diagnostizieren und behandeln, auch mit invasiven Techniken, d.h. durch Injektionen, Infusionen usw.

Daher darf ich auch Patienten mit Akupunktur- und natürlich Akupressurtechniken behandeln. Demnach habe ich viele IASTM-Tools in allen möglichen Variationen + Massagepistolen und anderen Geräten verwendet.

Ich wurde auch von meinem Mentor Charles R. Poliquin alias “Strength Sensei” (R.I.P.) als Certified Kinetik Chain Enhancement (KCE) Practictioner zertifiziert.

In diesen Artikeln gibt’s mehr zu KCE:

Kinetic Chain Enhancement – Sofort mehr Mobilität und Kraft

Kinetic Chain Enhancement – 7 Dinge, die ich gelernt habe

Auch dieser Artikel soll dazu dienen, Hilfe zur Selbsthilfe zu geben, durch mehr Informationen. In diesem Fall über die Behandlung von Weichgewebe, respektive das Heskiers-Tool.

Deshalb bestehe ich zunächst auf einer schnellen Terminologie:

Der Begriff IASTM steht für „Instrument Assisted Soft Tissue Mobilization“. Auf Deutsch etwa: „Unterstützte Weichteilgewebe-Mobilisation durch Instrumente“.

Genau hier kommt die Einzigartigkeit des Heskiers ins Spiel! Wie ich bereits in der Einleitung erwähnt habe, kann dieses Tool Finger „retten”, insbesondere, wenn man auch beruflich viel mit Massagetechniken etc. arbeitet.

Anwendung des Heskiers-Tool, Quelle: © Heskiers.

Wer den ganzen Tag Massage- und/oder Mobilitätstechniken an Kunden/Patienten durchführt, der belastet seine Finger- und Handgelenke, Sehnen und Bänder mitunter sehr stark. Deshalb  nutzen viele Profis sogenannte „IASTM-tools“.

Aufgrund des „Designs“ unseres Körpers sind die meisten Werkzeuge jedoch keine „Alles in einem-Lösung“. Man benötigt extra „tools“ für spezielle Kurven am Körper usw.

Die meisten „tools“ auf dem Markt sind zwar gut, aber meist nur für eine spezielle Aufgabe geeignet.

Kurz gesagt, das Heskiers-Tool ist aus meiner Sicht DAS „tool”, das die meisten Möglichkeiten in einem Gerät kombiniert. Sozusagen gemäß dem Pareto-Prinzip, bzw. der 80-20-Regel. Man investiert 20 %, um 80% Ertrag zu erwirtschaften.

Wie bereits erwähnt, erfüllt die Mehrheit der Werkzeuge nur eine, vielleicht zwei Aufgaben, während das Heskiers-Werkzeug nahezu alles erledigt!

Natürlich kann es nicht für jede Art von Weichteilbehandlung verwendet werden, aber es ist definitiv der „Allrounder” unter den IASTM-Werkzeugen UND es ist im Vergleich zu den anderen sehr billig!

Um genau zu sein ist „billig” nicht das richtige Wort, da das „tool“ tatsächlich eine Investition  und einen Wert darstellt, nur um präzise zu sein.

Egal, ob man ein professioneller Therapeut ist oder nur nach einem guten “Do-it-yourself-Behandlungsinstrument” sucht, ich denke, dass man mit dem Heskiers-Tool immer die richtige Wahl trifft!

Das Heskiers® Tool gibt’s exklusiv in Deutschland bei mir —> im Shop. <—


Das Heskiers-Tool – Design verbessert die Funktion

Wenn es um Design geht, gibt es ein Konzept, das besagt: „Design folgt Funktion“. Genau das habe ich Martin in unserem Interview gefragt, als ich herausfinden wollte, warum er das Design seines Werkzeugs so gewählt hat, wie es jetzt ist.

Er konterte mit: “Design VERBESSERT Funktion”.

In unserem lustigen und spannenden Interview gibt es die Geschichte zum Heskiers Tool, der Heskers-Merhode und noch mehr!


Das Heskiers-Tool und seine Funktionen, Quelle: © Heskiers

In diesem Bild sieht man alle besonderen Designmerkmale des Heskiers-Werkzeugs und warum es so vielseitig angewendet werden kann!

Während die meisten IASTM-Werkzeuge flach ausgelegt sind, passt das Heskiers ergonomisch in die Hand (siehe Bild).

Das Heskiers-Tool (in schwarz) liegt perfekt in der Hand, Quelle: Eigenes Foto.

Des Weiteren kann man sehen, dass neben einem „scharfen“ Rand, den es bei den meisten IASTM-Werkzeugen gibt, auch eine Reihe anderer Kurven zur Hydration des Gewebes enthalten sind sowie Kanten zur punktuellen Behandlung des Gewebes.

Wie ich bereits erwähnt habe, ist das „tool“ so konzipiert, dass es sich ergonomisch einer Hand anpasst, deswegen ähnelt es auch im Design einer Hand (siehe Bild unten).

Heskiers-Tool im Vergleich zur menschlichen hand, Quelle: Eigenes Foto.

Das „tool“ sieht aus wie eine „Handpistole”. Es ähnelt einigen der eigenen „Werkzeuge“ zur Massage des Menschen, der Hand, bzw. den Fingern.

Der Zeigefinger ist „Target 1″. Mit ihm ist z.B. eine punktuelle Behandlung (wie das Aktivieren von Akupressurpunkten) möglich.

Die „Release-Doppelkurve“ ahmt den Bereich zwischen Zeigefinger und Daumen nach („Target 2“) und so weiter.

Der große Vorteil des Heskiers-Werkzeugs im Vergleich zur menschlichen Hand besteht darin, dass man es in alle Richtungen verwenden kann.

Man kann schließlich die eigene Hand nicht von Ihrem Körper lösen, sodass man nicht die Möglichkeit hat, „Target 3“ (Ecke & Kante) wie mit dem Heskiers-Werkzeug zu erreichen.

Darüber hinaus kann man das Werkzeug in allen Winkeln nutzen und mit unterschiedlichen Hebeln arbeiten, um Gewebe zu bearbeiten.

Im nächsten Kapitel zeige ich den Unterschied, in Größe und Form, eines Heskiers-Werkzeugs zu einem traditionellen Gua Sha-Werkzeug aus Horn. Es ist offensichtlich, dass das erste aufgrund seiner Form ein viel breiteres Anwendungsfeld hat.

Traditionelles Gua Sha-Tool im Vergleich zum Heskiers-Tool, Quelle: Eigenes Foto.

Heskiers – Das Gewebe mit Flüssigkeit versorgen?

Laut Martin Heskier bedeutet „Hydratisierung des Gewebes“ Folgendes: „Die Blutgefäße bringen Plasma in das umgebende Gewebe“ (M. Heskier, 2020).

Darüber hinaus erklärte er mir:

Plasma transportiert Nährstoffe zu den Zellen und spült deren Abfall weg. Milchsäure, die während eines umfangreichen Krafttrainings mit hohem Volumen produziert wird, kann zu Entzündungen und Schmerzen führen. “

Außerdem kann man auf Heskiers.com lesen, dass:

Das Interstitium (der Plasma-Raum) wurde kürzlich auf CNN als„ neu gefundenes Organ“ im Körper gefeiert. Heskier erfand eine neue Technik, um den Plasmafluss zu erhöhen und Entzündungen zu senken. Verwenden Sie die speziell entwickelten weichen Kurven, um signifikante und schnelle Ergebnisse zu erzielen. “ (Heskiers, 2020).

Aber Moment, was steht da? Eine neues „Organ“? Wie ist es in unserer modernen medizinischen Zeit möglich, dass in unserem Körper noch unentdeckter Raum vorhanden ist?!

Nun, überraschenderweise gibt es anscheinend, nach Ansicht von Forschern, ein neuentdecktes Netzwerk von „(…) mit Flüssigkeit gefüllten Räumen in Gewebe” (Scientific American, 2018).

Jetzt fragt man sich vielleicht, worum es bei all dem Zinnober geht und was er mit dem Heskiers-Tool und der Heskiers-Methode zu tun hat. Ich werde dies, aus meiner Sicht, versuchen zu erklären:

Zunächst leitet sich Interstitium vom lateinischen Präfix inter- = zwischen, in der Mitte von; und Lateinisch statuere = pflanzen/situieren, festlegen/befestigen (Becher et al., 1995).

Wörtlich übersetzt bedeutet interstitium also so viel wie: „etwas dazwischen befestigen“.

Bereits 1984 kamen Bert und Pearce zu dem Schluss:

„(…) the interstitium is a contiguous fluid-filled space existing between a structural barrier, such as a cell wall or the skin, and internal structures, such as organs, including muscles and the circulatory system

Auf Deutsch etwa:

„Das Interstitium ist ein zusammenhängender, mit Flüssigkeit gefüllter Raum, der zwischen einer strukturellen Barriere wie einer Zellwand oder der Haut und inneren Strukturen wie Organen, einschließlich Muskeln und des Kreislaufsystems existiert.”

Dies wurde kürzlich (2012) durch die Untersuchung von Wiig und Swartz gestützt, die unter anderem behaupten, dass:

„Das Interstitium beschreibt die Flüssigkeit, Proteine, gelöste Stoffe und die extrazelluläre Matrix (ECM), aus denen die zelluläre Mikroumgebung in Geweben besteht. Seine Veränderungen sind grundlegend für Veränderungen der Zellfunktion bei Entzündungen, Pathogenese und Krebs. Interstitielle Flüssigkeit (IF) wird durch transkapilläre Filtration erzeugt und durch Lymphgefäße geklärt. “

Eine Behandlung mit IASTM-Werkzeugen wie dem Heskiers All-in-One-Werkzeug könnte sich also positiv auf die interstitielle Flüssigkeit, das Lymphsystem und aufgrund dessen auf die Hydrierung des Körpers auswirken!

Traditionell werden IASTM-Werkzeuge verwendet, um myofasziale „Triggerpunkte“ und/ oder Adhäsionen im Weichgewebe aufzulösen.

Neueste Forschungsergebnisse zeigen, dass “(…) die Muskelflexibilität unmittelbar nach einer einzelnen Intervention von IASTM (…) Massage positiv beeinflusst wurde“. (Koumantakis et al., 2020).

Was ist ein myofaszialer Triggerpunkt, höre ich den geneigten Leser fragen. Nun, laut Gulick wurde dieser definiert als:

„(…) Hyperreizbarer, fühlbarer Knoten in einem Skelettmuskel. Zu den Anzeichen und Symptomen (…) gehören Muskelschmerzen, Schwäche und Funktionsstörungen (…) im Zusammenhang mit der Weichteilpathologie. “ (Gulick, 2018).

Darüber hinaus ergab eine Studie zur funktionellen Bewegungsanalyse vor und nach der IASTM-Mobilisierung, dass:

“(…) IASTM kann als leistungssteigerndes Instrument eingesetzt werden, das das Potenzial hat, die Bewegungsfreiheit und Flexibilität von College-Athleten vorübergehend zu erhöhen.” (Gamboa et al., 2019).

Heskiers 99 Methode

Wie bereits erwähnt, ist das Heskiers-Werkzeug ein speziell entwickeltes IASTM-Werkzeug für die myofasziale Massage und Behandlung von „issue in the tissue”, d.h. wie die oben genannten “Triggerpunkte” oder Adhäsionen.

Laut Martin Heskier, dem Erfinder sowohl des Heskiers-Werkzeugs als auch der entsprechenden Methode:

Die Multifunktionalität von Heskiers fördert den Fluss der interstitiellen Flüssigkeit, setzt Bindegewebe mithilfe der Kurven [des Gerätes] frei und dient als sehr präzise Druckmodalität, die eine mikro-myofasziale Lockerung ermöglicht.“ (Heskiers, 2020).

Die Heskiers 99-Methode ist einfach. Um es kurz zu machen: Nachdem man an Trigger- und/oder Akupressurpunkten gearbeitet hat, streicht man 99 Mal oder 99 Sekunden lang mit der „release curve“ des Werkzeugs über das gewünschte Areal. Schlicht und einfach!

In diesem Video sieht man eine Demonstration der 99-Sekunden-Methode von Heskiers in drei einfachen Schritten:

Jetzt haben Sie viele neue Informationen erhalten, aber ich schulde Ihnen immer noch eine Definition des Begriffs “Adhäsion”, falls Sie neu in der Weichteilgewebebehandlung sind.

Beginnen wir zunächst mit der Definition selbst. Der Begriff ad/häsion leitet sich vom lateinischen Präfix ad- = zu, für; und Lateinisch haerere = an etw. festhalten, stecken bleiben (Becher et al., 1995).

Eine ziemlich gute und kurze Erklärung der Haftung ist, dass sie:

(…) Sind faserige Bänder, die sich zwischen Geweben und Organen bilden, häufig infolge von Verletzungen während der Operation. Sie können als inneres Narbengewebe betrachtet werden, das Gewebe verbindet, die normalerweise nicht verbunden sind. “ (Wikipedia, 2020).

Aufgrund meiner Erfahrung und meines Fachwissens treten Adhäsionen auch aufgrund aller Arten von umfangreichem und übermäßigem Training auf, ebenso wie der Versuch des Körpers, den „Verschleiß“ von beschädigtem Gewebe zu reparieren.

Aber wie der Begriff Adhäsion zeigt, ist etwas „an etwas anderes gebunden“.

Wenn es um Verwachsungen geht, haben Sie jetzt festgestellt, dass etwas, das miteinander verflochten ist, weniger Bewegungsfreiheit bzw. Flexibilität hat, was zu Bewegungseinschränkungen, Muskelhemmungen und einem falschen „strukturellen Gleichgewicht“ führen kann.

Hier kommen IASTM-Tools wie die Heskiers ins Spiel! Mit diesem „cool tool“ können Sie Ihren Körper unterstützen, indem Sie Verwachsungen lösen, die Mobilität wiedererlangen und Verletzungen vorbeugen.

Sie müssen jedoch kein Experte für Weichteilbehandlung sein, um an sich selbst zu arbeiten.

Probieren Sie einfach die Heskiers-Methode aus! Sie können viele kostenlose Lehrvideos online, auf Heskiers.com oder auf deren YouTube-Kanal finden.

Fazit/Conclusio

Ok, jetzt haben wir uns ziemlich intensiv mit dem Thema Weichteilbehandlung befasst und sind relativ tief in die Materie eingedrungen. Das ist aber buchstäblich genau das, was man bei solchen Anwendungen macht, Gewebe bearbeiten, ohne es zu verletzen (also nicht invasiv)!

Meine Absicht mit diesem Artikel ist es, dem Leser, aus meiner Sicht, ein neues nützliches Werkzeug vorzustellen und ihm gleichzeitig Informationen darüber zu geben, wie dieses funktioniert.

Ein Sprichwort sagt: “Wenn Sie nur einen Hammer haben, sieht alles aus wie ein Nagel”.

Ich würde dem zustimmen, ABER man sollte auch wissen, wie man einen Hammer benutzt … UND Sie sollten lernen, dass es mehr Werkzeuge gibt, die Sie in Ihrem „Gesundheits-Werkzeugkasten“ bereithalten sollten.

Das ist beim Handwerken dasselbe wie bei der Weichteilbehandlung!

Zusammenfassend lässt sich sagen, dass es viele IASTM-Tools gibt, die wahrscheinlich alle funktionieren. Wenn Sie jedoch nach einer „all inclusive-Lösung“ suchen, würde ich empfehlen, in ein Heskiers-Tool zu investieren.

Wenn dir dieser Artikel gefallen hat, dann teile ihn mit deinen Freunden, abonniere den Blog/Newsletter und hinterlasse einen Kommentar.

© HP Bernd Stößlein MBA in Sportmanagement


In diesem und anderen Artikeln findest du den ein oder anderen „Affiliate Link“, zu amazon. Wenn du über diesen Link etwas erwirbst, dann unterstützt du damit meine Blogartikel und schaffst Ressourcen für weitere qualitativ hochwertige Recherchen und Artikel wie diesen. Es entstehen für dich dadurch keine Mehrkosten! Alle meine grundsätzlichen Empfehlungen findest du unter: https://www.amazon.de/shop/bernd_stoesslein


Literatur

Meet Your Interstitium, a Newfound Organ, Source: https://www.scientificamerican.com/article/meet-your-interstitium-a-newfound-organ/, access: 12.3.20.

Hydrate the Tissue, source: https://heskiers.com/, access: 12.3.20.

Heskiers for Practicioners, source: https://heskiers.com/pages/heskiers-method-for-practitioners, access: 12.3.20.

Adhesion (medicine), source: https://en.wikipedia.org/wiki/Adhesion_(medicine), access: 13.3.20.

Lateinisch-griechischer Wortschatz in der Medizin, S. 31.

Lateinisch-griechischer Wortschatz in der Medizin, S. 31.

Lateinisch-griechischer Wortschatz in der Medizin, S. 104.

Lateinisch-griechischer Wortschatz in der Medizin, S. 213.

Bert JL, Pearce RH (1984) The interstitium and microvascular exchange. In: Renkin EM, Michel CC (eds) Handbook of physiology, section 2: cardiovascular, vol IV: microcirculation. American Physiological Society, Bethesda MD, chapter 12, pp 521–547.

Wiig H; Swartz MA. Interstitial Fluid and Lymph Formation and Transport: Physiological Regulation and Roles in Inflammation and Cancer. Physiological Reviews 2012, 92 (3), 1005–1060 DOI: 10.1152/physrev.00037.2011.

Koumantakis, G. A.; Roussou, E.; Angoules, G. A.; Angoules, N. A.; Alexandropoulos, T.; Mavrokosta, G.; Nikolaou, P.; Karathanassi, F.; Papadopoulou, M. The Immediate Effect of Iastm Vs. Vibration Vs. Light Hand Massage on Knee Angle Repositioning Accuracy and Hamstrings Flexibility: A Pilot Study. Journal of Bodywork & Movement Therapies 2020 DOI: 10.1016/j.jbmt.2020.02.007.

Gulick, D. T. Instrument-Assisted Soft Tissue Mobilization Increases Myofascial Trigger Point Pain Threshold. Journal of Bodywork & Movement Therapies 2018, 22 (2), 341–345 DOI: 10.1016/j.jbmt.2017.10.012.

Alejandro J Gamboa; Derik R Craft; Jose A Matos; Tania S Flink; Rebecca L Mokris. Functional Movement Analysis Before and After Instrument-Assisted Soft Tissue Mobilization. International Journal of Exercise Science 2019, 12 (3).

Secrets of Russian Sports Fitness and Training (affiliate link) is a book by Michael Yessis Ph.D., that was first published in 1987. About 21 years later this treasure chest of former U.S.S.R. training techniques received an update with addendums of every chapter. Even 30 years after the cold war this book is still hot and drops some massive “knowledge bombs” on every reader! In order to be a good trainer you should stay up to date to recent research. To be a fantastic trainer, who wants to stay ahead of the game, you should also pause and reflect what was done in the past! There is barely anything new in strength training. Therefore I highly recommend you to read this timeless piece of knowledge that can still be implied into today’s training!

Of course it’s hard to narrow all the knowledge of over 300 pages down to only 3000+ words, so please bear that in mind. This article is intended to get you curious to everything you might additionally learn from Dr. Yessis’ book!

Secrets of Russian Sports Fitness and Training – From Russia with Strength

In 1987 it probably was “I spy with my little eye”, when it came to Russian training methods for elite lifters preparing for Olympia.

After the “iron curtain” (great pun) was torn down and almost everybody has access to the world wide web you might ask if there still are Russian “secrets” in terms of strength training…

Well, although you won’t get persuaded by the KGB anymore and besides the fact that there’s no “iron curtain” anymore there is still an “iron game” and as you know you should strike the iron while it’s hot. Let me tell you, even after over 30 years this treasure chest of strength training is still hot as hell!

Let’s reveal a few of the secrets you can find in this book by taking a look at the updated version of the book from 2008:

  • How you can benefit from Soviet Sports Techniques
  • The Role of Sports in the Soviet Union
  • Soviet Sports Research: What It Has Taught The Russians
  • The latest Training Innovations: how they can help you
  • Speed-Strength Training: A new Soviet Breakthrough
  • Maximizing your fitness potential: From Running to Water Sports
  • The Soviet science of Sports Psychology
  • Nutritional guidelines for improving Performance
  • Making the most of Soviet restorative measures
  • Drugs in the Soviet sports system
  • What’s on the horizon?
  • About the author

Over 300 pages of well proven tools and techniques the former Soviet Union used to produce myriads of the finest athletes in history.

The chapters in Dr. Yessis’ book are by no means fairytales form “Mother Russia”, nor are they only anecdotal!

First of all you will encounter lots of the famous Athletes/Coaches from the former USSR, i.e. Dr. Anatoly Bondarchuk , Yuri Verkhoshansky, or Vladimir Issurin, just to name a few.

I first heard about Bondarchuk during a seminar of my mentor Charles R. Poliquin (R.I.P.) who was also known as “Strength Sensei”. Charles told us about the “Bondarchuk Rule”.

According to that there are three types of athletes:

  1. The ones who best respond to volume
  2. Those who thrive on intensity
  3. The ones who benefit most from variation

How you can benefit from Soviet Sports Techniques

The first chapter of “Secrets of Russian Sports Fitness and Training” starts with the difference between American and USSR (now Russian) Athletes, respectively their attitude towards how to approach sportiness itself.

You will learn how Russians empathized the teaching of skills from an early age on but also – in contrast to many misbelieves – saw to it that their youngsters had especially fun, instead of a strict performance oriented approach towards sports!  

Dr. Yessis also writes about the difference between pure training for strength and the integration and importance of technique for young athletes. Whereas the Americans foremost tried to produce stronger and stronger athletes, the Russians focused on technique as well.

Chapter one also introduces two important training methods, when it comes to periodization: The Generals Physical Preparation (GPP) and the Specialized Physical Preparation (SPP).

You will learn why the Russians probably have one of he largest body of scientific research on the training of athletes in the world but why even to this day only a fraction is applied by trainers and coaches in the West.

The Role of Sports in the Soviet Union

I think the biggest takeaway of Chapter 2 is the explanation for the Russian Sports dominance (in comparison to the USA) as they developed a training approach called “Conjugate Training”(CT). Let me explain briefly for those who are not familiar with this training technique:

First of all “con/jugate” derives from Latin cum (con) = with, togetherand Latin iungere = to connect, bring together (Becher et al., 1995). So literally translated “conjugate” means “ with a connection” or “something that is brought together”.

According to that, Conjugate Training is the combination of special strength and explosiveness exercises for experienced trainees. CT mimics the movements performed during an actual competition and is also technique oriented as solely a strength maximizing technique.

Therefore special exercises are performed, most likely a “specific key joint action” (Yessis), that resembles the movement of the body during competition, with proper technique and adequate amount of speed (i.e. 0,15-0,20 seconds).

To get the most “bang for your buck” two reasonable exercise have to be combined (a strength exercise followed by an explosive exercise) and they have to:

 “(…) duplicate the same action seen in execution of the sports skill. It’s not simply the coupling of any two exercises; they must overlap in their effect” (Yessis, 2008).

A modern approach of CT is propagated by the famous powerlifter Lou Simmons and his “Westside Barbell”. According to them:

The Westside conjugate system is the best of two advanced training systems: the Soviet system, where several special exercises are used to advance the training of superior lifters and athletes, and the Bulgarian system, where near-max lifts are performed every workout. The Westside system is a combination of the two”. (Westide Barbell, 2020).

Soviet Sports Research: What It Has Taught The Russians

Chapter three and its addendum will give you an idea of Russian sports research. How this knowledge not only came from universities but also “out of the trenches”. A combination of two worlds.

Lots of lecturers at Soviet/Russian universities have always been former athletes, like Dr. Bondarchuk or Verkohansky! Lots of Bondarchuk’s work can be read in depth in his books, like “Transfer of Training” (affiliate link).

Again you find the principle of “conjugate training” but in another field. The Russians didn’t refuse (like lots of US universities did) to integrate knowledge from athletes. They integrated their feedback and combined it with “cutting edge” science from university research!

According to Dr. Yessis, American universities try to stick to old fashioned programs, just because it’s “in the book” instead of integrating practical knowledge from the field.

Moreover their research probands are most likely non athletes, which will make an impact on the results of studies. According to that, Yessis writes that:

In many cases, the research can be considered “research for the sake of research”, rather than research to learn something new and different or to resolve a particular problem”.

The newest Training Innovations: how they can help you

In a nutshell, Chapter 4’s biggest “secret” is the explanation of Russian Training from a systemically point of view. This Chapter deals with Periodization, GPP and SPP.

Of course I’m not revealing every detail from Secrets of Russian Sports Fitness and Training (Affiliate) but I’ll tell you that you will get an insight how the Russians use periodization and the integration of other sports to get better in their own particular sport.

For example: Dr. Yessis writes how a national volleyball team came to America to face their American opponents. In order to prepare for the game in the evening they spend the afternoon, playing soccer performing deep jumps, squats jumps lunges major hops etc.

This shows how the Russians thought “outside of the box”.

Anecdotal approach: You can apply the Russian’s approach, i.e. if you’re trying to get stronger in bench pressing. Stop bench pressing for a while and focus on your structural balance.

Concentrate on improving your overhead press, as this tends to lag behind. Your overhead press (Behind the neck) should be 66% of your flat bench press.

When it comes to Periodization the Russian split up their year in 4 periods:

  • General Preparatory Period
  • Specialized Preparatory Period
  • Competitive Period
  • Transitional Period

Each period had its own special exercises and different volume. For further details I highly recommend reading Dr. Yessis’ book!

Speed-Strength Training: A new Soviet Breakthrough

In 1987 when the first edition of the book was published “Speed-Strength Training” seemed to be some silly approach to US coaches, as they rather stuck to the a rigid mindset. According to Dr. Yessis’ book they thought that “ a lot strength helps a lot” and that “more strength will help the most”…

Meanwhile in Russia something different was figured out. The connection between Speed and Strength. In regard to that, getting stronger, means simultaneously slowing down as your body, respectively your central nervous system (CNS) learns slowness!

According to that Dr. Yessis writes: “Thus, there must be a cutoff point, after which the athlete moves from strength into explosiveness training” (Yessis, 2008). This leads us back to the already mentioned CT (see summary of Chapter 2).

It seems to be essential to build strength in the first place (as a solid foundation) but while progressing in “training age” you have to switch to, respectively integrate speed training as well!

This, again leads us back to Periodization (see summary of Chapter 4). R

Reading Secrets of Russian Sports Fitness and Training (affiliate link) shows you how to think in principles! You will get an in depth insight on how the Soviets/Russians applied their principles and how you can, too…as long as you start thinking in principles!

Maximizing your Fitness Potential: From Running to Water Sports

My biggest takeaway of Chapter 6 was the major difference between US and USSR-Athletes. Whereas the first seemed to “play their sport in order to get in shape” the latter “get in shape to play their sport” (Yessis, 2008).

Another fascinating thing that made me chuckle, was a paragraph in Chapter 6 about Track and Field. In this segment Dr. Yessis writes about how to improve in sprints, respectively in running.

He cites Dr. Mann who concluded that: “elite runners do not fully extend their legs (…) they run in a more upright position than their slower counterparts” (Yessis, 2008). I said it made me chuckle as I immediately thought of Tom Cruise, running in his movies.

You might think of Cruise what you want, but when it comes to death-defying stunts he probably is the greatest daredevil you might have seen on the big screen (except maybe for Evil Knievel).

Next time you watch a Tom Cruise movie pay close attention to biomechanics and his way of running! He ultimately applies what has been done by Soviet Track and Field athletes! Cruise stays almost perfectly perpendicular to the ground while running (instead of leaning forward)!

His arms are bent in a 90° angle and he’s doing rather short strokes! Therefore he doesn’t fully extend his legs while running but seems to rather keep them at an angle of approximately 165° to 170°.

Did Cruise read Dr. Yessis book? I don’t know, but I think Tom is a good example if you like to get an idea of what was done in Track and Field during the Cold War.

Maybe, that’s why Cruise aka “Etahan Hunt” works for the Impossible Mission Force (IMF) and you actually can see him running away from an explosion of the Kreml in Mission Impossible: Phantom Protocol. 😉

Funny marginalia: According to an article of Vanity Fair the success of a Tom Cruise movie is direct proportional to the amount of time he’s running in his movies! (Vanity Fair, 2018).

The Soviet Science of Sports Psychology

When it comes to sports is it really only physical performance that matters? Which role do your thoughts play? Does winning or losing start in your consciousness? Is it rather a mental game that you are playing against an opponent or against yourself?

These are questions that inevitable arise when it comes to sports performance, no matter if you’re a “weekend-warrior” or if you’re performing on a world class level!

In Chapter 7 you will get a glimpse of how the Soviets/Russians dealt with athletes’ pre game excitement, fear, anxiety, intimidation and other stressors that could arguably influence their performance on a competition day!

You will learn about auto-conditioning, meditation techniques and how it is possible to optimize breathing for concentration.

If you like to “aspirate” more about  proper breathing techniques for training, feel free to read my article The Oxygen Advantage®. I’m a certified Oxygen Advantage Instructor!

It is a special nasal breathing technique originally developed by a Russian medical Doctor named Buyteko, transferred into the world of physical training and performance enhancement by Irishman Patrick McKeown.

According to Sports Psychology you will also get to know that music may play a great influence on athletic performance and which was used by Eastern-bloc athletes i.e. to produce positive feelings and attitudes to enhance an athlete’s mood and wellbeing.

Nutritional Guidelines for Improving Performance

In Chapter 8 Dr. Yessis writes about nutritional protocols the Soviets used. The Chapter starts with the sentence: “You are what you eat” (Yessis, 1987). That’s one of the things in the book I disagree on. From my perspective you are NOT what you eat, but what you can ABSORB!

So, to get me right, I have nothing against the mentioned protocols and recommendations of the book but from my point of view, working as a Personal-Trainer/Strength Coach and “Heilpraktiker” (complementary and alternative medicine practitioner) I tell you that even the “best” food will do nothing for you if you’re not able to absorb and digest it properly!

Yessis writes that: “Carbohydrates are the basic source of energy that permits muscles to remain active. In fact, certain tissues such as nerves can obtain their energy only from carbohydrates” (Yessis, 1987).

I would like to add something to this statement as research clearly shows that there is no such thing as an essential carbohydrate! Even if you stick to a ketogenic diet, where your main source of energy derives from fats and protein the body has the ability to switch to “gluconeogenesis”. A state in which he converts ketones into sugar to fuel the brain!

In addition to that you will also find in Yessis’ book that Russians seemed to thrive on butter being one of the most easily assimilatable fats! That is still true today even that you have options like MCT-Oils (affiliate link) or native Coconut-Oils (affiliate link) available today which might be absorbed even faster.

A thing that really stuck out in Chapter 8 for me was that even decades ago the Russian recognized that “bulking phases” are merely a nonsense. Gaining weight, just to gain weight isn’t beneficial as you simply accumulate fat.

Excessive fat will “castrate” males, you are feminizing yourself. Testosterone levels will drop, Estrogen levels will rise and inflammation of tissue will rise. You will probably increase your risk for Diabetes Type II, Metabolic-Syndrome and so on.

Making the most of soviet restorative measures

Chapter 9 deals with a really important topic: regeneration. Still today one of the most neglected factors not only in elite athletes. No matter if you use a Soviet approach or the even older Traditional Chinese Medicine one.

For every YIN (energy) you spend you have to put back some YANG in your “energy bank”. Otherwise your output will be more than your input. You don’t need an MBA to understand that this won’t work for a long time!

So make sure you try whatever protocol will suit and benefit you. Whether it’s like the Russians did with massages, sauna, mud baths or what we would call “biohacking devices”. Every workout will either deplete your Central Nervous System or your Peripheral Nervous System.

Both need your attention because hard workouts need hard regeneration. One of the things you really should improve is your sleep! Just to get more “gas in your anti-stress tank”.

Drugs in the Soviet Sport System

Of course this topic has to be spoken about and it inevitably will arise if you think about Eastern-bloc athletes.

If you like to know more about what has been taken and what not, read Yessis’ book. To make a long story short:

Yes, of course they did use substances like anabolic steroids, just like every other athlete did and is still doing in probably every sport in the world.

From my point of view it’s just foolish to assume the opposite. To get me right I DO NOT encourage anybody to take performance enhancing drugs.

But on the one hand society dooms people taking i.e. steroids, on the other it is perfectly acceptable if women take the pill to prevent birth…the pill is a steroid too! If you get a cortisol injection by your medical doctor it is steroids, too…

Just because something is legal by law doesn’t mean it’s good for you either! Think of alcohol, caffeine, nicotine and lots of NSAIDs. All are legal but are they beneficial? Sure, the dosage makes the poison, but just think about it…

What’s on the Horizon

Chapter 11 of the 1987’s version dealt with “cutting edge technologies” the former Soviets had and were up to develop. Of course a lot of what seemed fancy then is our everyday life now.

Of course the Russians nowadays are still sometimes ahead (not only) of the metaphorical game! They are big in every research and at least are still dropping “knowledge bombs” on the world!

About the Author

The book closes with a short summary of Dr. Yessis’ career and an overview about other books he has written. Throughout the book you will also get referrals to blog articles, written by Dr. Y. on his website (doctoryessis.com).

Conclusion

Should you buy Dr. Yessis’ book? Well, I definitely encourage you to do so. No matter if you’re a coach/trainer or if you are just trying to improve your own performance you will definitely find some useful information in this book!

If you are looking for a “secret formula” that will help you to transform yourself from a lazy person into an elite athlete by simply reading this book, you will be disappointed!

But that’s not what a book like this tries to be. It’s more to give you an insight of what was done to realize that there is hardly anything new to resistance training today!

Furthermore, if you’re a coach and you try to stay ahead of others, I think it is always beneficial not to look only for new stuff but also to investigate and imply what was done in the past and what has worked out to be effective for a very long time!

If you liked this article please comment and share it with your friends! Subscribe to the blog and the newsletter!

© HP Bernd Stößlein, Master of Business Administration in Sportmanagement.


Literature

Lateinisch-griechischer Wortschatz in der Medizin, S. 106.

Conjugate Training, source: https://www.westside-barbell.com/blogs/february-2018/conjugate-system, access: 26.02.20.
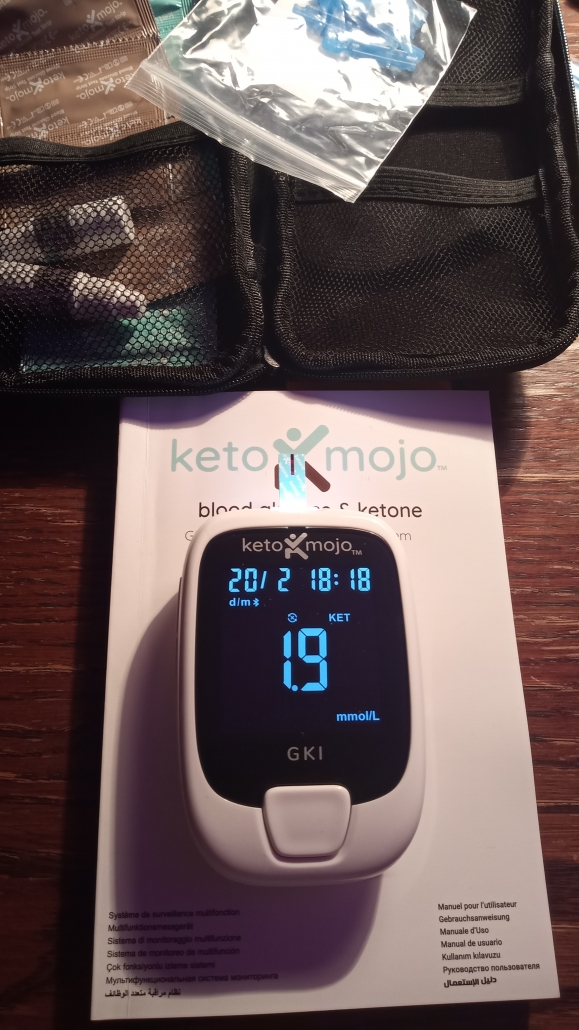
How good is a Tom Cruise Movie? That depends on how far he runs, source: https://www.vanityfair.com/hollywood/2018/07/tom-cruise-movie-running-ratings, access: 27.02.20.
Cover picture uneditedy by ArtTower on Pixabay.

Sigma iD Free – Eine Multisport-Uhr von der gleichnamigen Firma Sigma Sport. Mein neuer Begleiter, nicht nur beim Training. Diese Uhr folgt der gleichen Philosophie wie ich, sie ist ein professioneller Trainer und kein phrasendreschender Entertainer!

Hochwertige Komponenten, leichtes Design, bei gleichzeitig starkem und robustem Auftreten: Die Sigma iD Free ist ein auf seine Kernkompetenzen fokussierter Spezialist statt eines vorgetäuschten Alleskönners!

Wer auf der Suche nach einem ehrlichen Trainingspartner ist, der einem dabei helfen kann, die individuellen Grenzen zu überwinden und neue Bestleistungen zu erreichen, der ist mit der iD Free, aus meiner Sicht, gut beraten!

Ein extrem kontrastreiches schwarz/weiß-Display, unter kratzfestem Mineralglasdisplay, hochwertige Edelstahlknöpfe, eine intuitive Menüführung, das alles kann man sich mit einem bequemen Silikonarmband ans Handgelenk schnallen.

Optional auch ans Fahrrad, durch die mitgelieferte Halterung.

Auswertungen über Trainingsergebnisse können dann zusätzlich über die kostenlosen Softwaren Sigma Link App oder die Sigma Cloud analysiert werden.

Sigma iD Free – Freiheit beginnt im Kopf

Dieses „wearable“ von Sigma Sport trägt die Bezeichnung „iD Free“. Was soll uns das sagen?

Beginnt echte Freiheit nicht im Kopf? Wenn man sich nicht länger von seinem Verstand und seinen Gedanken beherrschen lässt, sondern zum Herrscher über die eigenen Gedanken wird?

Genau dort setzt die „iD Free“ meiner Meinung nach an. Sie ist kein Entertainer, der einen permanent mit Reizen überflutet und lediglich bespaßen will. Diese Multisport-Uhr ist genau das Gegenteil, sie ist ein qualifizierter Trainer!

Der Unterschied zwischen qualifiziertem Trainer und einem „Fitnessclown“, respektive Hofnarr oder eben Entertainer liegt auf der Hand oder sollte ich in diesem Fall lieber AN der Hand sagen?

Wer auf der Suche nach einer sogenannten „Smart Watch“ ist, der ist mit der Sigma iD Free sicher falsch beraten.

Wer allerdings einen echten Trainer/Trainingspartner sucht, der einen dabei unterstützt, die eigenen Ziele zu erreichen, der tätigt ein echtes Investment in sich selbst!

Der Unterschied zwischen Trainer und Entertainer ist essentiell wichtig! Denn in unserer heutigen „fabulösen Fitness-Welt“, darf sich nun mal ein jeder „Trainer“ nennen. Ob er nun wirklichen Mehrwert liefert oder ob er eine Gefahr für Leib und Leben darstellt.

Deswegen betone ich auch so drastisch, dass all diejenigen, die einen Entertainer suchen, mit der Sigma iD Free eben nicht glücklich werden. Denn auch bei „Fitness-Uhren“ gestaltet sich dieses Problem, aus meiner Sicht, äquivalent zu menschlichen Trainern.

Leider werden die Entertainer, respektive „Fitness-Clowns“, wie ich sie gerne nenne, aber heutzutage mehr „gehyped“ als diejenigen, die ehrlich sind und fachlich qualifizierten Mehrwert für Ihre Klienten bieten.

Sicher liegt das auch zum Großteil an unserer „Geiz ist Geil-Gesellschaft“, in der die Menschen gewohnt sind, tagtäglich belogen und betrogen zu werden. In Zeiten von Social Media ist es eben einfach „Vorher-Nachher-Bilder“ zu betrachten, die allzu oft durch die ein oder andere Bildbearbeitungssoftware aufgehübscht wurden und dann zu erwarten, dass sich Erfolge quasi über Nacht einstellen.

Doch Erfolg kommt nun mal von erfolgen und wer nicht bereit ist, hart dafür zu arbeiten/trainieren, der wird auch nur mangelhafte Resultate erreichen.

Fitnessuhren reihen sich nahtlos in diesen traurigen Trend ein. Viele von ihnen haben gefühlte 10.000 Funktionen, von denen 9,9990 aber mehr „nice to have“ als nützlich sind.

Im Englischen gibt es den Spruch: “What gets measured, gets manageable”. Zu Deutsch: „Was man messen kann, kann man managen“.

Wer also nur seine vermeintliche „Fitness“ misst (oder „trackt“, wie es Neudeutsch ja jetzt heißt), dann aber nichts damit anfängt, der hat nicht wirklich etwas gewonnen.

Das sogenannte „tracking“ sollte nicht zu einem Selbstzweck verkommen, sondern einem Trainierenden sinnvolle Trainingsparameter liefern, aus denen er einen Nutzen ziehen kann.

Lange Rede, und tatsächlich auch langer Sinn: Denn wer ernsthaft Sport betreibt, der ist auch an ernsthaften Resultaten interessiert. Egal ob ambitionierter Hobbyathlet oder Leistungs- bzw. Profisportler.

Wer ernsthaft Sport betreibt, der strebt nach Effizienz und nicht nach Effektivität!  Worin besteht hier der Unterschied? Lassen Sie mich es kurz an einem Beispiel erläutern:

Effektivität bedeutet, die „richtigen“ Schritte für ein anvisiertes Ziel einzuleiten. Wer z.B. übergewichtig ist und bereits das Bewusstsein erlangt hat, dass dies seiner Gesundheit nicht zuträglich ist und dann die Entscheidung unternimmt, etwas dagegen zu tun (indem er sich beispielswiese in einem Fitnessstudio anmeldet), der ist effektiv.

Wenn er dann fünf Mal in der Woche ins Fitnessstudio geht, bleibt er aber lediglich effektiv. Denn nur, weil er ins Fitnessstudio geht, bedeutet dies nicht, dass er dort auch trainiert. Er könnte ja z.B. auch nur an der Theke rumsitzen, um dort Kaffee oder Alkohol zu trinken!

Wer ins Fitnessstudio geht und dort aber auch trainiert, der wandelt Effektivität in Effizienz. Denn er leitet nicht nur die „richtigen“ Schritte ein, sondern unternimmt auch die „richtigen“ Dinge für seine anvisierten Ziele.

Ich stelle „richtig“ bewusst in Anführungszeichen, weil es dabei wieder stark darauf ankommt, ob man eben an einen „Fitness-Clown“ (Entertainer) oder einen wirklich qualifizierten Trainer gerät!

Was kann die Sigma iD Free ?

Welche Funktionen kann man in eine Sport-Uhr packen? Nun, heutzutage wohl so ziemlich alles mögliche, und genau das ist eben das Problem! Das Training verkommt aus meiner Sicht bei all zu vielen mehr zu Spiel und Spaß.

Natürlich ist Spaß eine elementare Komponente im Training. Denn auf Dauer wird man wohl nichts lange durchhalten, das einem keinen Spaß macht!

Aber muss man wirklich Nachrichten schreiben, während man trainiert? Muss man ständig an seinem Handy /Smartphone oder auf seiner Smartwatch herumtippen? Nein, sollte man nicht! Denn der Fokus sollte klar und deutlich auf dem Training liegen.

In Zeiten von permanenter Reizüberflutung ist die Sigma iD Free, aus meiner Sicht, ein erfrischender Purist. Zwar ist sie natürlich eine Sport-Uhr, beschränkt sich aber auf das Wesentliche.

Die Sigma iD Free sitzt! Auch bei ballistischen Übungen!

So wartet sie zwar nicht mit einem pompösen Farbdisplay auf, weiß dafür aber durch ein extrem kontrastreiches Schwarz/Weiß-Display zu begeistern! Schwarz und Weiß, Hell und Dunkel, „black and white“, eben „back to basics“. Weniger ist eben doch manchmal mehr!

Was nutzt mir ein farbenfrohes Farbdisplay, das einem Kaleidoskop gleich kommt, wenn ich in der Hitze des Gefechts, in der Sonne z.B., meine Vitalparameter nicht ablesen kann?! Richtig, nicht viel.

Nur damit mich der geneigte Leser auch nachvollziehen kann, was ich meine. Die Sigma iD Free ist mitnichten „Schwach auf der Brust“ !

Zu den klaren Stärken der Uhr zählen aus meiner Sicht diese 7 Sachen:

  • Multisport-Uhr mit diversen vorinstallierten Programmen z.B. Laufen, Radfahren, Schwimmen,  Wandern und Skifahren
  • Super simple und intuitive Bedienung
  • Stabiles Auftreten/Design
  • Leichtigkeit durch extrem geringes Gewicht
  • Navigationsmöglichkeit
  • Spiele (z.B. Geocaching!)
  • Smart Light

Multisport Uhr

Der Name der Uhr ist iD Free. Deshalb ist die Uhr wohl konzipiert worden, um dich auf Deinen (sportlichen) Abenteuern zu begleiten und Dir nützliche Infos zu liefern.

Trotz des Freiraums, den einem diese super- leichte Multisport Uhr  liefert, wird sie mit sechs vorinstallierten Programmen geliefert.

Dazu zählen Laufen, Radfahren,  Schwimmen, Wandern  und das Skifahren. Es gibt aber auch ein Programm für die Leibesertüchtigung bzw. den Kraftsport. Die Uhr ist also sowohl für Aktivitäten drinnen, wie draußen geeignet.

Wer lieber „Outdoor-Aktivitäten“ zu seinen Freizeitaktivitäten zählt, der wird sich bei der Sigma iD Free sicher über den integrierten Höhenmesser, den abrufbaren Wettertrend und den Kompass freuen!

Wer seine Vitalparameter während des Muskelaufbau- und Krafttrainings überwachen will, der kann dies am Armband oder natürlich auch optional mittels Brustgurt messen.

Auf beim Krafttraining ist die SIGMA iD Free ein starker Trainingspartner!

Simple und intuitive Bedienung

Wie bereits erwähnt finde ich die iD Free erfrischend puristisch. Statt planlosem „Alleskönner“ beschränkt sich dieses Modell von Sigma auf seine Kernkompetenzen. Dazu gehört insbesondere eine, nach meinem Empfinden, sehr einfache und intuitive Bedienung.

Man stelle sich auch hier wieder vor, man ginge in ein Restaurant auf dessen Speisekarte man 100 Gerichte findet. Wie hoch ist die Wahrscheinlichkeit, dass alle diese 100 Gericht vortrefflich schmecken? Wohl eher gering!

Äquivalent steht es mit der Sigma. Sie kann bei weitem nicht alles, aber das was sie kann, kann sie dafür richtig gut!

Bedient wird das Leichtgewicht über vier Knöpfe, optional kann man optische Hinweise aktivieren und sich durch ein sogenanntes „Smart Light“  visuelle Infos geben lassen.

Natürlich nur, wenn man das möchte. So ziemlich alle Funktionen lassen sich durchaus auch deaktivieren.

So lässt sich die ohnehin bewundernswerte Akkulaufzeit deutlich verlängern!

Stabiles Auftreten/Design & Leichtigkeit

Wie bereits erwähnt, ist die Sigma iD Free ein echtes Leichtgewicht. Das ist, aus meiner Sicht, ein ganz klarer Vorteil, wenn es um das Tragen einer Uhr während des Sports geht. Nichts ist nerviger als eine schwere „Handfessel“

Trotzdem ist sie super robust und scheut auch nicht den Einsatz im Freien! Also keine „Schickimicki“ Uhr, sondern „hard“ und „core“. Denn die Uhr lässt sich über hochwertige Edelstahltasten bedienen und die Daten werden von einem Mineralglas-Display abgelesen!

Selbstverständlich kann man die Uhr aber auch als „Ausgeh-Uhr“ tragen. Sie ist leicht, robust und schlicht im Design.

Also ein echtes Triumvirat! Optional lässt sich das Armband der iD Free auch super- schnell wechseln, falls man die sportliche Note des bequemen Silikonarmbands gegen ein eleganteres Band tauschen möchte.

Feder am Handgelenk, statt Klotz am Bein, die SIGMA iD Free.

Navigationsmöglichkeit (Track Navigation)

Wer viel draußen unterwegs ist und z.B. Radtouren fährt, der hat die Möglichkeit, sich von der Sigma navigieren zu lassen. Entweder am Handgelenk oder am Fahrradlenker (die Befestigung ist im Lieferumfang enthalten).

Für die Navigation wird natürlich eine App benötigt (komoot-App). Diese kann kostenlos heruntergeladen werden. Zusätzlich können über die App weitere Daten gespeichert und analysiert werden.

Optional kann das Smartphone dann auch in der Tasche, dem Trikot oder dem Rucksack bleiben. Die Sigma weist einem dann den Weg!

Spiele – Moderne Schnitzeljagd!

Weil heutzutage Anglizismen beliebt sind, hat die gute alte „Schnitzeljagd“ wohl ausgedient. Deswegen heißt es nun „Geocaching“. Gehupft wie gesprungen, die Sigma bietet einem vier „Exergames“, darunter eben auch das sogenannte „Geocaching“.

Die iD-Free ist sicher vieles, aber kein langweiliger Stubenhocker!

Neben der modernen Schnitzeljagd bietet einem die iD Free  noch den Activity Sprint, den HR-Slalom und das sogenannte Speed Recovery als weitere Spiel und Spaß Möglichkeiten.

Was im Poker das „All-In“ ist, das ist bei der iD Free der „Activity Sprint“ Hier kann man bis zu 5 Minuten Zeit festlegen, in der man Punkte gemäß Bewegung erhält. Hier gilt, viel hilft viel und mehr ist am besten 😉 Das Spiel ist an die individuelle Herzfrequenz gekoppelt.

Wer auf Intervalltraining steht, der wird am „HR-Slalom“ seine Freude haben. Auch dieses Spiel arbeitet mit der individuellen Herzfrequenz (Hf) und gibt dann weitere Hf-Frequenzen vor, die es zu erreichen gilt. Natürlich kann man auch hierbei Punkte sammeln.

Work Hard, Play Hard – die Speed Recovery. Man ist nur so gut im Training wie man sich von diesem Stressor/Reiz auch wieder zu erholen weiß. Mit dem „Speed Recovery-Spiel“ kann man diese Fähigkeit auf spielerische Art und Weise trainieren.

Hier geht es um die Fähigkeit seine Hf so schnell wie möglich um 50% zu senken! Auch dieses Spiel arbeitet mit einem Punktesystem.

Smart Light

Was ist ein Smart Light? Ein cleveres Licht? Könnte man so sagen. Klingt auch besser 😉 Was macht dieses Licht? Nun, es dient dazu, einen mit visuellen Reizen (unterschiedliche Farben) auf bestimmte Ereignisse hinzuweisen.


So „benachrichtigt“ einen Das SmartLight z.B. darüber, wann man während einer Tour abbiegen muss oder zeigt an, wenn sogenannte „Smart Notifications“ auftauchen oder du dich z.B. in deiner Zielzone befindest.

Die iD-Free ist also clever & smart 😉

Sicherheit geht vor! – Der Crash Alert

Eine wirklich tolle Funktion, die mehr als nur „nice to have ist“, stellt der sogenannte „Crash Alert“ dar.

Wer also eher adrenalingeladenen Hobbies, wie etwa dem Vulkanrodeln, Downhill-Biken oder dem Klettern frönt, der hat die Möglichkeit, nach einem Sturz nach 30 Sekunden ohne Reaktion, seine Notfallkontakte per SMS alarmieren zu lassen.

Dabei werden gespeicherte Medikationen sowie der aktuelle Standort gleich mit übermittelt. Eine feine Sache!

Sigma Link , „Für ne App und ’n Ei“?

Wer ein Fan fundierter Analysen ist, der kann all seine Daten auch mittels der Sigma Link App (kostenlos) dokumentieren und arrangieren. Übertragen wird ganz einfach und unkompliziert mittels Bluetooth. Noch genauer kann man dann seine Daten im sogenannten „Data Center“ analysieren.

Des Weiteren wird einem eine „Sigma Cloud“ (ebenfalls kostenfrei) zur Nutzung angeboten, welche einen direkten Datentransfer zu Sportportalen ermöglicht. Eine Synchronisierung zwischen Sigma Link App und Data Center ist ebenfalls möglich!

Sowohl die Sigma Link App als auch die Sigma Cloud können kostenfrei genutzt werden! Beides gibt es also noch günstiger als für „n’Appel und ’n Ei“ oder, passender: „Für ne App und ’n Ei“ 😉

Fokus aufs Wesentliche, statt “Clown” am Handgelenk!

Fazit/Conclusio

Wie kann ich meinen Erfahrungsbericht mit der Sigma iD Free am besten beschreiben? Nun, ich probiere es mal mit Folgendem:

Super Tragekomfort dank leichtem Gewicht und angenehmen Silikonband-Material.

Immer alles im Griff, dank hochwertiger Edelstahlknöpfe und Mineralglasdisplay.

Gut durchdachtes, schlichtes und zeitlos klassisches Design. Für alle Anlässe geeignet.

Mit allen erdenklichen Funktionen ausgestattet, dennoch aufs Wesentliche beschränkt!

Allseits bereit, ob Indoor oder Outdoor, es bleiben keine Wünsche offen.

Intelligente und intuitive Menüführung durch leichte Bedienbarkeit.

Datentransfer und -auswertung mittels kostenloser App und Cloud.

Freude an zahlreichen Spielen, wie der modernen Version der Schnitzeljagd (Geocaching).

Robustes Gehäuse, das trotz seines geringen Gewichts einiges wegstecken kann.

Einsatzgebiete, die alle ansprechen. Vom Hobbysportler bis zum Profiathleten!

Ein echter Trainingspartner und kein Entertainer!

SIGMA iD Free, Hilfe statt Hindernis!

Eine Kurzversion meines Artikel findest du auch auf dem Blog von SIGMA Sport.

Wenn dir dieser Artikel gefallen hat, dann teile ihn mit deinen Freunden, abonniere den kostenlosen Blog & Newsletter und hinterlasse einen Kommentar!

© HP Bernd Stößlein, Master of Business Administration in Sportmanagement.


In diesem und anderen Artikeln findest du den ein oder anderen „Affiliate Link“, zu Amazon. Wenn du über diesen Link etwas erwirbst, dann unterstützt du damit meine Blogartikel und schaffst Ressourcen für weitere qualitativ hochwertige Recherchen und Artikel wie diesen. Es entstehen für dich dadurch keine Mehrkosten! Alle meine grundsätzlichen Empfehlungen findest du unter: https://www.amazon.de/shop/bernd_stoesslein

KetoMojo™️ (affiliate link) ist ein Kombigerät, das mittels Blutanalyse sowohl den Blutzuckerspiegel (BZS) als auch den Grad der Ketose messen kann. Im Gegensatz zu Urinteststreifen oder Geräten zur Atem-Ketonmessung, aus meiner Sicht, die exakteste Messmethode. In diesem Artikel gehe ich auf die genannten unterschiedlichen Messmethoden ein und erkläre, worum es sich beim Begriff der Ketose überhaupt handelt. Des Weiteren grenze ich diese von der Ketoazidose ab, berichte über die sagenumwobene„ Keto Grippe“ und andere Begrifflichkeiten, die oftmals im Raum stehen und für Verwirrung sorgen. Ich beleuchte unterschiedliche Formen der ketogenen Ernährung, wie die „Anabole-Diät“, die „Atkins-Diät“, Dan Duchains „Underground Bodyopus“ oder auch eine vegetarische/vegane Form der ketogenen Ernährung. Hinweise über interessante Bücher zu den genannten  Versionen runden diesen Erfahrungsbericht ab.

➡ Über meinen affiliate link 👀 erhältst du exklusiv 15% Rabatt auf den Erwerb eines KetoMojo™️ Gerätes!  

Was sind Ketose und Gluconeogenese?

Wer sich mit dem Thema der Ketose befassen will, der sollte wissen, dass eine Änderung seiner Makronährstoffzusammensetzung (Kohlenhydrate, Fett, Proteine) sich zweifellos auf die Trainingsleistung auswirken kann (Rodriquez et al., 2009).

Bevor man sich damit beschäftigen kann, WIE man den Grad von Ketose misst, müssen wir uns zuvor erst einmal, in aller Kürze ansehen, WAS Ketose überhaupt ist.

Die allermeisten Menschen beschränken sich weitgehend auf die Einnahme und Verbrennung von Kohlenhydraten, weil sie der Meinung sind, dass diese zwangsläufig benötigt werden, um den Körper mit ausreichend Energie auszustatten. Doch ist das wirklich so?

Bei energetischen Stresszuständen, wie beispielsweise dem Hungern, erschöpfender Bewegung (z.B. Training) oder während einer kohlenhydratarmen Ernährung, stellt der Körper die Ketonkörper Acetoacetat (AcAc) und d-β-Hydroxybutyrat (d-βHB) als sogenannte metabolische Substrate bereit (Robinson und Williamson, 1980).  

Diese von Lipiden (Fetten) abgeleiteten Moleküle werden in großen Mengen von der Leber synthetisiert (Fukao et al., 2004).  

Übrigens, Ketone bieten eine alternative oxidierbare Kohlenstoffquelle zu Glukose (Kohlenhydrate = Zucker) für das Gehirn (Engl, 1970). Das ist nämlich immer einer der Einwände gegen eine ketogenen Ernährung von, aus meiner Sicht, Unwissenden.

Diese „keyboard heros“ behaupten, dass das Gehirn unbedingt Zucker als Energie benötigen würde. Das stimmt tatsächlich, aber der Körper ist durchaus in der Lage aus Ketonkörpern (also aus Fetten) Zucker herzustellen! Dieser Prozess nennt sich Gluconeogenese!

Gluco/neo/genese setzt sich zusammen aus Griechisch glyksy bzw. gluc(o)- = Traubenzucker enthaltend, Kohlenhydrat als Zucker und Stärke enthaltend, süß; Griechisch neos = neu, jung, frisch;und der griechischen Nachsilbe -gen = …hervorbringend, …erzeugend (Becher et al., 1995).

Gluconeogenese bedeutet also so viel wie: „neue Zuckererschaffung“. Im Fall der Ketose wird also Glucose (Zucker) bzw. Energie aus Fett gewonnen. Der Körper besitzt übrigens aber auch die Fähigkeit aus Proteinen Gluconeogenese zu betreiben!

Im Zustand der Ketose, ganz einfach in einem Satz erklärt, nutzt der Körper also vorrangig Fett als Energie.

Welche Formen der ketogenen Diät gibt es?

Ketogene Diäten zeichnen sich grundsätzlich dadurch aus, dass deutlich weniger Kohlenhydrate (normalerweise auf <50 g/Tag) und wesentlich mehr Fettanteile konsumiert werden. I

Insbesonders relaltiv hohe Fettanteile spielen bei ketogenen Ernährungsformen eine zentrale Rolle!

Anmerkung: Das Wort Diät bedeutet in diesem Zusammenhang KEINE Kalorienrestriktion, also KEIN Hungern, sondern bezieht sich auf die ursprüngliche Bedeutung des Wortes! Diät stammt von dem Griechischen diaita = Lebensart, Lebensweise (Becher et al., 1995).

Es existieren unterschiedliche Arten von ketogenen Diäten, die sich grob in die 4 folgende Formen unterteilen lassen:

  • Herkömmliche (Standard) ketogene Diät: Eine permanent sehr fetthaltige Ernährungsweise, deren Makronährstoffe sich in der Regel auf einen 70-80%igen Fettkonsum stützen, der entsprechend um 15-20% Protein ergänzt wird. Die restlichen 5-10% der Kalorien stammen dann aus Kohlenhydraten.
  • Periodische ketogene Diät: Diese Diät beinhaltet Perioden mit gesteigerter Aufnahme von Kohlenhydraten zwischen den ketogenen Diätzyklen, beispielsweise fünf ketogene Tage, gefolgt von zwei Tagen mit hohem Kohlenhydratgehalt als Zyklus.
  • Targeted ketogenic diet: (Auf Deutsch: „gezielt ketogene Diät“). Diese Form propagiert das Hinzufügen zusätzlicher Kohlenhydrate während der Perioden eines intensiven körperlichen Trainings.
  • Proteinreiche ketogene Diät: die sogenannte „High-protein ketogenic diet“ enthält mehr Eiweiß und „nur“ einen Anteil von etwa 60 Prozent Fett, 35 Prozent Eiweiß und fünf Prozent Kohlenhydrate (Shilpa und Mohan, 2018).

Welche Arten der ketogenen Diät existieren

Neben den unterschiedlichen Formen der ketogenen Ernährung existieren weitere Durchführungsmöglichkeiten bzw. Arten. Hierzu gehören z.B.:

  • Die „Fleischfresser“ Version. Dabei handelt es sich um die klassische Form, bei der auch tierische Produkte konsumiert werden.
  • Die vegetarische Version. Diese ist selbsterklärend, da sie praktisch identisch ist zu der „Fleischfresser“ Version, außer, dass sich eben vegetarisch ernährt wird.
  • Die vegane Version. Ebenfalls selbsterklärend, nur eben vegan.
  • Die „anabole Diät“. Spezielle Art der klassischen „Fleischfresser“ Version, für Bodybuilder.
  • Die „Atkins-Diät“. Eine der ursprünglichsten Versionen der ketogenen Ernährung.
  • Die „Underground Bodyopus“ Version. Eine extreme Version der periodischen bzw. zyklischen ketogenen Diät.

Aus Kapazitätsgründen kann/will ich in diesem Artikel nicht auf alle Details jeder dieser Versionen eingehen. In diesem Artikel soll es um die Art und Weise der Ketose-Messung gehen.

Aufgrund dessen gebe ich dem geneigten Leser an dieser Stelle meine Buchempfehlungen zu den einzelnen Formen, zum Eigenstudium. Alle aufgelisteten sechs Bücher sind affiliate links zu Amazon:

Was sind EXOGENE Ketone?

In den letzten Jahren gibt es (mal wieder) einen Hype um sogenannte exogene Ketone (affiliate link). Eine Alternative zur ketogenen Ernährung, bei der Getränke, die sogenannte exogene diätetische Ketone enthalten, wie z.B. Ketonester  und Ketonsalze konsumiert werden. (Stubbs et al., 2017).

Das Wort exo/gen setzt sich zusammen aus der griechisch Vorsilbe exo = außen, außerhalb und der griechischen Nachsilbe -gen = …hervorbringend, …erzeugend (Becher et al., 1995).

Bei exogenen Ketonen handelt es sich also um „von außen erzeugte“ Ketone und nicht vom Körper eigenständig „hergestellte“.

Der Hype um exogene Ketone ist, wie so vieles, aber übrigens nicht neu, meine Recherchen hierzu führen zurück bis mindestens auf das Jahr 1988, im Journal: Clinicla Nutrition („The Use of Exogenous Ketones to Improve Protein-Sparing during Experimental Starvation“).

Wie kann man Ketose messen?

Nun kommen wir zur spannenden Frage, wie man denn nun objektiv messen kann, ob man sich in Ketose befindet oder nicht. Im Folgenden zähle ich die, aus meiner Sicht, exaktesten Methoden auf, in absteigender Reihenfolge (beginnend mit der besten)!

  1. Blutanalyse
  2. Atemanalyse
  3. Urinanalyse

Schauen wir uns die unterschiedlichen Messmethoden nun im Detail genauer an.

Messung des Grades der Ketose mittels Blutanalyse (KetoMojo™️)

Der alte italienische Spruch „il sangue non mente“ (Blut lügt nicht) trifft wohl auch bei der Messung des Grades an Ketose zu. Heutzutage ist dafür aber keineswegs mehr zwangsläufig ein Gang zum Arzt notwendig.

Mit speziellen Kombigeräten, wie dem KetoMojo™️ (affiliate link) kann man bequem und einfach von zuhause oder unterwegs aus sowohl seinen BZS als auch seine Ketose-Werte messen. Mittels einer App kann man sich diese Daten dann per Bluetooth auch einfach aufs Smartphone übertragen und auswerten.

Die Überprüfung von Ketose-Werten ist aus meiner Sicht aus zweierlei Gründen sinnvoll. Zum einen sieht man, OB bzw. WIE „tief“ man sich in Ketose befindet und zum anderen kann man präzise und selektiv testen, welche Lebensmittel einen ggf. aus der Ketose „katapultieren“.

Die Anwendung eines Messgerätes, wie den KetoMojo™️ (affiliate link), ist denkbar einfach. Das Gerät wird mit allem geliefert, was man braucht. Einem sogenannten „Injektionsstift“ (wobei hier nichts injiziert wird, sondern man sich damit nur in die Fingerbeere sticht!), Lanzetten, und unterschiedliche Teststreifen (sowohl für die Messung des BZS als auch für Ketone).

Die Durchführung ist auch sehr simpel. Man nutzt eine Einmal-Lanzette im „Injektionsstift“, stellt diesen auf die Empfindlichkeit der Haut ein, zieht ihn auf und sticht (pikst) sich damit in eine Fingerbeere.

In diesem Bild fehlt die Abdeckkappe des “Injektionsstiftes”, damit man die feine Nadel sehen kann!

Das Gerät wird mit dem gewünschten Teststreifen bestückt und nach dem Piks in die Fingerbeere „saugt“ man mit dem im Testgerät befindlichen Teststreifen sofort einen klitzekleinen Blutstropfen auf.

Danach zählt das Gerät (im Falle der Keton-Analyse) von 9 herunter und zeigt dann das Ergebnis an. Der Teststreifen kann anschließend per Knopfdruck auf der Rückseite des Gerätes einfach ausgeworfen  werden und muss nicht nochmal berührt werden.

Die mitgelieferten Einmallanzetten haben einen abtrennbaren Kopf, der ihre Spitze freilegt. Nach dem Gebrauch kann mit der Nadel auf das Köpfchen gepikst werden, um die Nadel sicher entsorgen zu können. So wird eine Infektion anderer vorgebeugt!

Nach Durchführung der Messung können das Messgerät und der Inketionsstift wieder sicher im mitgelieferten Etui für einen Transport untergebracht werden.

Größter Vorteil dieser Messung ist die Genauigkeit. Mittels Blutanalyse hat man objektive Werte! Eventueller „Nachteil“ ist die Anwendung mit Nadel, vor der einige zurückschrecken könnten.

Aus meiner Sicht ein unbegründeter Einwand, da der Piks in die Fingerbeere wirklich nicht besonders schmerzhaft ist.

Neben den beschriebenen Eigenschaften, besitzt das KetoMojo™️ (affiliate link) Gerät auch weitere Funktionen, wie individuell einprogrammierbare Warnwerte, etwa bei Hypoglykämie (Unterzucker) oder andere Alarmfunktionen.

Des Weiteren kann das Gerät mit der KetoMojo™️-App (affiliate link) gekoppelt werden, um alle Werte etwa für eine Langzeitanalyse zu sammeln.

Woran sehe ich, dass ich in Ketose bin?

Bei der Einordnung der Ketonspiegel geben Dr. Stephen Phinney, MD, PhD, und Jeff Volek, PhD, RD. in Ihrem Buch „Low Carbohydrate Living“ (affilaite link) folgende Werte (in mmol/l) als Berechnungsgrundlage an:

0,5-1 leichte „nutritional“ Ketose

1-1,5 moderate ketogene Zone

1,5-2 optimale Zone zur Körperfettverbrennung

2-3 sog. „post exercise zone“. Beginn der „Optimal Therapeutical Zone“ (3-5mmol/l)

5-8 „fasting ketosis“

8-10 ab 9mmol/l Gefahr einer Ketoazidose (wird normalerweise aber nie durch eine ketogene Ernährung erreicht, sondern basiert auf pathologischen Ursachen!)

Ab 0,5 mmol/l beginnt laut Phinney und Volek der Zustand der Ketose. Die Maßeinheit ist Millimol pro Liter (l). Ein  „Mol“ ist ein Maß für die Menge, die auf der Anzahl der Moleküle und nicht auf deren Gewicht basiert, es wird als Maß für eine Lösung genutzt z. B. auch Glukosemenge (Zucker) im Blut.

Wenn es um Ketose geht, sind (Blut)Tests wohl der einzige „todsichere“ Weg, um festzustellen, ob man sich wirklich in Ketose befindet und wie „tief“, denn Blutuntersuchungen sind viel genauer als Urin- oder Atemtests.

Weitere, aber keineswegs objektive und stichhaltige Anzeichen für den „Eintritt“ in die Ketose können die Folgenden sein:

  • Metallischer Geschmack im Mund (aufgrund der Produktion von Ketonkörpern)
  • Weniger Heißhunger und „Fressattacken“
  • Mundgeruch (nach Aceton)
  • Subjektive Steigerung der Energie (physisch & psychisch)
  • Subjektive Steigerung der Konzentrationsfähigkeit

Die Keto Grippe – Keto Flu

Etwas, das man häufig von Anwendern einer ketogenen Ernährungsweise hört, ist ein Phänomen, welches als sogenannte „Keto-Grippe“ oder Englisch als „keto-flu“ bezeichnet wird.

In den ersten Tagen und Wochen auf dem Weg in die  Ketose kann es vorkommen, dass man sich, wohl aufgrund der Umstellung, zunächst etwas „komisch“ fühlt.

Viele Menschen berichten über die „Keto Grippe“ wie eine Art „Entzug“. Dies klingt für mich logisch, da Kohlenhydrate (bzw. Zucker) eine nicht zu unterschätzende, potenziell süchtig machende Wirkung haben können!

Wie bei jeder Umstellung können Symptome auftreten, weil man sich aus seiner bestehenden Komfortzone herausbewegt und etwas Neues probiert.

Aus der Zusammenarbeit mit Klienten und Heilpraktiker-Patienten habe ich z.B. die folgenden Symptome schon häufig gehört (kein Anspruch auf Gewähr und Vollständigkeit!):

  • Verstopfung
  • Durchfall
  • Schwindel
  • Heißhunger auf Zucker/Kohlenhydraten/Süßem
  • Muskelkrämpfe
  • Schläfrigkeit
  • Benommenheit
  • „Brain fog“

Natürlich sind diese Symptome NICHT obligatorisch. Sie treten also NICHT immer und NICHT bei jedem auf und wenn, dann auch NICHT zwangsläufig alle zusammen und NICHT in gleicher Art und Weise!

In der Regel halten sie, auch nicht sehr lange an. Andernfalls sollte der Gesundheitszustand von einem Arzt oder Heilpraktiker fachmännisch beurteilt werden und ggf. Interventionen eingeleitet werden.

Keton-Messungen über Atemanalyse

Wem das Pisen in die Fingerbeeren nicht behagt, dem bieten sich grundsätzlich zwei weitere Optionen. Zum einen die Messung über den Atem und das Messen über den Urin mithilfe von speziellen „Ketostix®“ (affiliate link)

Wer zum Messen seiner Ketonwerte nicht immer erst warten möchte, bis er einen Harndrang spürt, der findet bei amazon unter dem Begriff „Keton Meter“ (affiliate link) eine Fülle von unterschiedlichen Messgeräten in allen Preisklassen.

Das wohl bekannteste, aber auch teuerste Geräte dieser Art ist das „Ketonix“ (affiliate link). Dieses rangiert (je nach Ausführung) aber auch am oberen Ende der Preisklasse dieser Geräte.

Was die Genauigkeit der Atemanalyse angeht, gehen die Meinungen aber stark auseinander. Es ist aber auch eine Tendenz in Richtung hoher Ungenauigkeit zu erkennen.

Keton-Messungen über den Urin

Die kostengünstigste Methode, die Keton-Werte zu messen, sind, wie gesagt, die Ketostix® (affiliate link).

Dabei handelt es sich um Urin-Teststreifen, die man einfach in den Urin halten kann und deren Testfelder sich dann farblich ändern. Anhand einer Farbtabelle kann man dann sein Messergebnis einordnen.

Aber Achtung! Nur weil man etwas misst, muss es noch lange nicht exakt sein! Der Körper kann auch Ketonkörper ausscheiden, wenn man sich nicht in Ketose befindet. Die Ketostix® (affiliate link) sind aus meiner Sicht also die ungenaueste der drei genannten Messmethoden.

Außerdem sind die Ketostix® in der Handhabung unpraktisch, da man nicht ständig messen kann, sondern eben immer warten muss, bis man Harndrang spürt.

Ein differenziertes Messen nach einzelnen Lebensmitteln ist somit nicht möglich.

Hier sind die Messungen über das Blut und den Atem deutlich flexibler.

Vorteile und Nachteile einer ketogenen Ernährung

Über Vor- und Nachteil einer bestimmten Ernährungsform kann man sich endlos streiten. Wer mit einer ketogenen Ernährung beginnen möchte, der sollte sich zuvor von einem Arzt oder Heilpraktiker ausführlich beraten lassen.

Im Folgenden lege ich hier MEINE Meinung in Bezug auf die Ketogene Ernährung dar:

Einige Vorteile:

Die Vorteile der ketogenen Diät liegen, aus meiner Sicht, ganz klar in der Tatsache, dass man  so gut wie keine Kohlenhydrate mehr essen darf.

Damit fallen viele Lebensmittel weg, die potenziell entzündungsfördernde Eigenschaften haben und den Blutzuckerspiegel in die Höhe treiben, für Übergewicht und Adipositas oder auch das „Metabolische Syndrom“ sorgen.

Insbesondere Weizenprodukte und andere Getreide. Das bedeutet keine Pizza, Pasta oder Brot mehr! Keine Fertigprodukte und keine Süßigkeiten! Eine der wenigen Ausnahmen bildet z.B. 100% reine Schokolade (affiliate link) oder aber auch Kakao (affilaite link) in geringen Mengen.

Wer nicht ohne Naschereien leben kann, für den bedeutet die ketogene Ernährung sicher ein Höchstmaß an Herausforderung und Konsequenz!

Leider sind es meiner Erfahrung nach oft genau die Menschen, die massiv übergewichtig oder gar adipös (fettleibig) sind, die eine ketogene Ernährung zwar nötig hätten, aber denen es oft an Konsequenz mangelt, um damit erfolgreich zu sein.

Weitere Vorteile sind aus meiner Sicht, dass man aufgrund der hohen Fettmengen, die man konsumiert, selten an Heißhunger leidet. Der Blutzuckerspiegel ist eher konstant und man isst mengenmäßig tendenziell weniger, als bei einer kohlenhydratreichen Ernährung.

Einige Nachteile:

Einige Nachteile habe ich indirekt bei den Vorteilen bereits erwähnt. Die ketogene Ernährungsweise erfordert ein Höchstmaß an Konsequenz. Um in Ketose zu kommen, dauert es eine gewisse Zeit.

Eine kleine Nascherei hier und ein Brötchen da, sind dann nicht drin! Andernfalls erreicht man entweder niemals einen Zustand der Ketose, indem man dann auch Körperfett als Energiequelle anzapfen kann oder man „katapultiert“ sich schnell wieder raus aus der Ketose.

Wer Schwierigkeiten hat, zu seinen Prinzipien zu stehen, der wird mit der ketogenen Ernährung und sozialen Interaktionen eventuell seine Schwierigkeiten haben. Denn auch hier muss man eben konsequent bleiben und darf sich keine „Schnitzer“ leisten!

Fazit/Conslusio KetoMojo™️

Einfach ausgedrückt ist Ketose ein natürlicher Stoffwechselprozess, bei dem der Körper Fett anstelle von Glukose (Kohlenhydrate bzw. Zucker) als „Treibstoff“ nutzt. Dies geschieht nur, wenn dem Körper Kohlenhydrate (Zucker) entzogen werden.

Ohne Zugang zu Kohlenhydraten sorgt der Körper dafür, dass die Leber, Fett (aus der aufgenommenen Nahrung und aus gespeichertem Körperfett) in Ketone (Blutsäuren) umwandelt, und diese Ketone dann zur Energiegewinnung nutzt.

Die meisten Menschen, die gerade erst in den „Keto-Lebensstil“ einsteigen, juckt es wahrscheinlich unter den Fingernägeln, sofortige Ergebnisse zu sehen und zu erfühlen.

Möglicherweise testet man sein Blut dann sogar zwanghaft in Bezug auf den Ketonspiegel und fragt sich, warum die Testergebnisse so oft und so dramatisch schwanken können.

Dazu sagen ich: Gemach, gemach! Eine der größten Hürden für den Erfolg einer ketogenen Diät ist, wie beschrieben, Geduld und Konsistenz.

Warum kann es längere Zeit dauern, um in Ketose zu geraten?

Weil man den Körper umstellt! Ketose ist ein natürlicher Stoffwechselprozess, bei dem der Körper Fett anstelle von Glukose (Kohlenhydraten/Zucker) als Brennstoff nutzt. Um diesen Prozess zu aktivieren, muss man seinem Körper den üblichen Kraftstoff entziehen – Kohlenhydrate und ALLE Formen von Zucker.

Dann muss/sollte man dem Körper und seiner Leber Zeit geben, Fett aus der Nahrung und dem Körper (Fettgewebe) in Ketone für Energie umzuwandeln.

Wenn es um Messmethoden in Sachen Ketose geht, dann lautet mein Fazit: „Blut lügt nicht“. Deswegen setzte ich in Sachen Ketose-Messung auf mein KetoMojo™️– Messgerät (affiliate link).

Als toller Bonus kommt das Gerät übrigens mit einem kostenlosen über 100 Seiten langen „Kickstarter-Guide“ (in Englisch), für alle die noch keine Erfahrung mit dem Thema haben

Wenn dir dieser Artikel gefallen hat, dann teile ihn mit deinen Freunden, abonniere den kostenlosen Blog & Newsletter und hinterlasse einen Kommentar!

© HP Bernd Stößlein, Master of Business Administration in Sportmanagement.


In diesem und anderen Artikeln findest du den ein oder anderen „Affiliate Link“, zu amazon. Wenn du über diesen Link etwas erwirbst, dann unterstützt du damit meine Blogartikel und schaffst Ressourcen für weitere qualitativ hochwertige Recherchen und Artikel wie diesen. Es entstehen für dich dadurch keine Mehrkosten! Alle meine grundsätzlichen Empfehlungen findest du unter: https://www.amazon.de/shop/bernd_stoesslein


Literatur

Lateinisch-griechischer Wortschatz in der Medizin, S. 68.

Lateinisch-griechischer Wortschatz in der Medizin, S. 77.

Lateinisch-griechischer Wortschatz in der Medizin, S. 88.

Lateinisch-griechischer Wortschatz in der Medizin, S. 91f.

Joshi Shilpa; Viswanathan Mohan. Ketogenic Diets: Boon or Bane? Indian Journal of Medical Research 2018148 (3), 251–253 DOI: 10.4103/ijmr.IJMR_1666_18.

Stubbs BJ; Cox PJ; Evans RD; Santer P; Miller JJ; Faull OK; Magor-Elliott S; Hiyama S; Stirling M; Clarke K. On the Metabolism of Exogenous Ketones in Humans. Frontiers in Physiology 20178, 848–848 DOI: 10.3389/fphys.2017.00848.

The Use of Exogenous Ketones to Improve Protein-Sparing during Experimental Starvation. Clinical Nutrition 19887, 41–41 DOI: 10.1016/0261-5614(88)90305-6.

Rodriguez NR; DiMarco NM; Langley S; American Dietetic Association; Dietitians of Canada; American College of Sports Medicine: Nutrition and Athletic Performance. Position of the American Dietetic Association, Dietitians of Canada, and the American College of Sports Medicine: Nutrition and Athletic Performance. Journal of the American Dietetic Association 2009109 (3), 509–527.

Robinson, A. M.; Williamson, D. H. Physiological Roles of Ketone Bodies As Substrates and Signals in Mammalian Tissues. Physiological Reviews 198060 (1), 143–187 DOI: 10.1152/physrev.1980.60.1.143.

Fukao, T.; Lopaschuk, G. D.; Mitchell, G. A. Pathways and Control of Ketone Body Metabolism: On the Fringe of Lipid Biochemistry. Prostaglandins, Leukotrienes and Essential Fatty Acids (plefa) 200470 (3), 243–251 DOI: 10.1016/j.plefa.2003.11.001.

FREO gear is a USA based company that produces strength training boards, designed by mountain runner, coach and author Eric Orton who also wrote the book “The Cool Impossible” (affiliate link).

These portable and highly durable slant wobble boards and disks are a must have for every serious strength coach, personal-trainer and simply anyone who wants to improve foot strength! Every health professional who works with clients should equip their “health-toolbox” with these beneficial boards! In this article I‘ll show you how I train with these instability tools to build stable performance.

Freo Foot Care System

FREO manufactures “cool tools” who are designed for “rapid muscle firing”. Not only in the feet but in the whole body. Think of it. You virtually perform almost every exercise while standing on your feet!

How important a proper alignment is can be read in my article: “Alignment from head to toes”. 

FREO is also used by New York Times bestselling author Tim Ferriss, who calls himself a “guinea pig” due to being a true “Bad ass” Biohacker.

Ferriss wrote books like “The 4 hour Body” (affiliate link) and “Tools of Titans” (affiliate link). In the latter you can find me in the chapter about my mentor Charles R. Poliquin aka “Strength sensei” (R.I.P.).

In a video about his evening routine (minute 4:32) he talks about the FREO slant wobble board.

Special thanks to the CEO of FREO, Frank Ranum who sent me a FREO Foot Core System for testing.

After having unboxed the boards my honest first impression was: “well, that‘s it?!”. Don‘t get me wrong, the quality is very solid and the haptic, too. But I couldn‘t see how so simple tools would generate a big benefit to my strength training.

Well, let me tell you, I WAS WRONG! Nothing is further from the truth! They might be simple, but they are definitely not easy to use! Especially the wobble disk, which actually is my favorite!

Why are todays people‘s feet so weak?

The problem with the feet of our modern society is obvious. From the earliest age on we are put into “foot prisons”. Being in shoes means that our tendons, muscles, ligaments etc. cannot develop properly anymore. Think for yourself: when was the last time you walked barefoot?

Not only is it the wrong footwear, it‘s footwear itself that disconnects us from mother natures surface. Rubber soles and asphalt ground. No chance for reconnecting to the soil in order to soak up some electrons for the body’s energy field.

And again, please ask yourself the question: when was the last time you did some Earthing, respectively Grounding?

Of course I understand that you cannot perform every job while being barefoot. Besides looking a bit like a weiredo people are just not used to walk barefoot anymore.

My recommendation is to start with a solid pair of minimal shoes. I  use shoes from a German Company that also sells in the US. They are called “Wildling Shoes” (advertisement, not payed).

Besides being a strength coach/personal-trainer, I  also work as a “Heilpraktiker” in Germany. A proper translation would be something like “complementary and alternative medicine practitioner”.

That means that I can work with patients, am allowed to diagnose and treat, do invasive stuff like injections, intravenous infusion and so on. To make a long story short I do see a lot of patients with lots of orthopedically foot problems.

Too weak muscles, tendons, over stressed ligaments, lots of hallux toes and soft tissue deformations, just to name a few.

Often these derive from wrong footwear and a severe structural imbalance! That is another great field of application for the FREO boards, rehabilitation!

No matter what your current foot strength level is, as long as you don‘t have any contraindications, you should start training your feet. Will this cure all your structural imbalances in your body?

Don‘t be foolish. Of course not! But it will definitely be a helpful tool along with proper footwear, a holistic way of healthy living and a proper strength training.

Strength Training vs. Circus Training

Ok, now let‘s talk a bit about serious strength training. You do not have to be a competitive athlete to distinguish between: “the good, the bad and the ugly”!

My mentor Charles R. Poliquin used to say: “There is nothing new in strength training since 1892”, and guess what: he was probably right!

The point is that all day long something “new” pops up to show you “how it‘s done”. Well, occasionally there might be some new stuff from time to time but the basics will still be the basics!

In my opinion it‘s the same with instability training. You won‘t find as much stupid stuff anywhere else like in this particular field of training. If you look up the word “bullshit” in a dictionary there should be a picture of someone doing squats on a bosu ball!

Now I am going to tell you why the FREO boards are good and do NOT fall in the field of “circus training”.

When it comes to instability training there are:

  • The good (tool with flat surface and instable ground)
  • The bad (vice versa as above, instable surface and stable ground)
  • The ugly (all the crap you can buy on TV, won’t do any shit for you except emptying your wallet)

Is the earth really flat?

Wel, we are not going to do some flat earth debate but I tell you: if it comes to instability training for me, the “earth” should be as flat as possible! Why? Because in real life you do not perform on an instable ground (except playing beach-volleyball).

What do I mean by flat? Well, the board can have an inclination but its surface is still flat! On the contrary, its bottom side wobbles. That‘s the ONLY kind of instability training I recommend!

And for the smartasses, it does NOT work the way vice versa! If you have an instable surface and a stable ground. From my perspective an instable surface is simply too irritating for the central nervous system.

Of course there is no such thing as black and white and as we have learned in life, there are many “shades” of grey!

So, if you are a very skilled athlete and are for example really performing in a circus, like “cirque du soleil” you might also use an instable surface to perform on. Without a doubt, I pay my absolute respect to artists of this “caliber”!

But, when you are not a superb circus athlete/performer you should focus on working with tools whose surfaces are flat and whose bottom sides might be unstable. Just from my expertise this will bring you the fastest results!

Feet strengthening exercises with FREO Gear

As I mentioned before, strength training of the feet will not only benefit themselves but also the whole body. Especially in terms of structural balance!

That‘s due to the fact that feet contain a lot of small muscles, joints, articulations, ligaments and tendons. For them in order to perform at their optimum they should be able to move as mother nature designed them.

From my expertise especially when people are doing rehabilitation programs little to no attention is paid to the importance of foot strength and structure!

Most people rather rely on externally supporting devices instead of training and (re)strengthening the intrinsic and extrinsic muscles of their feet.

I do consider that as one of the general problems in today‘s society. People always fall for the easy way…instead of taking responsibility for their own health they rather search for a short cut.

When we draw our attention to the “design” of a healthy foot we can see its arched shape on first sight. According to McKeon et al. this arch and its muscles are relevant to the foot‘s core stability (McKeon et al., 2015).

In their research paper: “The foot core system: a new paradigm for understanding intrinsic foot muscle function” Mc Keon et al. propose that: “(…) the concept of core stability may also be extended to the arch of the foot. The arch is controlled with both local stabilisers and global movers of the foot, similar to the lumbopelvic core.

Therefore you can see that a stable “core” is not only achievable in your upper body but also in your feet!

In terms of structural balance you have to have a holistic point of view. That means if something (muscles) are too strong, something else is too weak! The goal is to create an equilibrium in all of your foot muscles to ensure proper stability in your whole body.

The FREO boards where designed by Eric Orton, who is a professional runner. But that does not mean that their usability is limited to endurance athletes! From my point of  view everybody who likes to improve foot stability and strength might benefit from these cool tools!

Even when you are rather a strength athlete I encourage you to have a look into Orton‘s book, “The Cool Impossible”.

At least you will learn techniques for foot strength exercises to catapult performance, combat injuries, and transform technique. All things you can also benefit from as a strength athlete.

How to work out with a FREO wobble board and wobble disk

A smart human being once said: “ Every exercise is a foot exercise if you are on your feet doing it”. I completely agree. According to that you can imagine how important the strength and structural balance of your feet is.

Using FREO tools my clients and patients (regardless of age and level of strength) are able to improve their (foot)strength, body equilibrium and balance.

Both the Slant Wobble Board and the Wobble Disk are really beneficial tools which amplify the exercises by introducing instability, forcing both dominant and more important lesser used muscles to fire, creating a more balanced, equalized mind and lower body (FREO 2020).

Figure 1: Primary Foot Orientations using the FREO Wobble Board, source © FREO.

Rules for all Exercises:

  • Wobble Disk Exercises can be started once the slant board exercises have been mastered! That means you can forward to the wobbling board exercises if you can perform the slant board moves with proper form! FREO recommends performing the exercises using two (hiking)poles (affiliate link).
  • Balance on the center of the board while keeping your heel raised, your board leg straight and knee locked (except performing pistol squats). Keep the non-boarding leg slightly elevated off floor as the resting position.
  • Keep the board balanced on the center, resist allowing it to tilt any direction while doing the exercise. Keep exercise movements smooth, fluid and controlled. Alternate each foot.
  • Once you feel using two poles is easy and controlled for two minutes with proper form you are ready to begin using a single balancing aid.

Instead of two poles I use the boards performing the exercise in a squat rack. I place a barbell in the hooks in case I need a help for balancing. But if you do not perform the exercise in a gym stick to the FREO instructions mentioned above!

Also make sure that you perform the exercises on a suitable underground that prevents the boards from slipping. Especially the Wobbling Disk!!!

Exercise pictures and why I prefer videos

Pictures of exercises are nice, but what you commonly get are a starting- and an ending-position. What is done in between is left to the imagination of the reader/viewer.

Therefore I decided to shoot a quick FREO exercise guide.

This video shows you how I  use the FREO tools. So please feel free to adopt what you like and skip what you don‘t. Enjoy!

Conclusion

I stumbled upon the FREO Foot Core System while watching a video of Tim Ferriss. Funny enough because I‘m also mentioned in one of Tim‘s New York Times best-selling books, “Tools of Titans” (affiliate link). After having contacted FREO we found out that its CEO Frank Ranum had roots in Germany J

So, he was kind enough to send me a FREO Slant Board and a Wobble Board. After having unboxed the tools I first wasn‘t flabbergasted, to be honest. But I have to tell you I completely changed my mind after my first try in my gym!

The material is very solid and the tools are built to last a lifetime. They are super lightweight and therefore predestinated to travel with. Whether you are a Personal-Trainer/Strength-Coach or if you just use it for home training with family and friends.

The FREO strength tools are a very affordable investment in optimizing your foot strength. The training can be done almost everywhere and anytime, in- and outdoors. You just need a dry, horizontal and non-slippery surface to place the boards.

For all those who are new to the topic of instability training will benefit from the FREO Quick Start Guide that comes for free with every purchase!

© HP Bernd Stößlein, Master of Business Administration in Sportmanagement.

If you liked this article please share it with your friends, subscribe to the newsletter and the blog.

If you like to book a professional online/offline consultation please feel free to contact me: info@bernd-stoesslein.de


Literature/Reference

McKeon PO; Hertel J; Bramble D; Davis I. The Foot Core System: A New Paradigm for Understanding Intrinsic Foot Muscle Function. British Journal of Sports Medicine 201549 (5), 290–290 DOI: 10.1136/bjsports-2013-092690.

FREO Quick Start Guide.