Beiträge

WristBall was originally designed as a special tool for improving your technique, respectively strength for arm wrestling. As I always point out: I like to think very much: to think outside of the box and grip training. So, why not fusing too cool things together? Although not being an arm wrestler, I implemented the WristBall into my own training and the one of my clients and patients. Why? Because I think this “cool tool” is very versatile and a true enrichment for everyone who is trying to work on improving grip strength. In this article I’ll cover furthermore how you might also use the WristBall besides from grip training!

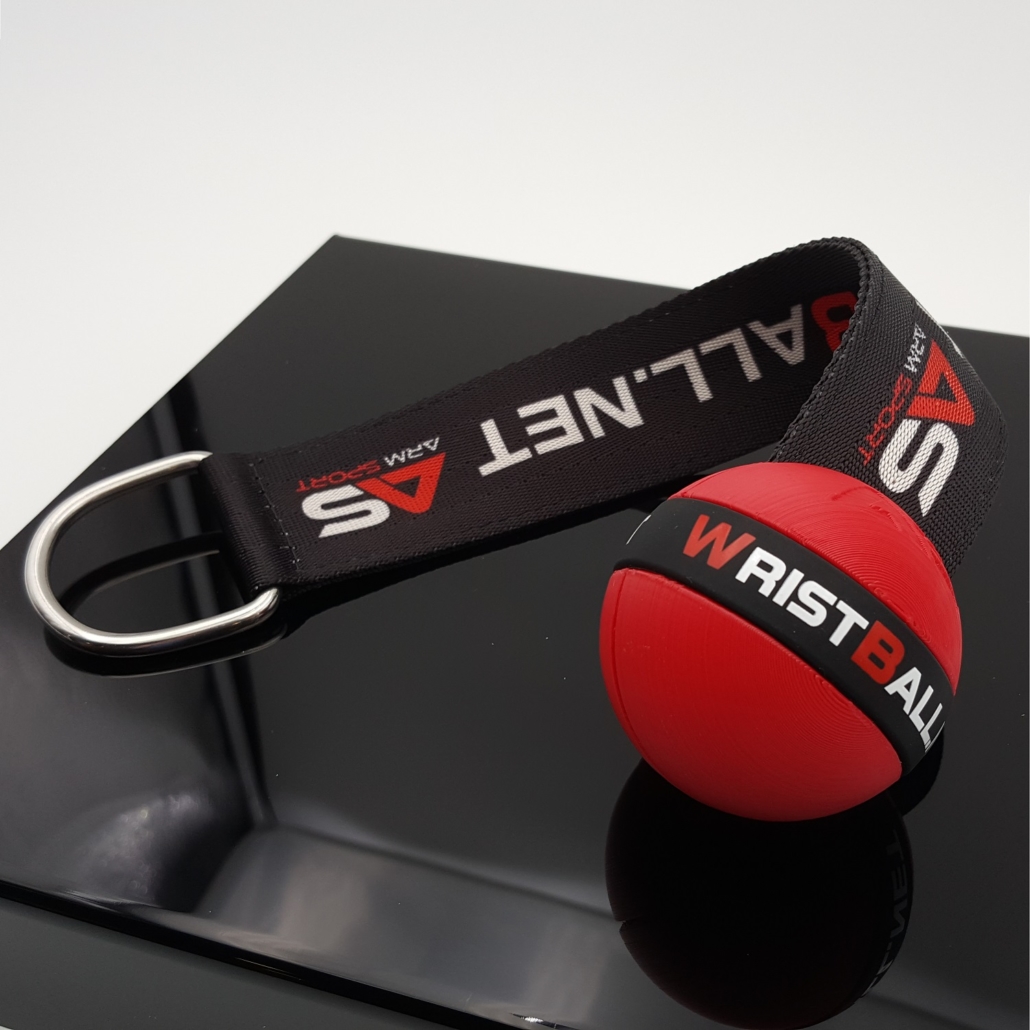
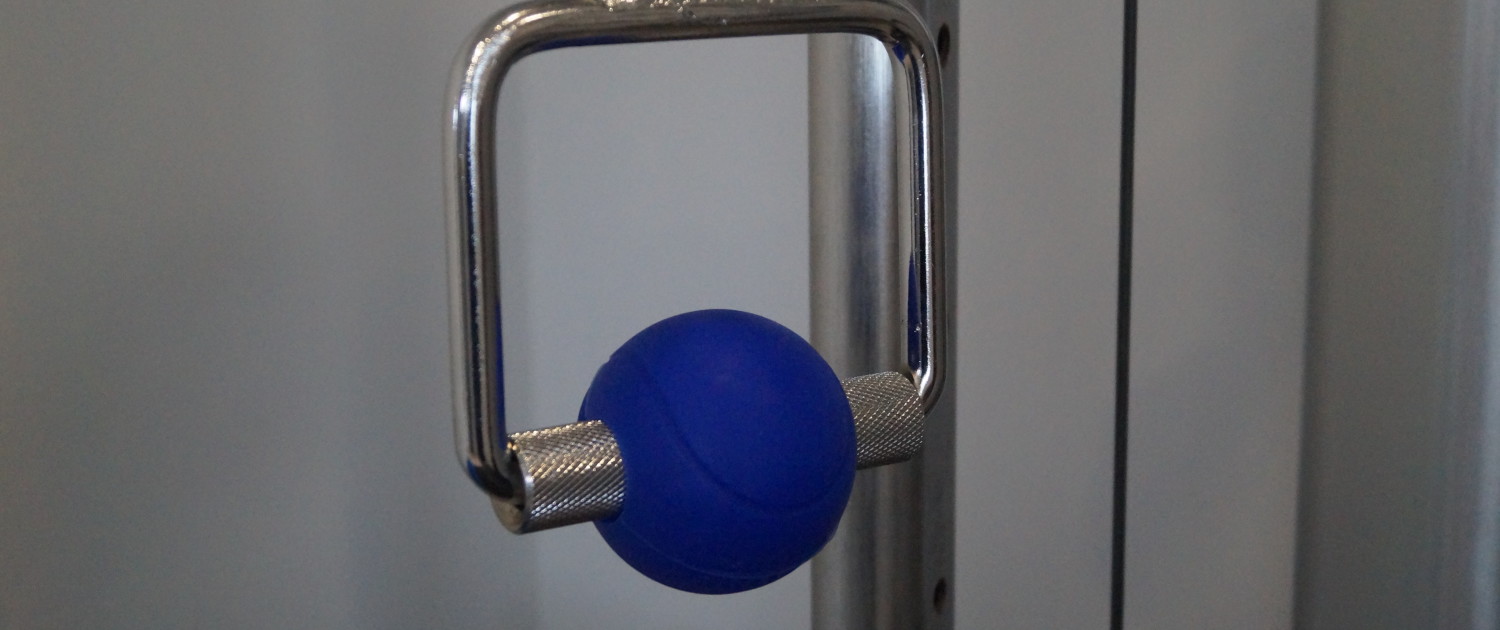
WristBall: 70mm, source: © ArmSprot.

WristBall Review – All good things come in threes?

Special thanks to Misha from Israel who was kind enough to send me not only one of his WristBall trainers but also a pair of his Cone Grips, as well as his WristMax! So, kudos to Misha, respectively his company called “ArmSport”.

If you want to read my other reviews of the aforementioned tools, please feel free to read it in my extensive reviews, here:

WRIST MAX – EQUIPMENT REVIEW

CONEGRIP FOREARM TRAINER REVIEW

WristBall – THE most versatile gripping device?

As mentioned before, I’m a huge advocate of training grip strength. Why? Well, besides neck training and training to improve electromechanical delay, grip strength training is probably one of the most underrated aspects in Strength and Conditioning training!

If you want to know more about the importance of training in regards of electromechanical delay and why it is especially important in esports, I highly recommend to read my detailed article:

STRENGTH AND CONDITIONING TRAINING FOR ESPORTS

So, why might the WristBall be at least one of the most versatile tools for improving grip strength? I’ll give you my expertise.

First of all, the WristBall is suuuuper pricey! They do sell these things (depending on the diameter of the ball) starting from 39.90 (medium, 60mmÆ)-41.90 (large, 70mmÆ)$. Pretty economic, if you ask me!

I emphasize the fact that I chose the words economic and pricy over cheap, as “cheap” usually has a more negative connotation. Regarding the versatility of the WristBall it’s rather pricy, respectively more an investment than an expense!

To make a long story short, the WristBall is, as the name describes, a ball, attached to some kind of seat-belt-like material with the possibility to attach a carabiner.

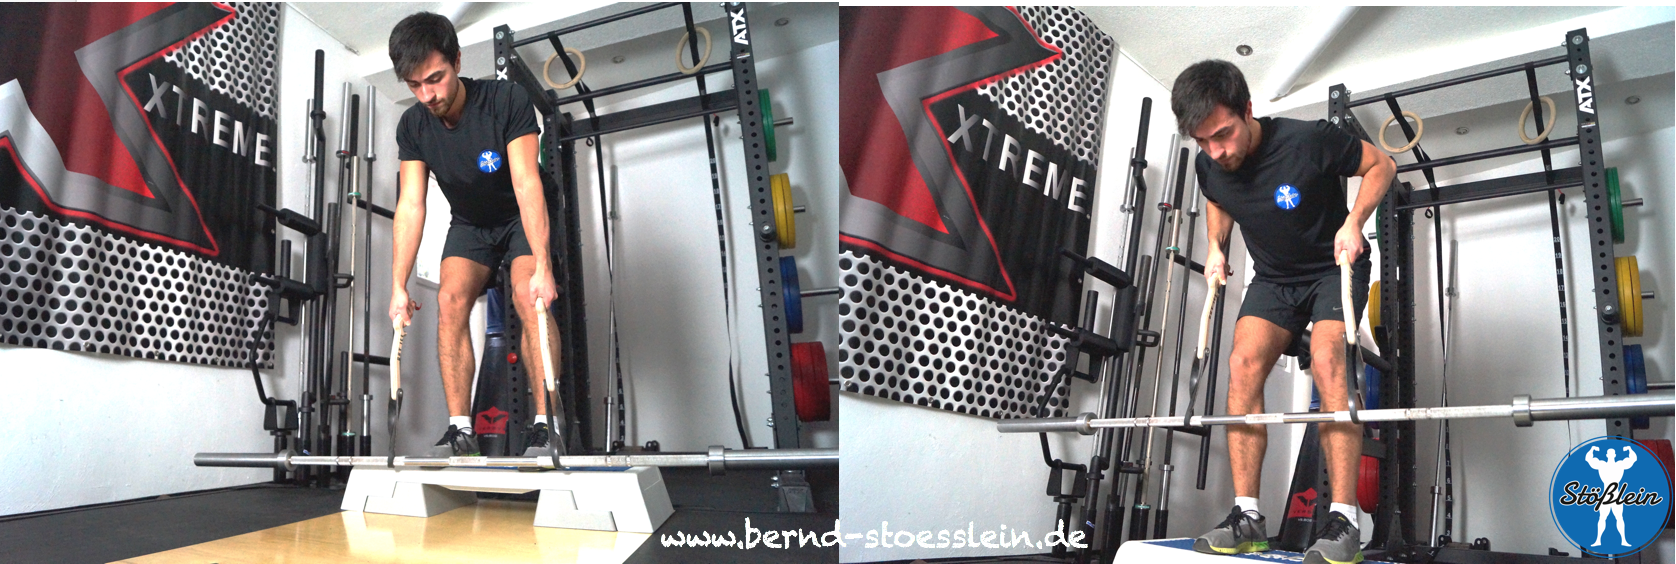
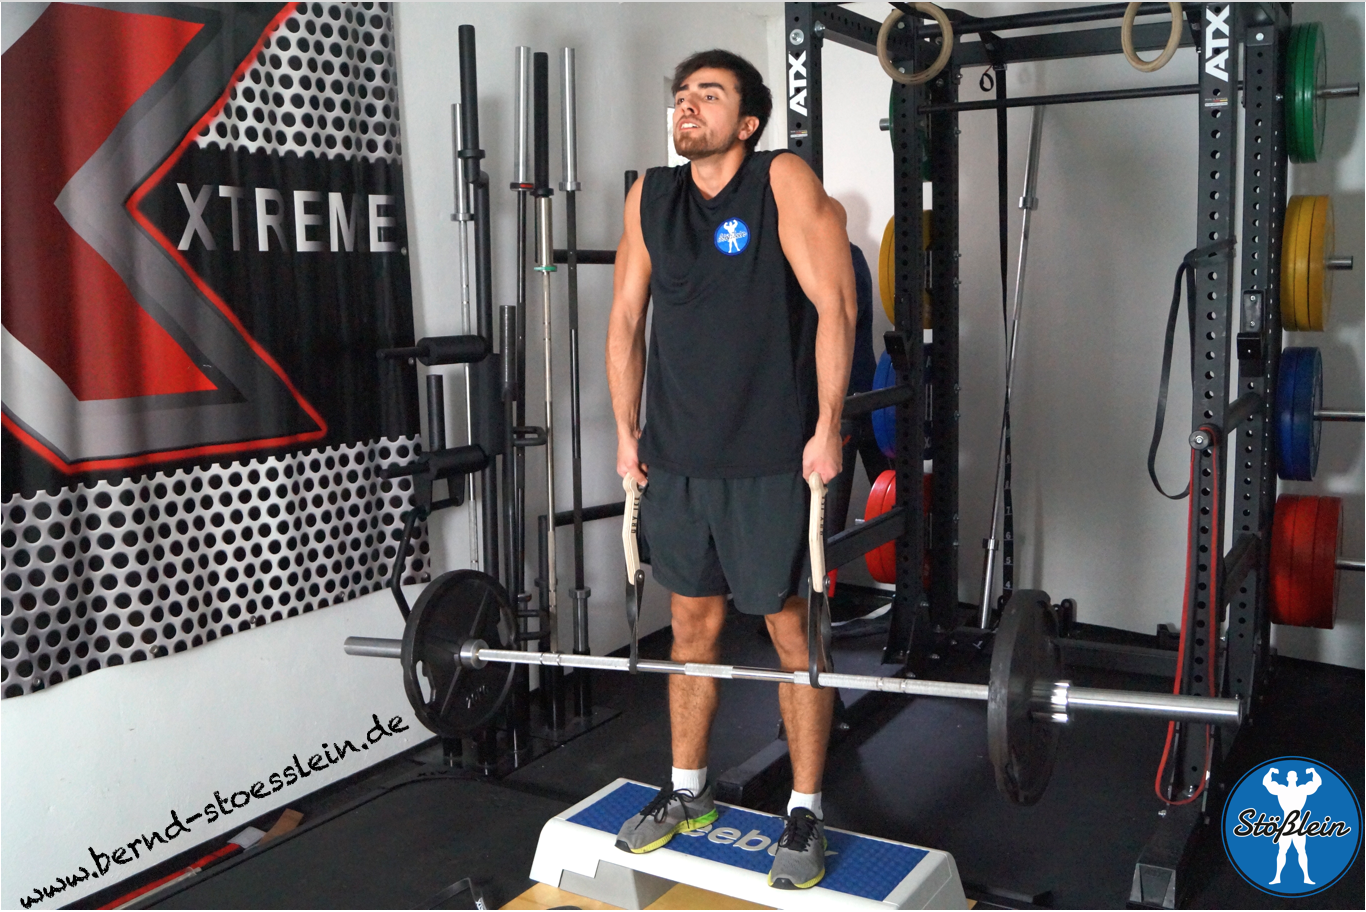
Therefore you can mount it on anything that can hold a carabiner, such as any cable pulley and/or so-called loading pins.

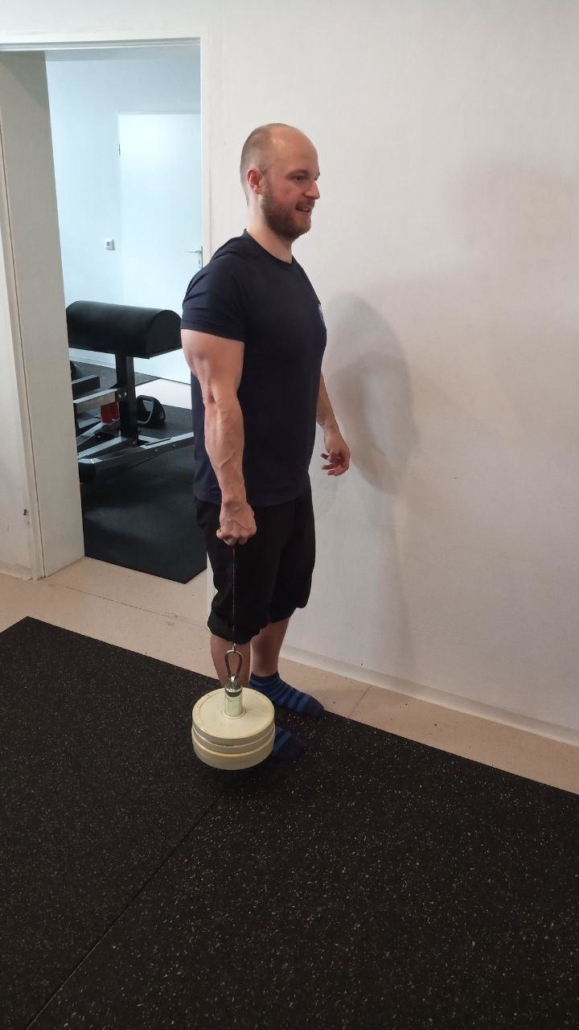
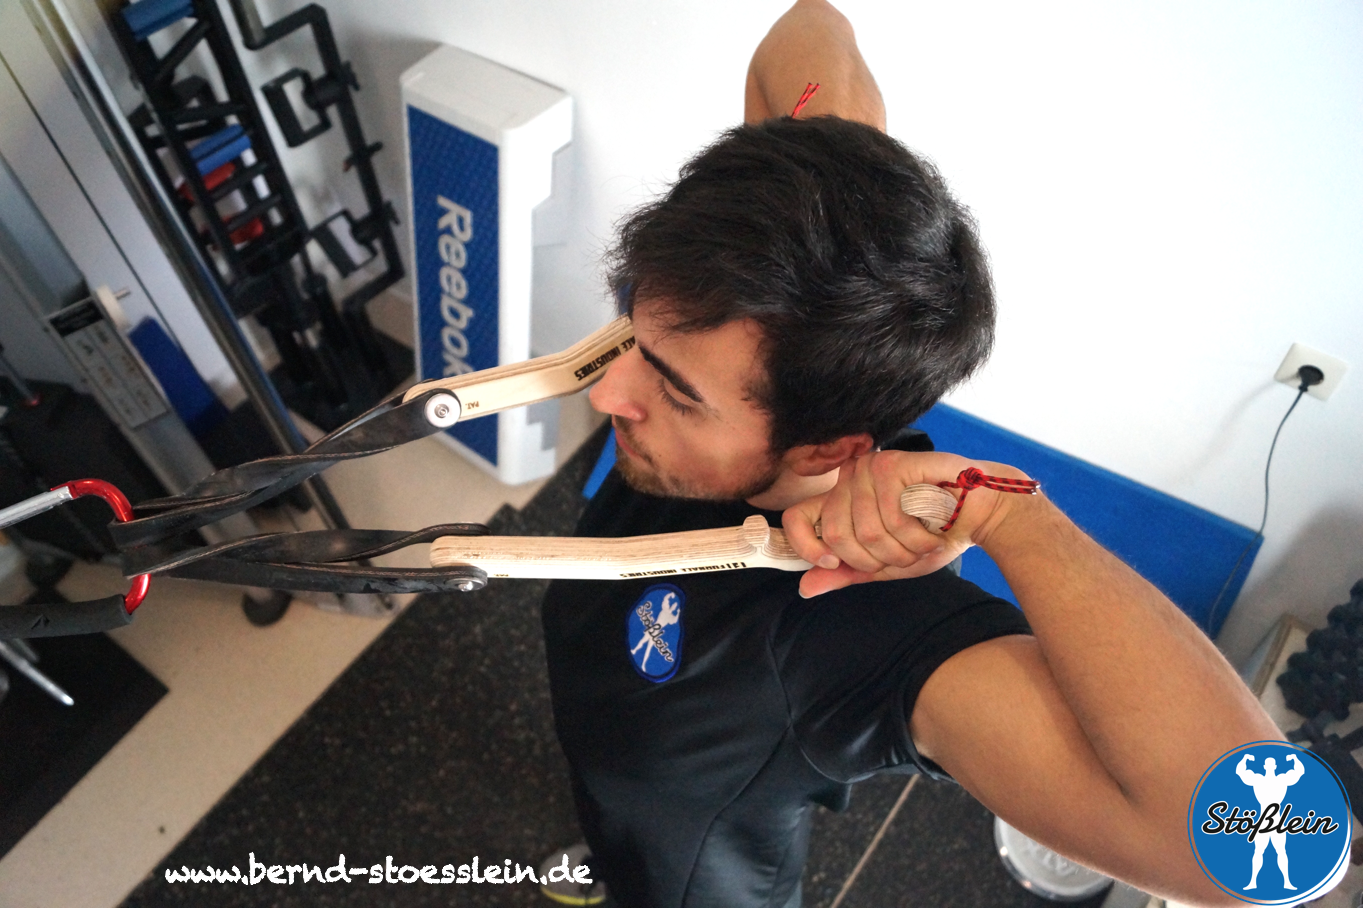
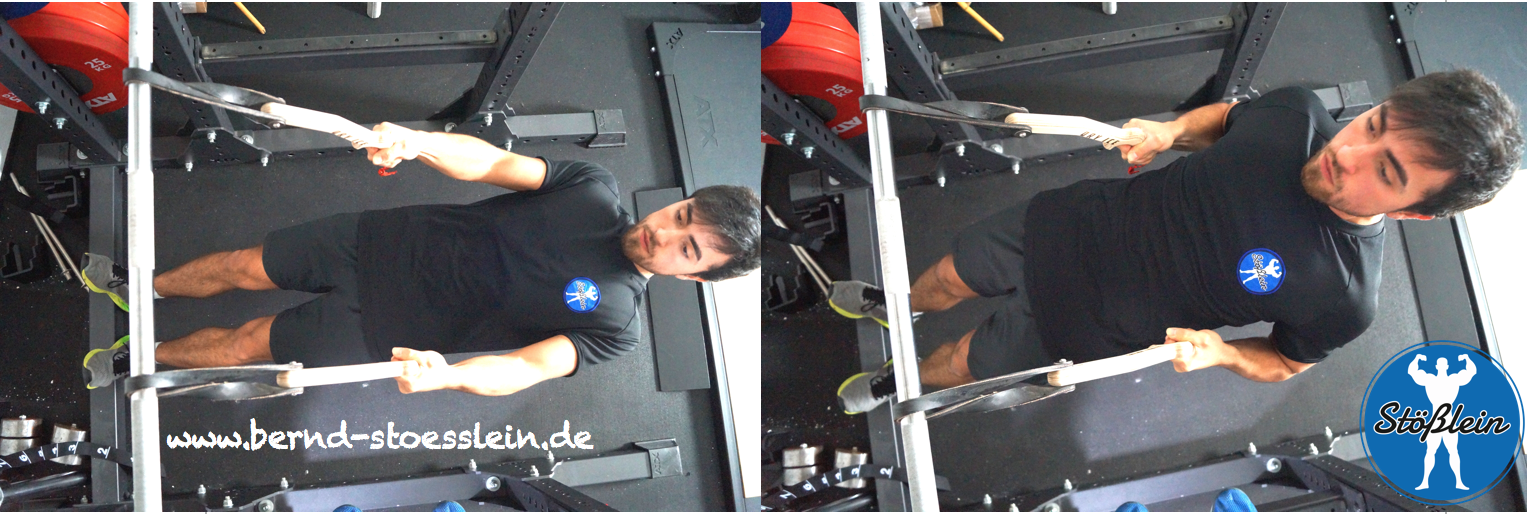
Grip Training with the WristBall, source: own picture.

WristBall – Let’s do some functional anatomy

What makes the WristBall super versatile are its multiple options. You can train:

  • Wrist extension
  • Wrist flexion
  • Hand abduction
  • Hand adduction                    
  • Finger opposition
  • Thumb flexion

Which muscles can be trained? Well, as always, that depends. Literally, on the one HAND on your flexibility (Range of Motion = ROM) restriction and/or on the other HAND other pathologies that might prohibit one or more of the aforementioned functions.

Let’s say you don’t have any issue in the tissue, bones or whatsoever and no problems with structural balance, here’s a list of muscles that can be trained in your hand (and of which you might probably have never heard of):

  • M. abductor pollicis brevis
  • M. opponens  pollicis
  • M. flexor  pollicis brevis Caput superficiale
  • M. flexor  pollicis brevis Caput profundum
  • M. adductor  pollicis  Caput transversum
  • M. adductor  pollicis Caput obliquum
  • Mm. lubrivales I-IV
  • Mm. lubricales III-IV
  • Mm. interossei  palmares  I-III
  • Mm. interossei dorsalis I-IV  
  • M. aductor digit minimi
  • M. flexor digiti minimi brevis
  • M. opponens digiti minimi
  • M. palmaris brevis

That should cover pretty much all of our major hand muscles. If you want to know where all of them are located, you can use this publication as a springboard for your own little research!

Well, wait a second. It is called WRISTBall and not HANDBall, right?! Correct! But all of these muscles do play an important role when it comes to gripping!

According to that, it might be helpful to have at least  heard of them. Of course you can also train your forearm muscles with the WristBall, as mentioned above.

WristBall – Other exercises

Which other exercises, besides the already mentioned, can be performed with the WristBall? Maybe a myriad, but I’ll give you only an impulse of what can be done. You should always use your own fantasy and think outside of the box.

You could perform the following:

  • Single arm standing/seated rows
  • Chin ups (if you have a pair of WristBalls)
  • Biceps curls (you need a loading pin)
  • Triceps extensions in all variations (on cable pulley)
  • Butterflies on a cable machine (pair of WristBalls needed)
  • Spider curls (pair of WristBalls needed)
  • Reverse Flies (single/double handed)
  • Lateral raises (single/double handed)
  • Front raises (single/double handed)
  • Grip help for front squats (pair needed)
  • Internal/external rotation for shoulders/rotator cuff
  • Much more

As you can see, you can use the WristBall for quite a bunch of exercises, and that’s just what I came up so far. There are probably lots of more usabilities to this “cool tool”.

I’d be happy if you share your ideas with me and others in the comment section.

WristBall – Round and round it goes?

We haven’t discussed the most obvious fact of the WristBall, its shape! Compared to other grip tools, which are normally cylindrically shaped, the WristBall, of course, is round…sure, as it’s a ball!

Yet, you must understand that in terms of training/gripping round is actually better than cylindrical! Why? That’s due to its great transfer effect to everyday life. Most things you grip are rather round than cylindrical.

Furthermore, if you train sport specific, for first responders, for self-defense sports (e.g. Krav Maga) and/or law enforcement you need to grab your opponent. Therefore your life literally might depend on a strong grip!

WristBall review Conclusion

In my obligatory conclusion I’ll provide you with my expertise, being a Personal-Trainer, Strength and Conditioning Coach, Consulting Biohacker and Heilpraktiker (Complementary and Alternative Medicine Practitioner), with (2020) over 13 years of professional experience in the Health and Fitness- Industry.

Should you use a WristBall? Well, as mentioned earlier, that depends. Are you a novice lifter with less than two years of “training age” you probably don’t need it yet, as you are trying to build some foundations first. A WristBall could be too specific yet!

I think, besides the fact of its original purpose, you could benefit from incorporating a WristBall in your training, especially in prehab and rehabilitation phases, i.e. if you’re suffering from something called “Tennis- and/or Golfer’s arm”.

If you’re looking for new input for your training for constant progression, you could also benefit from integrating the WristBall and, of course, if you are trying to get a stronger grip!

© HP Bernd Stößlein, Master of Business Administration in Sportmanagement.

If you liked this article please share it with your friends, subscribe to the newsletter and the blog.

If you like to book a professional online/offline consultation please feel free to contact me:

 info@bernd-stoesslein.de

Esports players should train like “normal” professional non-esport related athletes! Every professional gamer should invest in a professional Strength and Conditioning Coach, and there are at least a ton of reasons to do so!

Esports players benefit from strength and conditioning training as it is a sport specific performance coaching, consisting of a special nutrition designed diet, posture improvement, musculoskeletal efficiency enhancement, brain coaching for faster neural processing and so much more!

Regarding how much money pours into esports, it would be simply stupid not to consider, and treat, pro gamers as professional athletes! But just like any other professional athlete they should hire a professional strength and conditioning coach to get a winning edge!

This article is primarily designed for professional esport players, those who want to make a living out of pro gaming and how the collaboration with a professional Strength and Conditioning Coach will enhance their game.

My article is also intended to show Strength and Conditioning Coaches how they can work with professional athletes they might never have thought of and how and where they might start to work with them.

Ok, what does a Strength and Conditioning Coach for professional esports do? Well, pretty much the same he does with all his other professional clients, too. He trains them in a sport specific manner, to make them better athletes in their particular sport.

Esports – The relentless training of professional gaming stars

If you’re reading this because you’re a professional esport gamer, respectively athlete, I won’t have to explain you how relentless and hard you’re training to be(come) one of the world’s best.

For all my other readers I will give a brief overview of how intensive a pro-gamer’s training routine is:

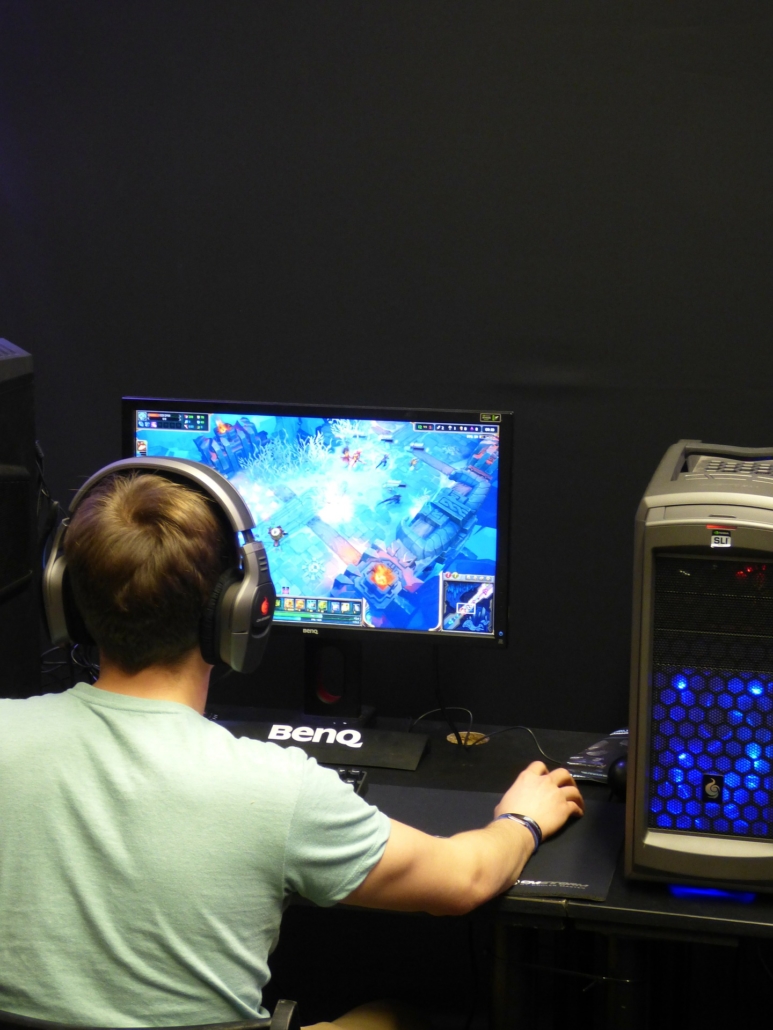
It’s not uncommon for professional esport athletes to perform gaming for more than 12 hours daily, on a regular basis, respectively every day!

In an industry in which the fraction of a second can decide over hundreds of thousands of dollars, the margin for errors is thinkable small!

Esport is not a sport?! That’s probably what lots of non-gamers might think now. What’s the deal? You sit all day long in front of a computer, watching your ass getting bigger and bigger? Everybody can do that…

Something like that is what you usually hear, when you talk about people who are not related to sports of any kind and particularly not to esports!

Esports – the fastest gamer wins!

From a traditional point of view esport gamers/athletes are not what you have in mind when you think of an “athlete”. A bunch of guys sitting in their mom’s basement thriving on junk food and energy drinks to stay awake as long as possible.

You might change your stereotype view!

Esports have evolved in the last decades to a multi-million, respectively multi-billion dollar industry!

Their top athletes have sponsoring contracts, earn hundreds of thousands of prize money and are followed by a huge fanbase. Just like other professional non esport athletes as well!

Being a pro esport gamer requires you being able to process information as fast as possible to make the winning move!

That means that it is not only some typing on a keyboard and scrolling around with the cursor of your mouse. It is about the speed of information<—>reaction time!

How fast can you absorb, realize, interpret your esport related environment (game) AND how fast you can take action!

According to that there are lots of points that have to be taken into consideration:

  • Range of Motion (ROM) improvement
  • Information processing capacity in total
  • Neuromuscular control
  • Fine motor skills
  • Sensory perception (especially visual and auditive)
  • Alignment of musculoskeletal system
  • Neuronal efficiency
  • Motor control efficiency
  • Firing rate of motorneurons
  • Nutrition
  • Supplementation
  • Biochemistry (Neurotransmitter !)
  • Much more
  • Physiology & psychology

As you can see there are lots of things you can optimize with an athlete. Please bear in mind that the list above, by all means, is NOT complete! It’s just to give you a glimpse of what you can work on with a professional Strength and Conditioning Coach!

Esports and brain performance optimization

Of course every pro gamer wants to be the best. A simple yet effective way of improving an esport athlete’s performance is to “rewire” his/her brain!

This does not mean that you haywire some neurons…it’s a metaphorical meaning!

How can you do that? Well, I’ll give you a little glimpse of how I do it, by correcting/improving visual perception.

As I write more in detail in my article about my Brain Coach Performance Certification:

“ (…) it simply has to do with basic human anatomy and how your brain is wired. How you observe and process the world you live in, particularly visually. What you see, in terms of sensory impulses, and HOW this information is perceived and processed in the correspondent part of your brain (visual cortex) determines your motoric actions!

According to that, postural problems are not always and only limited to misalignments of your musculoskeletal system, but most likely due to neuromuscular problems, especially problems with sensory perception through the eyes.” (Stoesslein, 2020).

In a nutshell, this means if an esport athlete receives misaligned information due to eye divergence, this will result in asynchronous visual information procession. This, in turn, will lead to slower information processing which inevitably will lead to slower reaction time.

And we all know that in esports it’s all about speed! You might have the best reaction time on your hardware (super-fast screen and keyboard) but if you are simply not performing on your best due to slow neuromuscular control, bad neurotransmitter distribution, diet issues etc. (the list is long) you will waste a lot of potential optimization!

Esports – Secret to success

Nowadays people are always looking for short-cuts. They don’t want to learn something properly but want to know how something works, explained best in just one sentence.

According to that, and the drastically decreasing attention span I’ll give you (at least some “ingredients”) of my “magic formula”, concerning strength training for esports:

  • Grip strength
  • Neck strength
  • Electromechanical delay

In a nutshell, these are, by far, the most neglected and overlooked factors when it comes to esport performance. Of course an esport athlete doesn’t have to be as “yoked” as Mike Tyson at his prime but a “pencil neck” won’t do the job either.

Especially when we think 20 years ahead, when the average retiring age of professional esport athletes might rise from mid-twenties to, let’s say around 40 or even above.

Considering posture and grip strength might even predict the longevity of an individual, not only in esports. There are countless studies which say that grip strength is a better vital parameter for longevity than blood pressure!

More about the importance of grip strength, how to measure and implement it in a strength and conditioning training (for esports), can be found in my article:

HANDKRAFT MESSEN – HAST DU ALLES IM GRIFF? (German)

If you like to receive an English translation, please email to: info@bernd-stoesslein.de

The third “ingredient” on my list is something called “electromechanical delay”, in human skeletal muscle under concentric and eccentric contractions. Think of the following:

In contraction of skeletal muscle a delay exists between the onset of electrical activity and measurable tension. This delay in electromechanical coupling has been stated to be between 30 and 100 ms.”(Cavanagh & Komi, 1979).

Wouldn’t it make sense to improve/maintain/enhance that speed? Remember, the margin between winning and losing in esports is super small! Therefore optimizing the fracture of a second will determine whether you win or lose a lot of money!

Of course there is a ton more of optimization potential. Lots of more useful tools and techniques, but you will understand that this article is supposed to “whet your appetite” for more!

If you want to get a professional coaching/consulting (online/offline) please feel free to contact me:

info@bernd-stoesslein.de

Esports Performance Continuum

Of course a single blog article is far too short to tell you all about Strength and Conditioning Coaching for esports. Yet, I’d like to give you some input how to start and what the most important things are, from my expertise.

Considering the training of an esport athlete, a very important point comes into play! The periodization of the athlete’s training. What do you train when and how? Is there an in-season, and off-season, how do you schedule strength training etc. etc. etc….

I will give you my basic PERFORMANCE CONTINUUM FOR ESPORTS on which you can build on specific programming:

  1. Assess and Correct
  2. Enable full ROM
  3. Stabilize full ROM
  4. Load full ROM
  5. Load & Link bodily segments
  6. Load segments & start focusing on improving velocity
  7. Load segments + further increase velocity
  8. Unload segments + keep on increasing velocity

Esports and Soft Tissue Treatment

When it comes to esports there is one big issue every professional Strength and Conditioning Coach must pay attention to: How to assess and correct movement restrictions!

This is my Number One on my PERFORMANCE CONTINUUM FOR ESPORTS!If you fail to assess and correct a pro gamers movement restriction all the other listed points cannot be addressed in a proper fashion! Therefore “first things first”!

Remember this blog article is the “finger in the eye approach” of how and where to start if you either want to coach professional esport athletes or you are/want to become a pro gamer and are searching for info how to get coached.

The best, so called Instrument Assisted Soft Tissue Mobilization (IASTM) tool, due to my expertise, is the Heskiers All-In massage tool.

Heskiers All-In-One massage tool + method is a special designed IASTM tool and soft tissue treatment, developed by Danish acupuncturist and designer Martin Heskier.

So, you might wonder if the Heskiers tool is just another IASTM tool out there. To make a long story short: it is, BUT it is one of a kind!

How do I know? Because besides working as a strength coach/personal-trainer, I do also work as something that is called “Heilpraktiker” in Germany. A proper translation in English would be something like “complementary and alternative medicine practitioner”.

It’s a unique profession that, in this constellation, is only available in Germany and in modification in Switzerland. You’re allowed to diagnose and treat patients (with restrictions), even with invasive techniques, i.e. like giving injections, infusions etc.

Therefore, I’m also allowed to treat patients with acupuncture- and of course acupressure-techniques. According to that I’ve been using lots of IASTM tools in all kinds of variations + massage guns and other devices.

I’ve also been certified by my mentor Charles R. Poliquin aka “Strength Sensei” (R.I.P.) as a Certified Kinetic Chain Enhancement Practitioner.

Esports  – The most important task of a Coach

So, with all the info you already received, what do you think is THE most important task of a Strength and Conditioning Coach for esports? It’s to keep the athlete save from injuries and ready to perform at his/her best!

Strength and Conditioning Coaching is different from coaching “joe average”. A coaching that focuses on athletics intents to spare energy instead of trying to burn as much calories as possible!

You must pay attention to the energy system that are used during an esport competition and how you can improve an athlete’s movement economy!

These energy systems have to be considered:

  • Phosphagen
  • Glycolytic
  • Aerobic

Considering the fact that esports are most of the time done while sitting, the aerobic system won’t be competition winning thing to focus on, right? Wrong!

Training the aerobic system will also benefit the anaerobic (phosphagen and glycolytic) systems!

Just by giving you a glimpse of the myriads of things that can be improved in a professional gamer’s life, should open your eyes on how much potential is hidden in this sport.

Both, for the Strength and Conditioning Coach AND the pro gamer! Due to my experience and expertise neither the Coach nor the esport athlete.

Most likely that’s the case as they come from different ends of the continuum of sports, or maybe really from different “worlds”.  

But why not combining the best of two worlds to create something new?

I hope my article lays the foundation for the collaboration of professional Strength and Conditioning Coaches and professional esport players to work together!

Conclusion

Let’s come to a conclusion. Are esports something that can be considered to be a serious “sport”?

Well, that kind of depends on your definition of “serious” and “sport”. From the perspective of economics, esports far surpass lots of “traditional” sports.

From the perspective of a “real” athlete that has a lot more physical involvement some might say: no!

But the same could be said about other sports like horse riding, car driving or chess!

Being a professional means “leaving no stone unturned”! Who cares what other people think? If you want to be a professional game player, respectively esport athlete, go for it!

But you should/could be the one who thinks outside the box! Think of the benefits it would bring to you and your team to hire a professional Strength and Conditioning Coach!

If you like to book an online consulting with me to learn more about strength and conditioning, nutrition, brain coaching, supplements etc. for esports please feel free to send me an E-Mail to:

info@bernd-stoesslein.de

© HP Bernd Stößlein, Master of Business Administration in Sportmanagement.

If you liked this article please share it with your friends, subscribe to the newsletter and the blog.

If you like to book a professional online/offline consultation please feel free to contact me:

info@bernd-stoesslein.de


Literature

Electromechanical delay in human skeletal muscle under concentric and eccentric contractions, P R Cavanagh, P V Komi, Eur J Appl Physiol Occup Physiol . 1979 Nov;42(3):159-63. doi: 10.1007/BF00431022.

Literature

Brain Coach Performance Certification, source: https://www.bernd-stoesslein.de/2020/07/22/posturepro-brain-coach-performance-certification-review/, access from 26.08.2020.
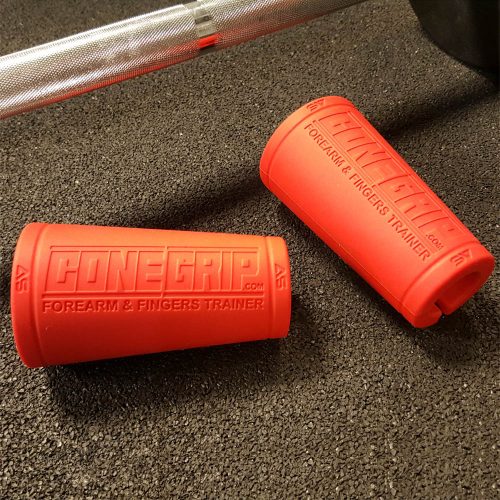
Conegrip Forearm and Finger Trainer (affilate link) are – as the name suggests – cone-shaped grip strengthening tools. Nothing new under the sun you might think, but it is! As most tools designed for enhancing grip strength are cylinder- shaped! Well, Bernd, “no big deal” I can hear you say. But think again! In this article I’ll tell you more about the importance of gripping power in strength training, how you might benefit from it (in Team-Sports i.e. like Basketball, Football, Soccer, etc.) and what distinguishes the Conegrips (affiliate link) from cylinder-shaped grip tools.

How to recruit more muscle fibers in your hand, like the abductor digiti minimi and much more.

Get a grip…

How to become a Conehead

Ok I cannot resist to make this joke about the Coneheads…come on, it’s too good not to make it! For those of you who are old enough to remember, “Coneheads” is a 1993 movie, starring Dan Aykroyd, about cone-headed aliens who try to live a normal people’s life on earth 🙂  

But, what I’d like to stress with the sentence “how to become a Conehead” is actually that you should start to think about the benefits of a cone-shaped grip strength tool!

Cone Grips, sourcet © 2016–2020 ConeGrip.

Let’s start with the basics. What actually is a cone? Well, according to Wikipedia a cone is:

“(…) a three-dimensional geometric shape that tapers smoothly from a flat base (frequently, though not necessarily, circular) to a point called the apex or vertex.

A cone is formed by a set of line segments, half-lines, or lines connecting a common point, the apex, to all of the points on a base that is in a plane that does not contain the apex. Depending on the author, the base may be restricted to be a circle, any one-dimensional quadratic form in the plane, any closed one-dimensional figure, or any of the above plus all the enclosed points. If the enclosed points are included in the base, the cone is a solid object; otherwise it is a two-dimensional object in three-dimensional space. In the case of a solid object, the boundary formed by these lines or partial lines is called the lateral surface; if the lateral surface is unbounded, it is a conical surface.” (Wikipedia, 2020).

Why are you telling me that, you might wonder? Well, it will make sense within a second when we switch from basic geometry to basic human anatomy.

The Art of Grapping and punching

In martial arts, self-defense techniques (like Krav Maga and others) or law enforcement you have to grab i.e. forearms, which are more like cone- shaped instead of a cylinder….

That’s where a strong grip comes into play and how you can transfer your efforts in the gym to “the real deal”. You apply what you have strengthened “in the trenches”.

The more you train with thicker grip implements, like the cone grip, the more motor units you might recruit. This will inevitably lead to improved overall upper body strength and useful skills, both in you specific sport and profession.

It’s not like simple “show off” muscles, but something you can really use!

If you want to know more about grip training you can read my article about the “Gripedo”.

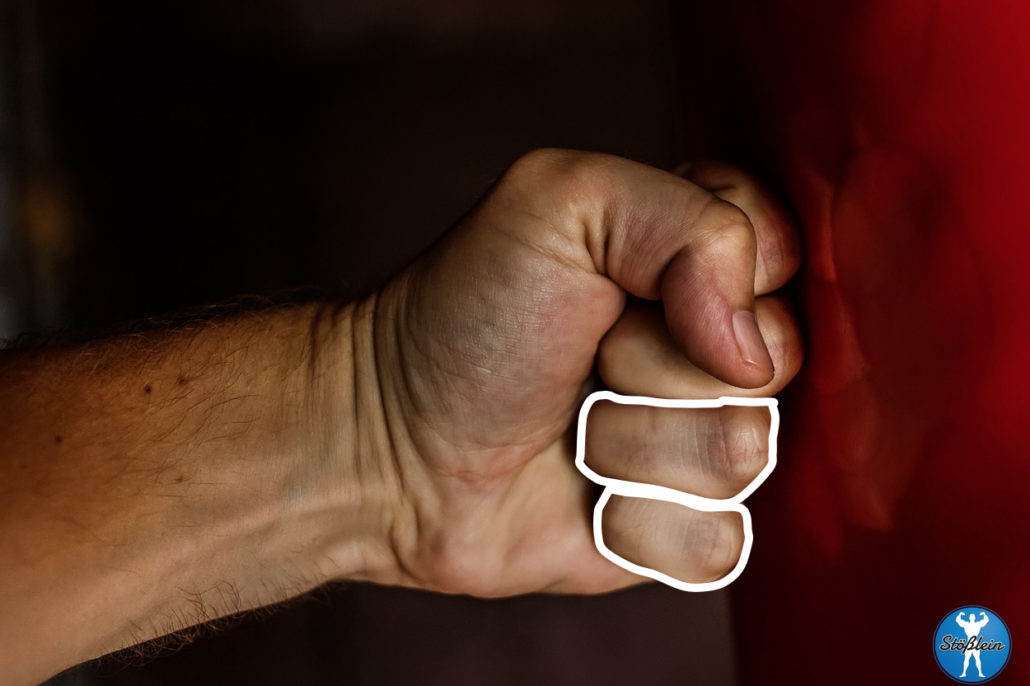
So, what does all that have to do with cone-shaped grip devices? Well, if you have ever been engaged in any kind of martial arts and/or self-defense technique you might have realized that if you clench a fist and strike an object, the toughest knuckles are the first two ones.

The  third finger and the pinky (see image below) are commonly the lesser reliable “strike-buddies”.

The third (ring finger) and the pinky are commonly week(er) fingers for gripping and/or striking with a clenched fist. Source, own picture.

Why is that so? We will see in a minute.

First, think of another similar phenomenon…if you have ever trained with Barbells/Dumbbells or any kind of grips that are above 30 mm of diameter (50mm and above) you probably will have realized, that you most likely develop the most gripping power (fist clenched) with the thumb, the index- and the middle-finger.

The ring finger and the pinky can be closed too, but are normally not that involved in gripping (a cylinder-shaped) object, like the rest of the hand!

According to my anecdotal experience with myself and lots of patients and clients that might be due to our “cone-shaped” hand.

Cylinder-shaped grip-tools in different sizes, source: own picture.

If you take a look at the comparison of the cylinder-shaped gripping tools and the cone grips the difference is obvious. Whereas it’s troublesome to create a “gripping-equilibrium” in all five fingers using cylindric tools,  it is much easier using the cone-shaped ones.

The extra load, respectively the stress you put on the hand muscles should also create a greater training effect, especially on the abductor digiti minimi. “

It is  “(…) a skeletal muscle situated on the ulnar border of the palm of the hand. It forms the ulnar border of the palm and its spindle-like shape defines the hypothenar eminence of the palm together with the skin, connective tissue, and fat surrounding it. Its main function is to pull the little finger away from the other fingers (i.e. abduction).” (Wikipedia, 2020).

Well, aductor digiti minimi? Sounds funny…but I have never heard of that one, you might think. Is it important? Well…if you ask me, when it comes to gripping strength, it definitely is. That’s just simply the fact as in gripping strength the more equals the better!

Ad/ductor derives from Latin ad = after, to; and Latin ducere = to draw/pull sth. (Becher et al., 1995).

Digiti derives from Latin digitus = Finger (Becher et al., 1995).

Minimi comes from Latin minor = smaller (Becher et al., 1995).

To set the record straight: gripping strength is an absolute necessity when it comes to professional strength training/coaching, no matter which sport or profession you’re into!

It clearly isn’t limited to arm wrestling or gripping competitions!

Unfortunately the development of proper grip strength is still one of the most overlooked and neglected issues -not only- in sports performance. At least to my experience.

How to usefully implement Cone Grips?

The next question is how you can usefully integrate these cone-shaped training devices in your workout.

Well, as always, the answer to that question is: “it depends”. It clearly depends on your training age and the experience you have gained in the gym.

Let’s say you’re a novice lifter with training age of zero years. Would it be useful to jump start training with thick implements? I’d say: no.

You wouldn’t lend a novice driver your new Porsche GT 2 RS, would you?  The answer to this rhetorical question is obvious: “hell no!”.

Same with special thick gripping implements like the Cone Grips (affiliate link)! But, if you have a training age of, let’s says, two continuous years with regular strength training (4 times a week) you should absolutely consider using them.

By the way, your training age has nothing to do with your biological age! You can be comparatively young (i.e. 18 years of biological age) and have a higher training age as someone being (biological) age 50.

Training age depends on how many consecutive years you have spent with PROPER training!

According to this, an 18- year- old with 3 years of consecutive, structured and regular strength training can have a higher training age as the 50 year old who just started working out!

The variation in grip diameter will bring more progression and stimuli to your workout and your body! This will result in new neuromuscular adaptations, increased strength and hypertrophy!

Just switch from your regular 30mm diameter grips to the cone grips. They can be implemented on almost any regular Barbell and/or Dumbbell, gripping devices, machines etc.

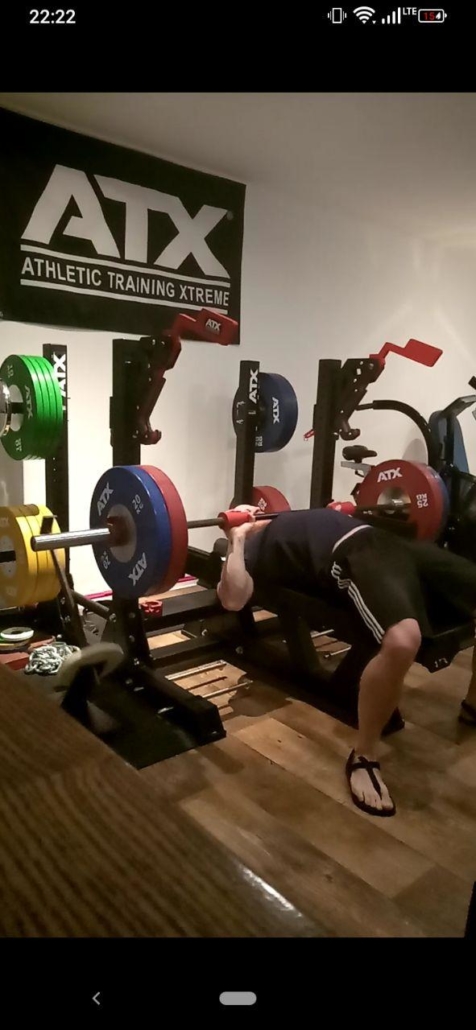
In this picture i.e. you can see me in my Personal-Training Gym, using the Cone Grips while performing bench press, using other special tools, like my BambooBench®, weight releasers and a monolift.

Me useing the Cone Grips while performing bench press, source: own picture.

By the way, look at the time of the screenshot (22:22) that’s synchronicity! If you’d like to know more about this interesting phenomenon I highly recommend you reading the works of Carl Gustav Jung (affiliate link)!

Back to the thick implements, respectively the Cone Grips. If you start using them don’t be surprised that you might experience a slight drop off in your weights. As you cannot close your hands as much as you were used to, gripping starts get harder.

That’s clearly not a disadvantage but you should be aware of that obvious fact.

Which exercises are predestinated for using Cone Grips (affiliate link)? Well, essentially all exercises!

I’d highly recommend using these special grip tools on all kinds of arm exercises, for different variations of pull ups, bench press and other back exercises.

You just have to ask yourself whether it’s an exercise you want to improve your grip strength on or if you don’t want your grip to be the “limiting factor”. That might be the case on deadlifts for example.

If you want to challenge yourself by deadlifting with a thicker grip you’re good to go. But if you want to emphasize other muscles more, skip the Cone Grips for that workout. Just start playing with the use of them.

Cone Grips are a useful variation in a structured periodical and goal oriented training regime.

If you’re unsure how to usefully integrate such devices in your workout, please feel free to contact me for a professional Strength-Coach/Personal-Training (Online)-Consultation :

info@bernd-stoesslein.de

Conclusion ConeGrip

Let’s draw the mandatory conclusion of the implementation of Cone Grips (affiliate link). To make a long story short: should you use them? From my point of view that’s a “Hell yes!”. But you should take in consideration when and how!

Being a novice lifter you should start with basic stuff to gain lifting experience. After having gained a proper lifting age of two years or above, I think you’re good to go using the Cone Grips!

There are lots of thick grip implement tools which have a cylindrical shape. The Cone Grips are superior in design, as the cone-shape structure has a higher transfer effect to sports and professions (i.e. law enforcement, first responders etc.).

In addition to that, a cylinder will give you the chance to further recruit muscle fibers in your fingers and hand, like the aductor digiti minimi.

Something with the surname “minor” doesn’t seem to be something being of consideration when it comes to strength training but in terms of grip strength every muscle fiber counts!

But of course Cone Grips are not the “magic pill”. If you fail to proper plan your workouts you plan to fail, as the saying goes!

Or, if you put it this way, if you don’t know how to design your training program for your specific needs the Cone Grips won’t do the “magic” for you either!

Cone Grips are an investment in your strength training, they are affordable, portable, versatile and easy to use and clean.

Conclusion: go and get a pair!

© HP Bernd Stößlein, Master of Business Administration in Sportmanagement.

If you liked this article please share it with your friends, subscribe to the newsletter and the blog.

If you like to book a professional online/offline consultation please feel free to contact me: info@bernd-stoesslein.de


Literature

Cone, source: https://en.wikipedia.org/wiki/Cone, date of access: 6.7.20.

Abductor digiti minimi muscle of hand, source: https://en.wikipedia.org/wiki/Abductor_digiti_minimi_muscle_of_hand, date of access: 6.7.20.
Lateinisch-griechischer Wortschatz in der Medizin, S. 3
Lateinisch-griechischer Wortschatz in der Medizin, S. 31.

Lateinisch-griechischer Wortschatz in der Medizin, S. 69.

Lateinisch-griechischer Wortschatz in der Medizin, S. 137.  

Gripedo [Advertisment/] is a great Strength-Training tool for developing some serious grip strength. It’s easy to attach to standard Olympic (or other) Barbells (with 50mm holding ficture) or can be used “old school” in a bucket of sand!

This “cool tool” offers you a bunch of different grip options for developing some gorilla-like grip. Learn how to use it properly and how to integrate it in your training routine to get the most bang for your buck!

If you wish to master hand strength [Affiliate Link] think about getting your hands on this tool and soon you won’t need to use a wrench anymore 😉 From wrist rolling over single handed deadlifts or rowing exercises.

 This tool will definitely bring you back some flair of the “good old gym days” where people used to blacksmith their forearms with real steel and not only their thumbs by posting gym selfies and tapping on their smartphones 😉

The story behind the Gripedo

The word „Gripedo“ comes from grip + torpedo = Gripedo, which is also illustrated by its cool shape.

It was invented by Emre Bardakci, a Biomedical Engineer with 25 years of strength training and experience in martial arts.  The original concept of this tool has its roots in rehabilitation but, over time, grew to a strength training product with a huge variety of usage.

Emre told me that he obtained Bachelors and Masters in Biomedical Engineering with some focus in Biomechanics.  He pursued these degrees due to his passion for Martial Arts, Strength training and human movement.  He has a black belt in judo, won a Silver Medal in Sambo US Open 2017 and trained martial artist from different backgrounds. So he seems to walk the walk instead of only talking the talk!

Emre furthermore says:

Gripedo in the sand application is mainly a concentric exercise and is great for conditioning the hands, wrists, forearms and the arm musculature as a whole.  This helps athletes with having strong, long lasting that does not easily fatigue during competition.  The sand application can also be a great rehabilitation, active recovery, injury prevention tool.   With the use of the pin, the Gripedo can be attached to pull up bars, sleds, loading pins which enable the user to do pull ups, deadlifts, goblet squats, etc.”

Having talked to Emre multiple times about his tool  he moreover told me the following:

The Gripedo sand application is great for building strength and endurance.  The Gripedo slips on to an olympic barbell for wrist/forearm rolls and supination/pronation exercises while gripping the ball handle.  Gripedo is a functional strength tool to train the hand, forearm and finger strength with many uses.”

Why should you have a stone crushing strong grip

Ok, when it comes to grip training, for me it’s more than just an optical thing. Of course any kind of proportional hypertrophy/muscular body looks nice and strong. But big muscles aren’t necessarily strong. Strange, but this is still confusing people although it’s absolute basic knowledge how to distinguish between strength and muscular hypertrophy.

This article is not intended to discuss this topic in detail. Only a very short reminder:

Strength is mainly a neuronal adaptation (intramuscular). It involves your so-called Central Nervous System (CNS). Muscular Hypertrophy describes how to enlarge muscle fibers in size.

To make a complex story short: Strength is how much weight you can lift (high training-intensity, low training )volume, whereas muscular hypertrophy is more about Bodybuilding kind of stuff (moderate intensity, more volume). 

Takeaway for Training: If you want to increase muscle size try to lower the weights more slowly. If your goal is to increase strength, focus on the lifting part of the weights.

So, mastering hand strength is probably a “dying art”. Ask yourself, when was the last time you saw someone doing forearm training in a commercial gym? Yes, there might occur some wrist curling here and there, but that’s probably all.

In times of Social Media where a good training seems to only happen if you post it on some account it’s no wonder that good old-fashioned training is no longer “appropriate”. In Gyms where you aren’t allowed to make sounds while e.g. performing heavy deadlifts or behind the neck press there won’t be some buckets full of sand to get a skull crushing grip 😉

But let’s move back to blacksmithing your forearms. Having a strong grip is crucial as the hand(muscle) is the angle point where the load of the force (weight) is transferred to the upper extremities.

You might have heard the proverb that a “chain is only as strong as its parts”. So if your arms are strong or your back might be strong, you might be able to lift a certain amount of weight, but if your hands open you’ll lose contact!

No problem, I’m just using lifting straps you might think. But I encourage you to think again! Lifting straps might work if you perform lift specific exercises, like deadlifts. But if you want to create a transfer effect to a special sports, e.g. any kind of Martial Arts, Climbing or Law-Enforcement (where you need to grip enemies, guns etc.) you simply cannot use straps.

What you need is a strong grip! Same for “normal” people in a non-sport related environment. Think of your grandma trying to grab a suitcase on her own, opening a jar or whatsoever. Being self-sufficient is important, if you might live alone.

If you have clients (even beginners or elderly people), encourage them to (re)master their hand strength. According to studies, hand strength is a more accurate predictor for overall health than your systolic blood pressure![1] It’s therefore seems to provide clues to heart health[2]

How to measure hand strength

Ok, you might think. Cool, but how do I measure hand strength and what do I do with the data? Simply compare it to other days and look for improvement. Yes, but you can also use it as kind of predictor whether to train or not!

For measuring grip strength you can simply use a hand dynamometer [Affiliate link].You might get some on Amazon but you can look for better ones in medical supply stores as well.

Here’s how to use it:

  • Measure your strength by gripping the Dynamometer (after a couple of rest days)
  • Do it in the morning after getting up
  • Grip it (standing) with your dominant hand (opposite food slightly forward)
  • Raise your hand overhead and while lowering the arm squeeze the Dynamometer as hard as you can
  • Repeat with your other hand
  • Record your results

I learned this simple technique by my mentor Charles R. Poliquin who was also known as “Strength Sensei” (R.I.P.)

He also recommended me to test every morning, at least when you’re planning to work out that day.

If your grip strength is below 2kg or more (compared to the day before) your CNS hasn’t recovered properly and you should better take another day off.  If your grip increased e.g. over 4kg Charles said you’re good to go, maybe even for a maximum effort day and some PRs.

So keep this simple trick in mind how to determine if someone’s ready to lift heavy or better to take another day off. It’s not only about how hard you work but how smart!

The muscles of the forearms

So, when it comes to training of the forearms, what actually can you train here? Let’s have a closer look:

Your forearms consist of basically two different compartments. The flexor- and the extensor compartment. A more medical term would be a ventral/anterior and dorsal/posterior compartment.

That means, if you want to flex your forearm you use the anterior/ventral compartment and if you extend your forearms it’s the posterior/dorsal compartment which does the job.

In order to move muscles, they must be innervated, by nerves. This is important as an improper movement function in muscles may be an issue of blocked/crushed nerves!

Therefore it’s good to know which nerve gives electrical power to which compartment. Just keep in mind, that’s basically the so called radial nerve, which innervates the posterior compartment  and the median and ulnar nerves, which innervate the anterior part.

Why do I tell you these things of basic anatomy? Because I think it’s important to know which muscles work, cause if you have a deeper knowledge of their function you can design a well-structured and efficient training program, using grip tools like the Gripedo [Advertisment Link] instead of just doing “some grip work”.

I know, that this might be a bit “boring” but let’s see how things are working in your forearms before we move on to some exercises you can perform for grip training.

If you’re completely new to strength training related anatomy I recommend you to buy this book [Affiliate Link] and learn some new stuff.

Forearm Flexor compartments

The flexor compartment of your forearms consists of the following muscles (including their function). I’m not including all of them, just the most important ones to give you a little overview.

Again, if you want to have a deeper knowledge, take a look at “Strength Training Anatomy”[Affiliate Link].

  • M. pronator teres –> pronates the forearm and does some light elbow flexion
  • M. carpi radialis –> flexes the forearm, flexes the wrist and does abduction
  • M. flexor carpi ulnaris –>flexes the wrist and does a strong adduction

Forearm Extensor compartements

If you can flex the forearms – of course – you have some antagonists which perform the job of extension. Let’s have a short basically overview here as well:

  • M. brachioradialis –> does elbow joint flexion
  • M. extensor carpi radialis longus –> performs a dorsiflexion and abduction
  • M. extensor carpi radialis brevis  –> same as above
  • M. extensor  carpi ulnaris –> does wrist extension and adduction
  • M. ancaneus –> lets you extend your elbow

Now we have taken a look at some (very basic) human anatomy of the forearms. If we know now how things are moving, we can figure out some workout routines, to make them stronger!

Gridpo excercises – Which & How to integrate ?

The “Original Gripedo” comes as 4 inch diameter Ball Handle. For those of you who (like we Germans) stick to the metric system, it’s a about 5,5 cm in diameter for the pipe (so it will fit perfectly on any 50 mm Barbells) and about 12 cm in diameter, for the Ball on the edge.

In this video [Advertisment/Werbung] I do show you some basic exercises with the Gripedo. Of course there are lots of other possibilities. Just be creative!

You can use the Gripedo e.g. as a “wrist roller”. This is a classic way of training forearms, but this time with a 5,5 cm diameter! Performing this “re-gripped” version of a classic exercise is very versatile, as you can roll up and down. Furthermore you can easily adjust the weight, e.g. using even tiny friction plates for the “perfect” weight.

Furthermore you can perform a variation of a single handed Deadlift. Just attach some weight (preferably loading pins) with a carabiner to your Gripedo and…give it a grip!

If you don’t have access to loading pins go and perform it on a cable tower. There you can also use the Gripedo for single-handed rowing exercises, triceps extensions and even more. Use your phantasy!

Are there any downsides of the Gripedo?

To be honest – in my point of view – there are no real “downsides”. But as a coach I do always look for things to improve. Having used the Gripedo for quite some time now I do really like it and include it in almost each of my own workouts. Just 10 minutes of additional grip work after the main part is done.

The only thing I’d improve would be some kind of knurling on the tool which would enable you a “better” grip. Cause if you have sweaty hands you might slip from the rather smooth surface of the Gripedo.

Of course you might use some chalk but I wouldn’t be a smart strength coach if I didn’t come up with some new and “out of the box” ideas to solve this problem (which isn’t a real problem, cause there are no problems).

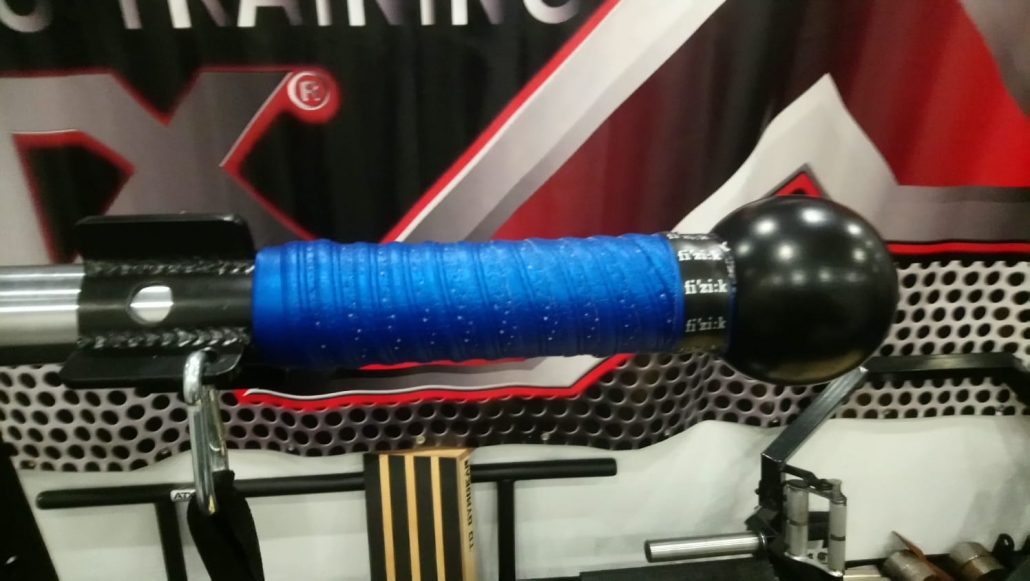
A client of mine is a hardcore biking (cycling) professional. He told me about some special bike tapes, which are used for racing bikes. If you get one of these (available in different colors) you can wrap it around your Gripedo and, voilà!  (see picture)

If you want to know how to handle a tennis elbow or a golfer’s elbow, read my article.

Unfortunately the Gripedo doesn’t come with a rope to attach some weights on. But it does include a large splint which you can use to attach lifting straps on to. With this cool possibility you can use the Gripedo for vertical gripping and even attach it to any kind of cable.

Conclusion

When it comes to grip strength there’s only one possibility in my opinion: “a strong grip is never a weakness”, and there is no such thing as a too strong grip!

But there is certainly such a thing as a too weak grip. Improving gripping power not only improves probably all your upper body lifts, but also seems to be an indicator for overall health, cardiovascular risks and even general mortally!

Measuring grip strength with a dynamometer can be integrated in your morning routine, not only for coaches in order to determine how good your CNS has recovered from a hard workout and if you’re ready to lift again or better take another day off.

In my point of view the Gripedo is a tool to invest in. It’s durable and probably will last you a whole life long.  Although it doesn’t include a rope or carabiner it comes with a splint which adds a nice bunch of further exercises to perform with, e.g. cable rows, vertical grip training or variations of one handed deadlifts!

If you like this article please share it with your friends and leave a comment.


Author: Bernd Stoesslein, MBA in Sportsmanagement, “Heilpraktiker” (naturopath/complementary and alternative medicine practitioner).

Literature:

[1] https://www.bmj.com/content/361/bmj.k1651

[2]  https://www.health.harvard.edu/blog/grip-strength-may-provide-clues-to-heart-health-201505198022


Disclaimer:  This article is for information purpose only! Additionally, it should be clear that I’m not making any guarantees or promises regarding the accuracy, reliability or completeness of the information presented. Before you start this training program consult a physician/medical doctor etc. The information provided in this blog post is not intended to be a substitute for professional medical advice, diagnosis or treatment.  Never disregard professional medical advice, or delay in seeking it, because of something you have read on this website.  You should understand that when you’re exercise with the Gripedo, there is the possibility of physical injury. If you engage in this exercise or exercise program, you agree that you do so at your own risk, are voluntarily participating in these activities, assume all risk of injury to yourself, and agree to release and discharge Bernd Stoesslein Personal Training from any and all claims or causes of action. Bernd Stoesslein is not responsible for any damage that might occure using a Gripedo!

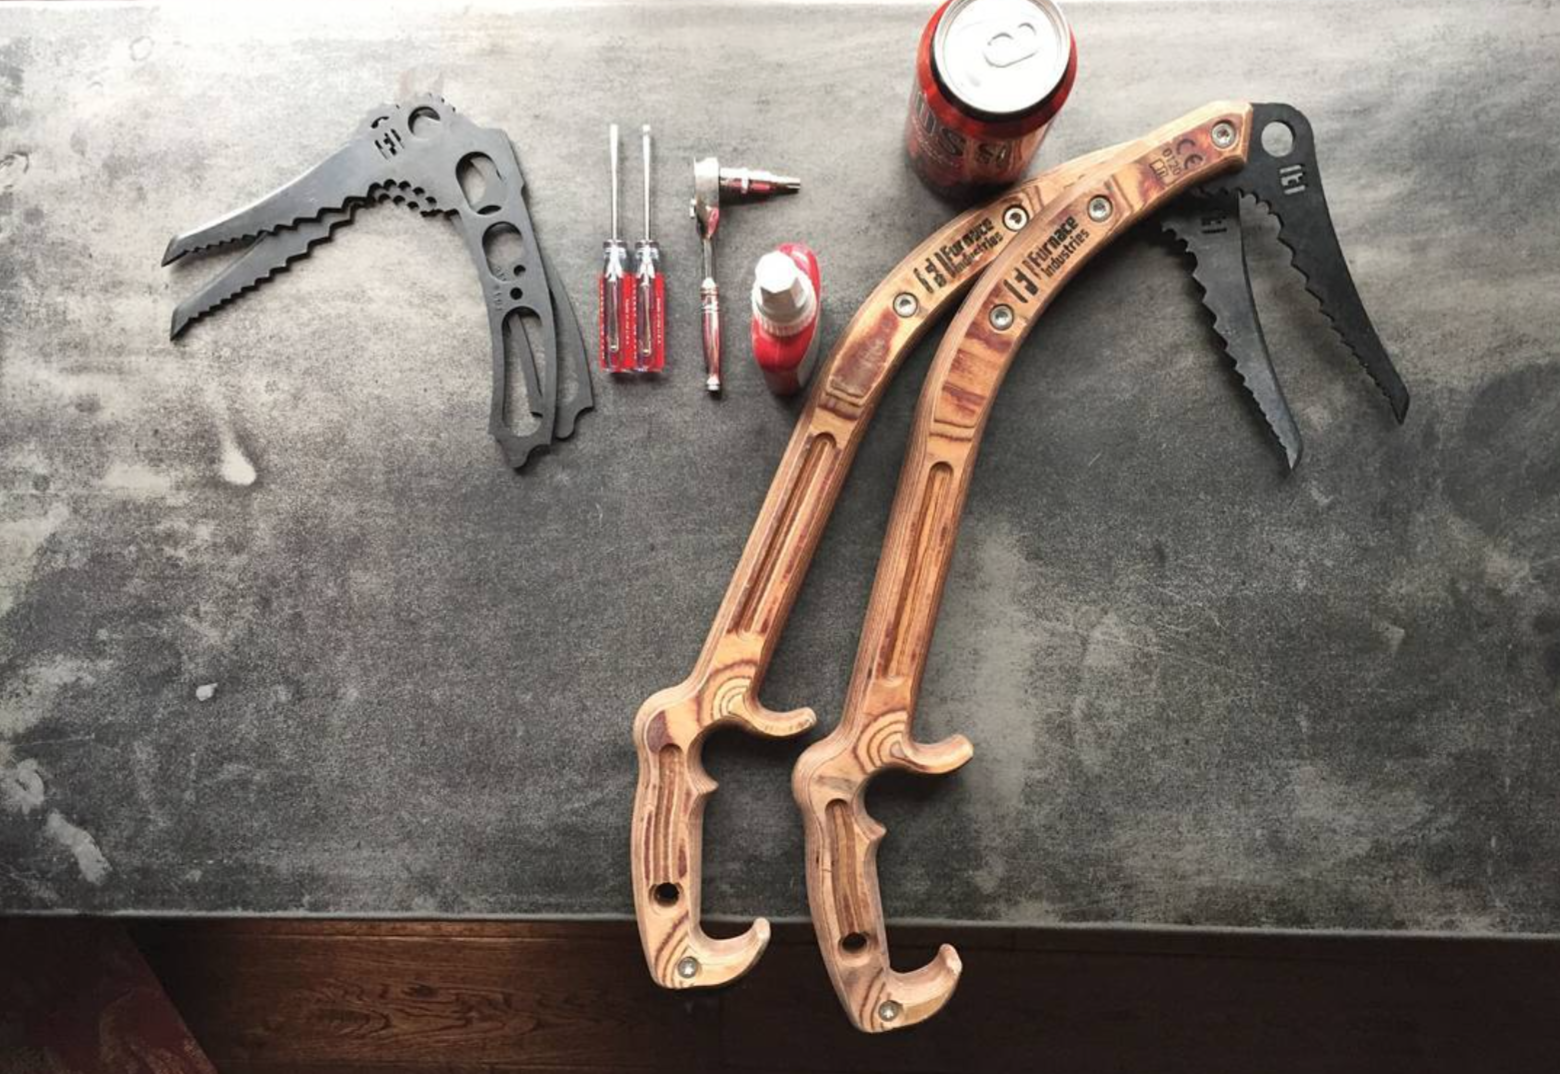
DRY ICE Tools (DIT)– are made by Furnace Industries. With these gadgets your workout is cool as ice and really nice! Originally these tools were invented to give you the most realistic possible experience of ice climbing indoors, without having to use sharp and harmful ice picks.

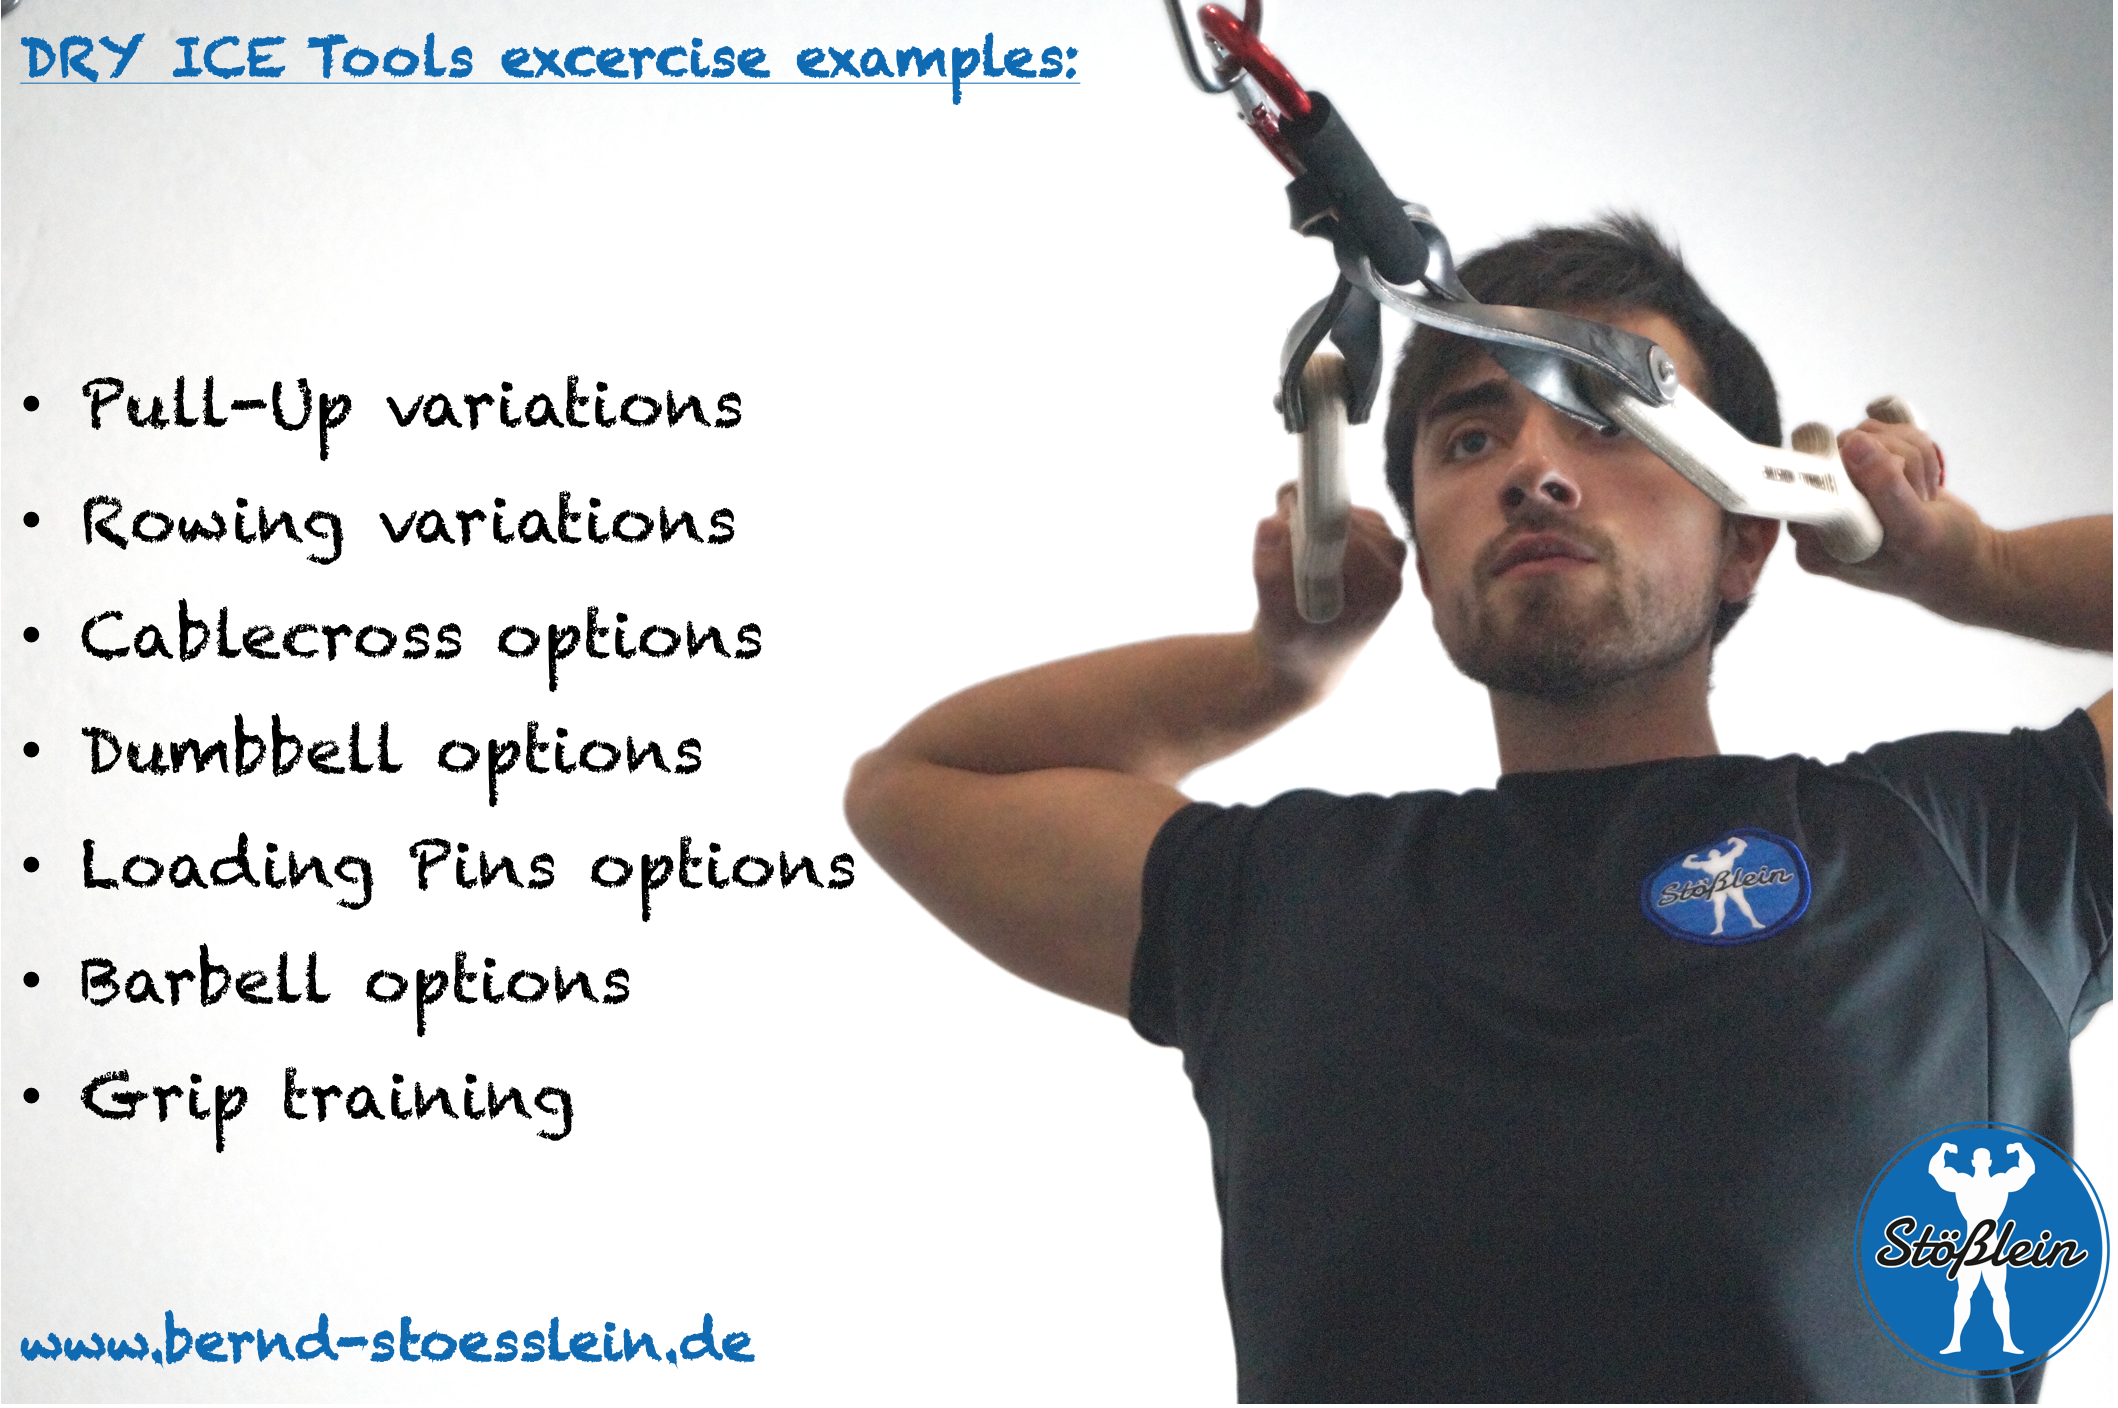
But, guess what, you can also use them in a regular (non climbing) gym for a great variety of different exercises. In this article you’ll learn more in depth about these cool tools and I’ll show you how you can integrate them into your training, not only to boost your climbing (grip)strength but also overall power using them in a structured sport specific training circle.

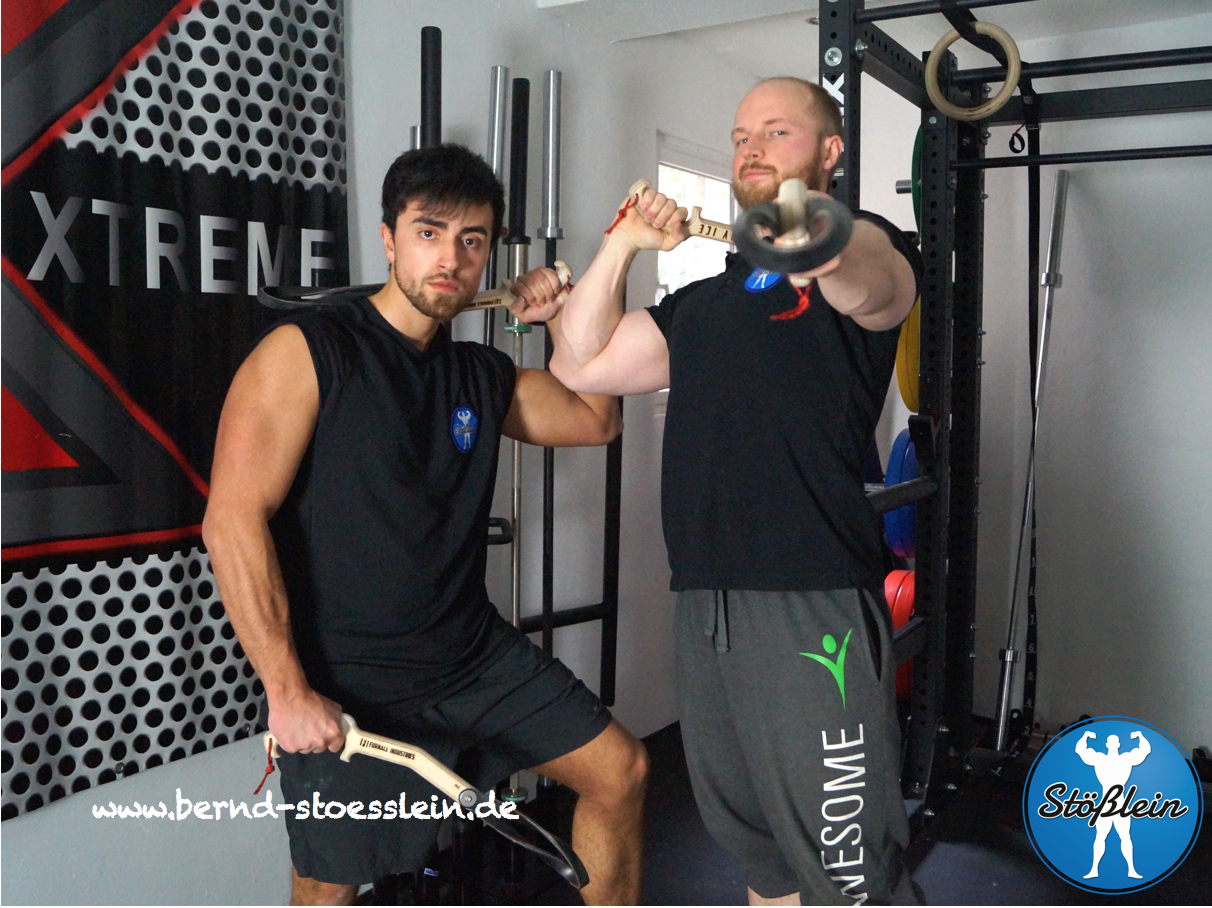
The article is also featuring actor, friend and my client Luciano Christobal Gassman Ferrada, presenting the DRY ICE Tools! You can also see Luciano in the 2018 Movie “The Happy Prince” by Rupert Evert, starring Colin Firth and Emily Watson!

DRY ICE Tools – Hooked on a Feeling

Hooked on a Feeling is a Song by “Blue Swede” (which was used in Guardians of the Galaxy btw) but it also describes the experience of using DRY ICE Tools as a training tool.

Bildschirmfoto 2018-03-23 um 19.54.47

Special thanks to Ben Carlson from Furnace Industries for supporting me with a pair of test DRY ICE Tools!

“If you only have a hammer, everything looks like a nail” (Proverb)

So, if you only use the same training tools you will eventually stick to training plateaus. Integrating new tools with different angles and grip positions will not only increase your (grip)strength but also enrich your workout enabling constant progression and bursting plateaus.

What makes the DRY ICE Tools really “cool tools” (#ItsAlwaysIceSeason) is the fact that they’re almost made entirely out of wood (except for the rubber lashes and their attachments).

When I first saw these tools I immediately wanted to have them – although I’m not a climber – as useful add on for my Personal -Training Gym. The first question that struck my mind was: “will they withstand heavy training, like e.g. weighted pull-ups?”.

Don’t worry, they will!! According to the manufacturer the strength of the DRY ICE Tools and ICICLES (a smaller version for kids) was tested at the Westmoreland Mechanical Testing & Research, Inc. of Youngstown, PA.

After the destruction of several tools, the average results showed that the tools can hold 3.8 Kn, or about 860lbs (390kg). So, even if you’d be a 150kg Athlete made out of pure rock hard solid muscle mass you could add (theoretically) another 240kg ;). Considering this the DIT are almost indestructible!

But even in the unlikely case that something might happen you could replace the rubber lashes without having to buy a complete new pair of DIT.

DRY ICE Tools – Sport specific training vs. transfer to every day life 

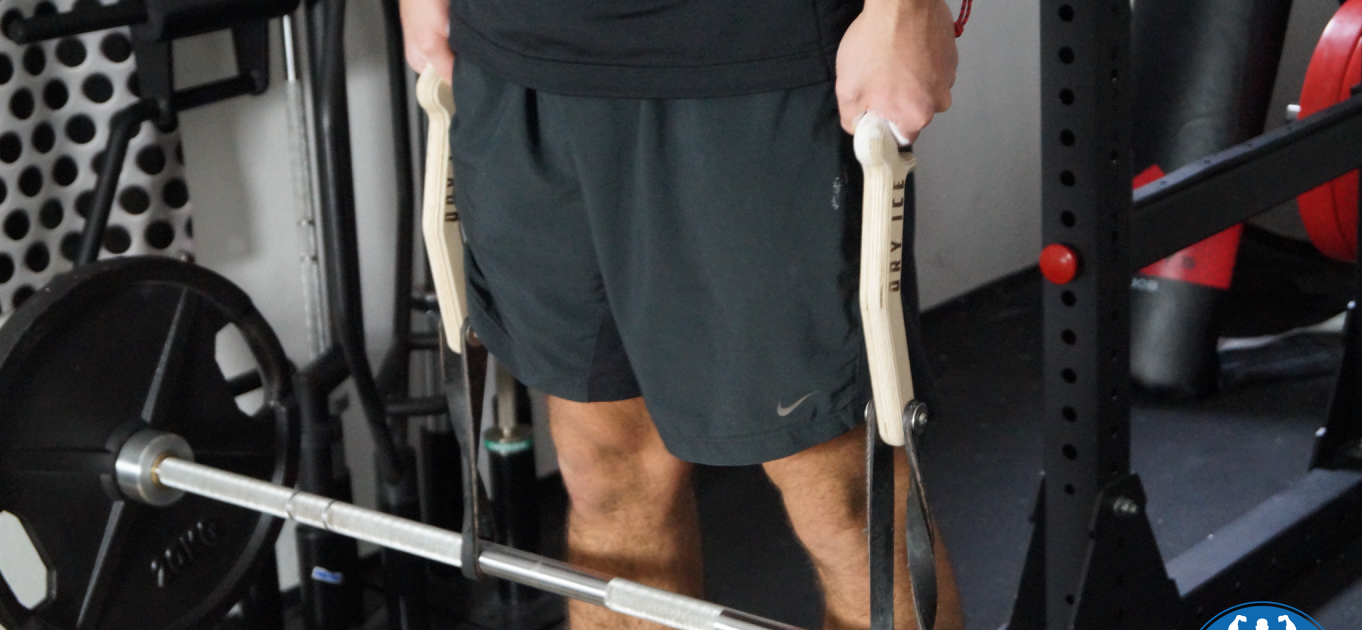
The Grip Edge (see photos) gives you a kind of “cutting edge” as – in some exercises – it’ll reduce the need of gripping power but enhances your pulling movements, recruiting more muscle fibers in your back.

This is an advantage if you want to focus on developing your back muscles and not your grip strength which gives the DIT a wider application and not only a sport specific use for ice climbers.

The Edge enables a smooth pulling movement while also reducing the possibility of slipping out of the grip (due to the edge). This works incredibly well for all kinds of pulling movements, like cable pull downs, cable rows, face pulls and so on.

Due to the design of the grips your wrist won’t stay in a neutral position but in a slightly abducted (ulnar flexion) positon (see photo).

Bildschirmfoto 2018-03-25 um 01.20.41

Some might argue now that the DIT’s grips are too ergonomically designed which eliminates a transfer to every day life. But keep in mind that they were originally designed to resemble their outdoor counterparts (see photo).

Bildschirmfoto 2018-03-21 um 01.01.05

Furthermore, pulling with a slight ulnar flexion shouldn’t be a problem as it also resembles every day life’s movements, like e.g. using a computer keyboard or driving in a car, grabbing the steering wheel.

Of course these might be one-sided movements, but these are not the only ones you should do…you should always train to keep your overall body structural balance in mind!

Would be the same as only doing chest training & biceps curls – to look cool in the club – while holding your drink and neglecting the other muscles 😉

DRY ICE Tools – A Training, best served cold

If you’re looking for a cool and of course structured way of integrating the DIT into your workout follow my “cold as ice circle” either to just get in shape and/or to improve your sport (climbing) specific performance, it’s always ice season 😉

Cold as Ice Circle

To get a rock hard body follow the instructions. The following plan is an example for climbers who want to integrate their DIT for a sport specific training:

Bildschirmfoto 2018-03-25 um 10.13.13

Time under Tension (TUT) = certain amount of time you perform the exercise, e.g. 4010 means: you lower the weight 4 seconds, you remain 0 seconds in the turning point and you lift it within 1 second, again 0 seconds at the top of the exercise, and so on.

The letters, stand for the different exercises, all performed in a row, at the end of one circle you rest for 120 Seconds and start again. Repeat this circle for 4-6 times. The abbreviation for “as many as possible” is “AMAP”. The letter “X” in the TUT stands for “eXplosive” (yet  controlled), BB = Barbell, DB = Dumbbell

Upper Body DRY ICE CIRCLE for STRENGTH

A – 45° DB (BAMBOO BENCH®) Bench Press; 6-8 reps; TUT: 4010, Rest: 0 Sec.

B – DIT Pull-Ups, neutral position; 6-8 reps; TUT: 4010, Rest: 0 Sec.

C – Standing Barbell behind the neck press; 4-6 reps; TUT: 4010; Rest; 0 Sec.

D-DIT-Facepulls; 8-10 reps; TUT: 3110; Rest: 0 Sec.
E – DIT Crunches; AMAP, TUT: 2010; Rest: 0 Sec.

REST: 120 Seconds.

Lower Body DRY ICE CIRCLE for STRENGTH

A – DIT Cable Lunges: 6-8 reps; TUT: 5010; Rest: 0 Sec.

B – 45° Back extension, Reverse Snatch Grip with BB: 8-12 reps; TUT: 30X0; Rest: 0Sec.

C – Reverse Hyper: 10-12 reps; TUT: 20X0; Rest: 0 Sec. (Alternative Exercise: Glute Ham Raise)

D – DIT-Deadlifts: 5 reps; TUT: 4010; Rest: 0 Sec

E – DIT Abs

DRY ICE TOOLS – Additional Exercises 

Of course the above Strength Circles are only an example of useful exercises you can perform by using the DRY ICE Tools. To give you more input I’ll show you some more stuff you can either use with a Cablecross or different Bars/Loading Pins.

All these exercises are just a small view of what you can do. So just think of other stuff an be creative. Let me know about the exercises you came up with in the comments!

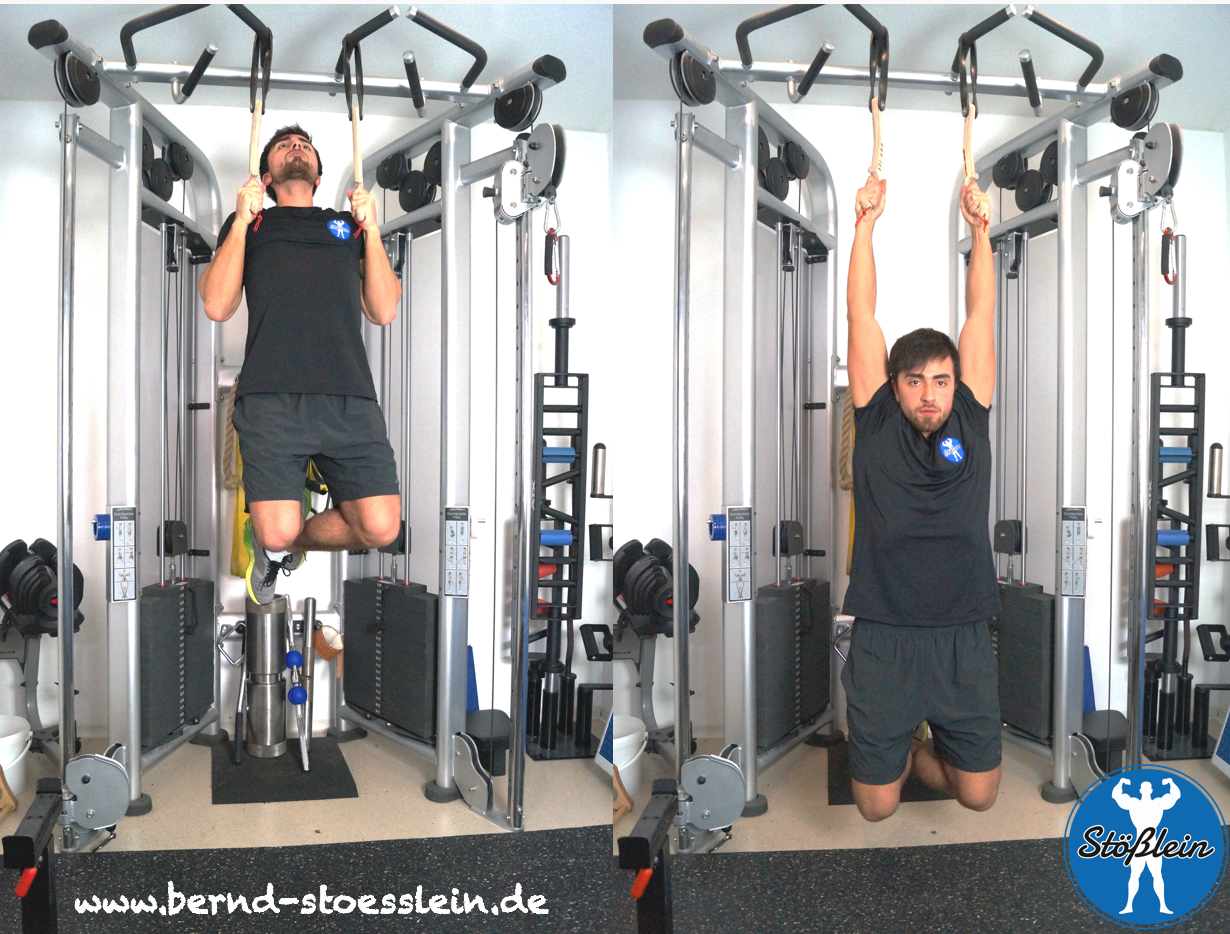
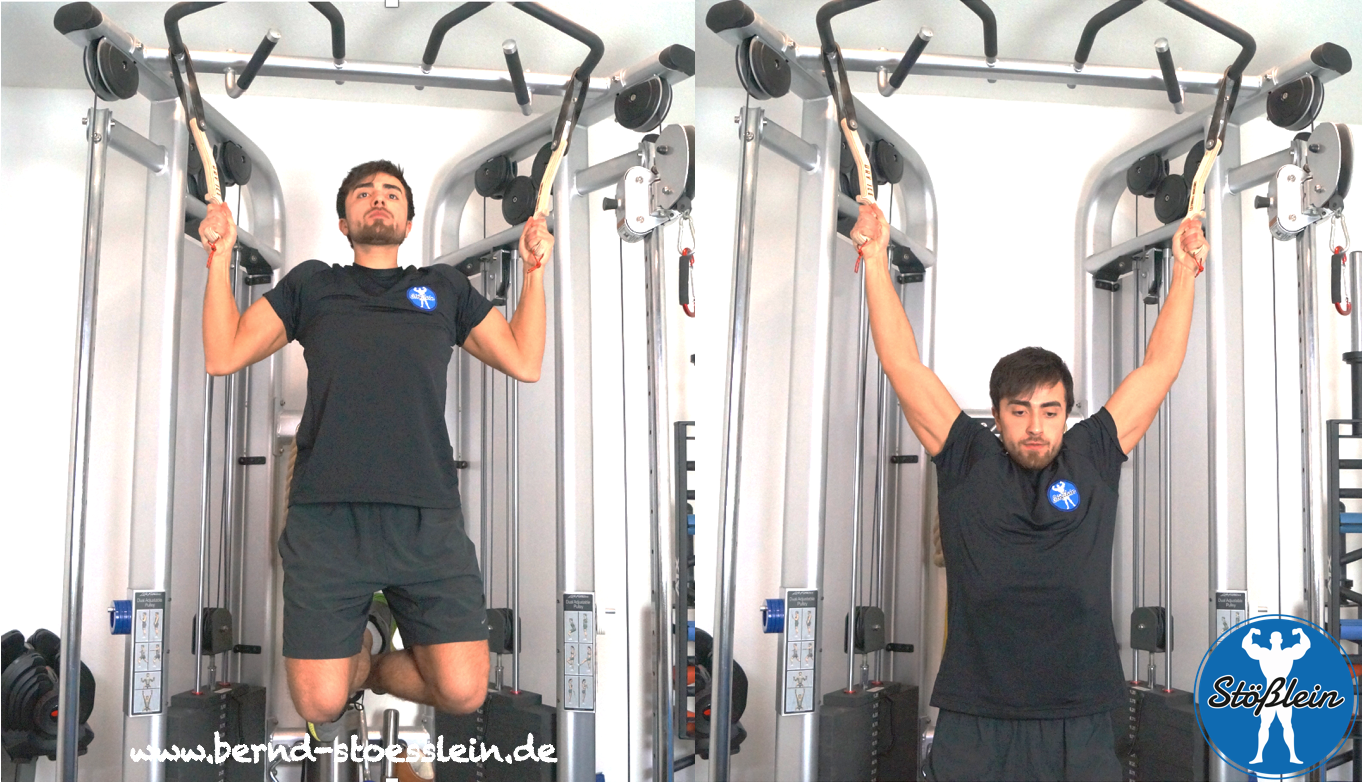
DRY ICE Pull-Up Variations:

Bildschirmfoto 2018-03-25 um 10.20.44

Narrow Pull-Ups, neutral grip position, shoulder with grip.

Bildschirmfoto 2018-03-25 um 10.25.57

Wide Pull-Ups variation.

Of course these are not the only Pull-Up variations! Just like other exercises with the DIT these could also be performed single handed.

DRY ICE Rowing Variations:

Bildschirmfoto 2018-03-25 um 10.31.46

Face-Pulls. Keep your shoulder blades puled back during the whole exercise. Perform an internal rotation with your hands and keep this position! pull back (using a cablecross), hands over shoulders, elbows above the ears.

Bildschirmfoto 2018-03-25 um 10.38.51

Seated rows in a squatting position. Can either performed double- or single handed! The squat position is superior to common seated positions, e.g. normally done on a Lat Pulldown.

Bildschirmfoto 2018-03-25 um 10.46.10

Narrow (shoulder with) grip, performed in a power rack, using a Barbell. Place the DIT in the Barbell and rack the BB. You can use different widths to do your rows. Be creative.

Bildschirmfoto 2018-03-25 um 10.51.34

DIT deficit rows, using a Barbell. Just like normal Barbell Rows, but with a changed strength curve due to lower center of mass.

DRY ICE Grip Training/Shoulder/Shrugs

Bildschirmfoto 2018-03-25 um 11.03.29

Shrugs performed with the DIT. Much more convenient. The grips enable you a more comfortable way of working your traps. 

Conclusion 

As the famous song by Foreigner goes: “(…) You’re as cold as ice, you’re willing to sacrifice (…)” I’d add not “our love” but: “to gain more strength” 😉 That motto fits perfectly for the DRY ICE Tools!

These cool tools are absolutely worth the investment of only 119€ (sold as pair)! You can apply them for their originally designed purpose (simulating Ice Climbing indoors) and also take them to your (non climbing) gym!

The DIY are easily stored in pretty much every Gym Bag and are almost indestructible! What gives them a really nice touch is that they’re made out of wood. So you don’t have to touch some plastic stuff but nice smooth wood!

Bildschirmfoto 2018-03-25 um 11.08.41

Don’t finish when you’re tired. Finish when you’re done! Strength is never a weakness!

My recommendation as an internationally well known strength coach is to get a pair of these to put more special tools into your “tool box”. There’s even a smaller version (e.g. for smaller hands or kids) called “Icicles”.

Get your hands on a pair of these. You’ll find them on: https://furnace-industries.com

If you want to get professionally coached (on- or offline) please drop a mail:

 Info@bernd-stoesslein.de

www.bernd-stoesslein.de

 Subscribe to the free blog/newsletter and follow me on Facebook & Instagram for more content.


Fat Gripz sind – wie der Name schon sagt – „fette“ Griffe. Natürlich handelt es sich hierbei nicht um ein fetttriefendes Schmalzbrot, das dir die Hände einfettet, sondern um Griffe aus einem Gummimaterial.

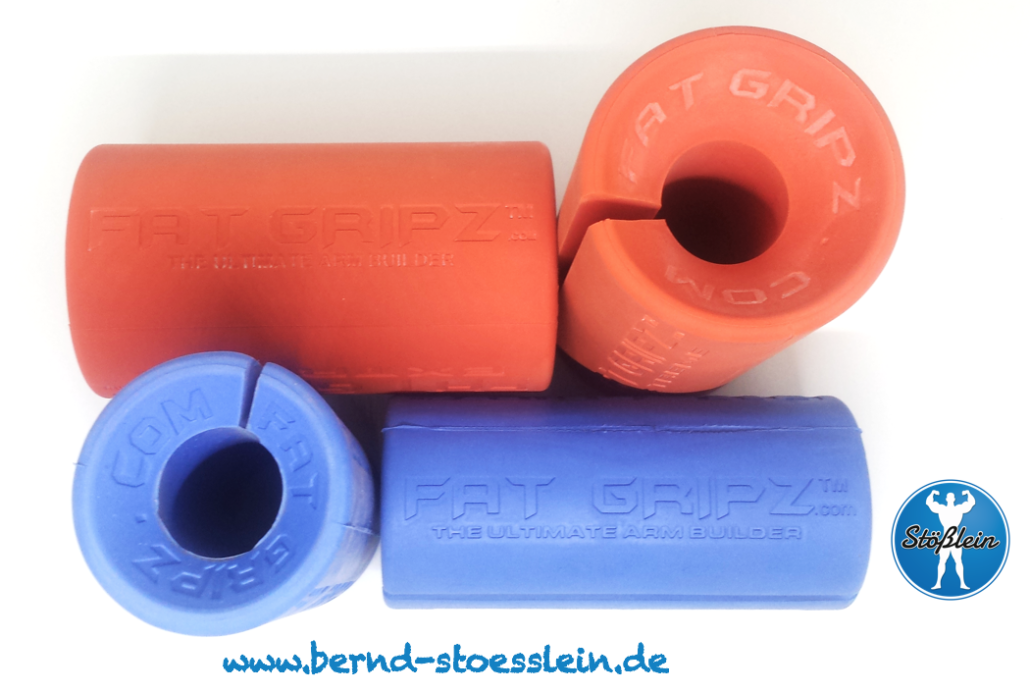
Fat Gripz dienen dazu, den Durchmesser von Hanteln oder Griffen zu vergrößern, um so deine Griffkraft zu stärken, die oftmals das schwächste „Glied“ der „(Muskel)Kette“ ist.

Neben den gleichnamigen Griffpaaren stellt die Firma „Fat Gripz“ übrigens auch die, m.M.n. besten sogenannten „eccentric hooks“ bzw. „weight releasers“ her.

Erfahre, wie du beide Trainingstools sinnvoll in dein eigenes Training einbauen kannst, um auch sogenannte „Überlebensfasern“ zu aktivieren.

Fat Gripz oder –  Was ist eigentlich Griffkraft? 

Eine Kette ist bekanntlich nur so stark, wie ihr schwächstes Glied. Genau dieses berühmt berüchtigte schwächste Glied ist deine Griffkraft.

Es geht also die Fähigkeit, einen Gegenstand so fest und lange zusammendrücken zu können, ohne dass sich deine Finger öffnen und dir der Gegenstand/das Gewicht aus den Händen gleitet.

Die Griffkraft ist der Punkt an dem deine Oberkörperkraft auf die zu bewegende Last/das Gewicht übertragen wird. Im Krafttraining ist das in der Regel eine Hantel oder ein anderes Gewicht, das bewegt werden soll/muss.

Wenn du keine starke Griffkraft hast, bedeutet das, dass deine Griffkraft schwach ist. Und wenn du schwach bist, dann sind deine Gelenke instabil(er). Instabile(re). Gelenke können dann beispielsweise zu einem höheren Verletzungsrisiko führen.

Außerdem lässt dich ein schwacher Händedruck nicht gerade souverän erscheinen, denn wer schüttelt schon gerne einem „feuchten Handtuch“ die Hand…

Bildschirmfoto 2017-09-27 um 10.03.11

Fat Gripz – Die Vorteile eines dickeren Griffes 

Wenn es um Muskelfaserrekrutierung geht, dann heißt das: Wie viele der Muskelfasern können von deinem Gehirn angesteuert bzw. hier von den beteiligten Unterarmmuskeln „benutzt“ werden, Dann entscheidet die Dicke/der Durchmesser des Griffes bzw. der Hantel darüber, wie viele Muskelfasern rekrutiert werden.

Je dicker der Griff, desto schwieriger ist es, ihn zu umgreifen.

Wenn du also stärker werden willst, dann solltest du neben deinem absoluten Gewicht auf der Hantel (und anderen wichtigen Trainingsvariablen, wie z.B. Tempo, Pause, Zeit unter Spannung usw.) also auch den Durchmesser variieren.

Mehr darüber, warum konstante Verbesserung bzw. „Kaizen“ wichtig ist, erfährst du in diesem Artikel.

Auf diese Weise gestaltest du dein Training abwechslungsreich und sorgst dafür, Plateaus zu verhindern bzw. zu überwinden.

Durch den Einsatz von Fat Gripz sollten nicht nur deine Unterarmmuskeln stärker werden, sondern auch deine Leistungen bei anderen elementaren Übungen wie z.B. beim Bankdrücken, Kreuzheben oder bei Klimmzügen verbessern.

Anmerkung: Ich empfehle den Einsatz von Fat Gripz – der Sinnhaftigkeit halber – grundsätzlich nur bei Übungen des Oberkörpers, also z.B. Bankdrücken, Klimmzügen, Bizeps-, Trizeps- und/oder Überkopfdrückübungen. Ich empfehle ihn nicht bei Kniebeugen oder Kreuzheben, da die Dicke des Griffs die Leistung z.B. beim Kreuzheben signifikant reduzieren kann.

Trainierst du aber deine Griffkraft mit Fat Gripz in den Oberkörperübungen und steigerst dadurch deine Griffkraft, wird sich dies dann positiv auf z.B. deine Leistung im Kreuzheben (insbesondere ohne Zugschlaufen ohne Fat Gripz) bemerkbar steigern.

Denn dann ist dein Griff stärker, und du kannst auch ohne Unterstützungen (Zugschlaufen) mehr Gewicht heben,und das ohne dass dir die Hände aufgehen.

Weitere Vorteile, die den Einsatz von Fat Gripz sinnvoll machen, sind z.B. Sportarten in denen viel gegriffen werden muss. Hierzu zählen viele Kampfsportarten (z.B. Judo, Ringen), aber z.B. auch Leichtathletik oder auch so etwas Exotisches wie der Schwertkampf sowie auch die Arbeit beim Militär und/oder der Polizei.

Kurzum: Immer wenn dir ein starker Griff Vorteile bringt, sollte er möglichst nicht versagen! Stärke also deine Griffkraft durch entsprechendes Training!

Fat Gripz – Wie du den Durchmesser von Griffen ganz einfach vergrößerst 

In den meisten Fitnessstudios sind die Griffe/Hanteln etwa 29/30mm dick. Dies ist das ist die Standardbreite beispielswiese bei Langhanteln oder konventionelle Kurzhanteln.

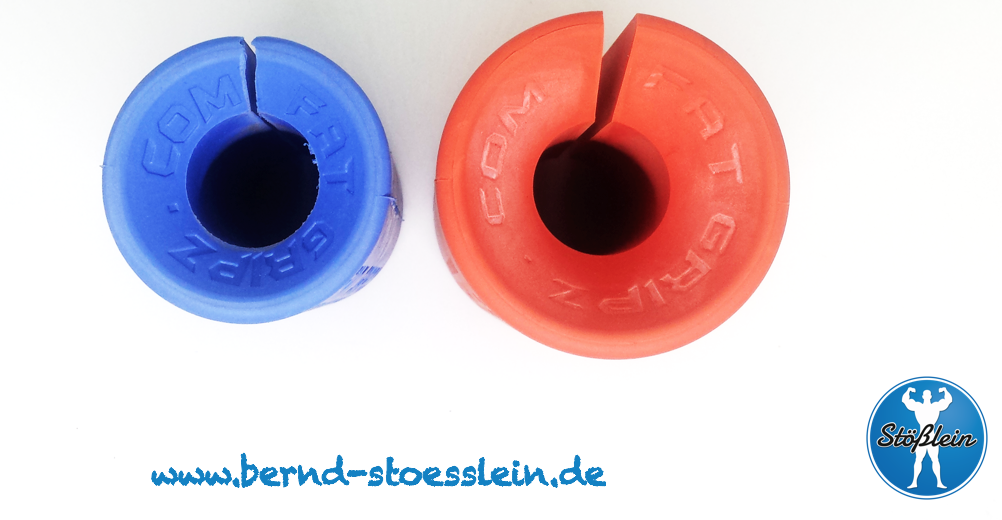
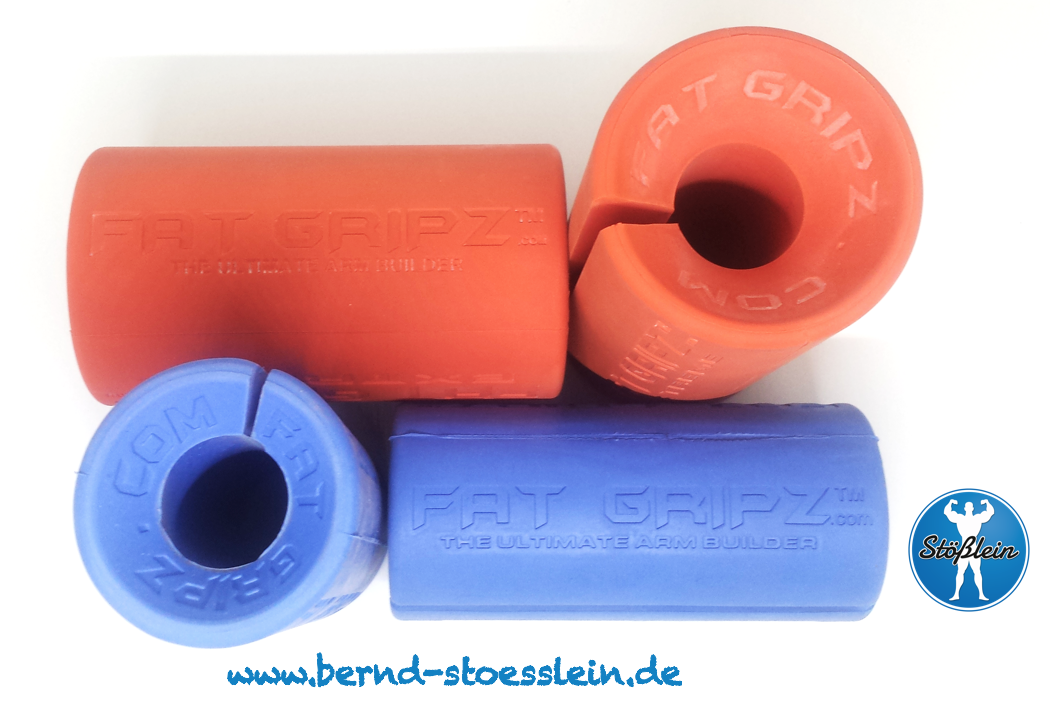
Fat Gripz hingegen gibt es in zwei unterschiedlichen Varianten: blaue, mit einem Durchmesser von Ø 5,7cm und die größeren roten (Fat Gripz Extreme), mit einem Durchmesser von (Ø 7cm).

Bildschirmfoto 2017-09-27 um 09.56.39

Beide Fat Gripz Varianten können ganz einfach so gut wie an jede Langhantel, Kurzhantel und/oder Griffe von Maschinen angebracht werden.

Somit stellen sie eine günstige und portable Alternative für all diejenigen dar, deren Studio nicht über ausreichend Equipment wie verschieden dicke Stangen verfügt.

Mehr Beispiele für Einsatzbereiche findest du in meinen Artikeln:

Fat Gripz – Eccentric Hooks/Weight Releasers 

Obwohl Fat Gripz mittlerweile in der „Fitness-Szene“ recht bekannt sind, wissen wohl die wenigsten, dass dieses Unternehmen neben seinen gleichnamigen Griffpaaren auch noch die besten mir bekannten sogenannten „eccentric hooks“ bzw. „weight releasers“ baut. (siehe Bilder)


Bildschirmfoto 2017-09-27 um 00.11.44

Eine weitere Meinung zu besagten Trainings-„tools“ kannst du dir in diesem Video mit Mark Bell und Charles R. Poliquin ansehen (ab etwa Minute 17).

Exzentrisches Training bedeutet, dass vermehrt die „negative“ Phase einer Übungsausführung in den Fokus rückt.

Um mehr Kraft und Muskeldickenwachstum (Hypertrophie = Querschnitt des Muskels wächst) zu stimulieren, kann die Zeit (TUT = „time under tension“; Englisch für: Zeit unter Spannung) verlängert werden.

Mehr Details zu diesen Trainingsparametern bzw. Fachausdrücken erfährst du in meinem Artikel: Gym-Deutsch; Deutsch-Gym: Was bedeutet was im Fitnessstudio? Teil II 

Eccentric hooks bzw. „weight releasers“ können benutzt werden, um sogenannte „Überlebensfasern“ zu trainieren, d.h. es werden auch diejenigen (Muskel)Fasern trainiert, die dein Körper nur in absoluten Extremsituationen (meist nur, wenn es um Leben oder Tot geht) aktivieren würde.

Bildschirmfoto 2017-09-27 um 10.00.12

Darstellung am Beispiel der Kniebeuge:

Beim Kniebeugen werden die „hooks“ links und rechts an die Langhantel gehängt. Gehen wir davon aus, dein Maximalgewicht (= 1 R.M. = „repetition maximum“) läge bei 100kg bei einer kompletten „sauberen“ Wiederholung, einmal komplett runter und wieder komplett hoch.

Mit „weight releasern“ bzw. „eccentric hooks“ ist es nun möglich, die „negative“ (exzentrische) Phase der Kniebeuge – also das Herablassen des Gewichtes – zu überladen. So kannst du also statt 100kg die negative Phase mit bspw. 120kg oder mehr absolvieren (und dies dank der „hooks“ an denen die Zusatzgewichte angebracht werden).

In der untersten Position der Kniebeuge haben die „hooks“ dann Bodenkontakt, klappen eigenständig von der Stange weg, und du kannst die „Positive“ (= Aufwärtsbewegung) der Kniebeuge mit 100kg absolvieren. (siehe Bilder/Video)

In der „negativen“ Phase der Übung hättest du also – bei diesem Beispiel – satte 20% mehr Gewicht bewegt als bei deinem derzeitiges Maximum (= 1 R.M.) und zwar ohne Angst haben zu müssen, du würdest die Langhanteln nicht mehr hochbringen und sie würde dich unten zerquetschen. Du konntest aber trotzdem die Fasern „ansteuern“, die nur in solchen „Überleben oder Tod-Situationen“ zur Hilfe gezogen werden würden.  

 Die beschriebenen „eccentric hooks“ von Fat Gripz werden allerdings nur in Kanada auf Wunsch gefertigt und sind nur dort erhältlich.

Natürlich ist uns im BSPT-Studio in Kulmbach kein Weg zu weit, um unseren Kunden die allerbesten „tools“ zur Verfügung zu stellen. Deshalb haben wir uns seit kurzem ein Paar dieser fantastischen „Werkzeuge“ zugelegt.

Wenn du eccentric hooks als Investition z.B. für dein eigenes Homegym siehst und diese bestellen möchtest, dann kannst du dies hier tun: http://www.fatgripz.ca/gear/pr_hooks.php  Mit freundlicher Empfehlung von Bernd Stößlein.

Eine kurze Demonstration am Beispiel des Langhantel Flachbankdrückens (unter Verwendung meiner BAMBOO BENCH® und eines ATX® Monolifts) sieht du im folgenden Video:

Fazit – Kraft ist niemals eine Schwäche

Vom allgemeinen Einsatz im Alltag bis hin zum speziellen Gebrauch im Profisport ist oftmals ein starker Griff über Sieg oder Niederlage entscheidend,.

Leider werden die Unterarme – wenn überhaupt – nur sehr stiefmütterlich trainiert. Ab und an sieht man mal jemanden ein paar Unterarmcurls machen, und das war es dann aber auch schon.

Da du die Muskeln deiner Unterarme nicht nur im Training, sondern eben auch im Alltag ständig gebrauchst, vertragen diese auch generell ein eher hohes Trainingsvolumen bzw. eine höhere Trainingsfrequenz als andere Körperpartien. Dies kann jedoch von Mensch zu Mensch variieren.

Fat Gripz sind eine sinnvolle und kostengünstige Investition in deine „Trainingswerkzeuge“. Denn wenn du nur einen Hammer hast, sieht nun mal alles aus wie ein Nagel!

Eccentric Hooks bzw. „weight releasers“ sind ebenfalls ein wertvolles Investment, um dich vor allem physisch stärker und auch muskulöser werden zu lassen.

Weight Releasers Fat Gripz

Allerdings sind diese eher fortgeschrittenen Trainierenden zu empfehlen, die bereits über ein ausreichendes „Trainingsalter“ verfügen und schon viele andere Trainingsvariationen erfolgreich in ihr Training integriert haben.

Somit reihen sich “weight releasers” zusammen mit z.B. Isometronics (Anschlagskontraktionen) in die Reihe der sehr effizienten aber auch sehr weit fortgeschrittenen Trainingsmethoden ein.

Neben Den Fat Gripz gibt es übrigens auch sogenannte Globe Gripz. Wie du diese sinnvoll z.B. bei einem sogenannten “Tennis-oder Golferellenbogen” einsetzen kannst erfährst du hier.

Wenn dir dieser Artikel gefallen hat, dann abonniere den Fitness-Blog und den Newsletter und hinterlasse einen Kommentar!


Ursache von Schmerzen innerhalb und außerhalb des Ellenbogens sind oft mechanische Über- und/oder Fehlbelastungen beim Krafttraining oder anderen Sportarten, die ein wiederholtes Bewegungsmuster erfordern.

Wie die Namen schon sagen, klassisch, beim Tennis- oder Golfspielen. Aber auch kontinuierliche Krafteinwirkung bzw. mechanische Belastungen auf deinen Sehnen und Bandstrukturen im Ellenbogengelenk (Armflexor), z.B. bedingt durch Krafttraining in bestimmten Winkelstellungen/Griffpositionen.

Je nach Sportart werden einem bestimmte Bewegungsmuster häufiger abverlangt und verursachen demnach (bei unsachgemäßer Handhabung) unterschiedlich starke und auftretende „Abnutzungserscheinungen“.

In diesem Artikel erfährst du was Ursachen für „Tennis- und Golferellenbogen“ (englisch auch oft als „lifter’s elbow“ bezeichnet) sind, wie diese durch das Krafttraining entstehen können und wie du ihnen vorbeugen kannst oder auch bereits vorhandene Beschwerden wieder lindern, womöglich sogar beseitigen kannst.

An english version of this article can be found here.

Der „Tennisellenbogen“

Je nach Literatur versteht man unter einem „Tennisellenbogen“ oder „Tennisarm“ eine sogenannte Epicondylitis humeri radialis. Also eine schmerzhafte Reizung der Sehnenansätze von Muskeln des Unterarms.

Bei einem Tennisarm treten meist die folgenden Beschwerden auf:

  • Außenseite des Ellenbogens schmerzt, oft ausstrahlend Richtung Handgelenk
  • Schmerz tritt auch bei Druck auf
  • Beim ballen einer Faust treten Schmerzen auf
  • Beim greifen von Gegenständen mit gestrecktem Arm treten Schmerzen auf
  • Schmerzen, wenn das Handgelenk überstreckt wird

Der „Golferarm“

Unter einem „Golfer- oder Werferarm“ spricht man, je nach Literatur, wenn es sich um eine Epicondylitis humeri ulnaris handelt. Hauptunterschied zum „Tennisarm“ ist, dass die Schmerzen in der Regel an der Innenseite des Ellenbogens auftreten.

Beide Entzündungen klingen dabei von der Bezeichnung fast gleich, lediglich das letzte Wort lautet anders. Nämlich Epicondylitis humeri RADIALIS („Tennisarm“) vs. Epicondylitis humeri ULNARIS (Golferarm).

Kompliziertes einfach erklärt:

In der Anatomie bedeutet radialis = die Speiche betreffend. Dein Unterarm besteht aus den zwei Knochen, Elle und Speiche. Demnach bedeutet ulnaris = die Elle betreffend.

So kannst du „Tennis- und Golferarm“ auch ganz einfach unterscheiden. Je nachdem ob sich deine Schmerzen an der Außenseite (radial, von Radius = die Speiche) befinden oder ob die Schmerzen eher an der Ellenbogeninnenseite (ulnar, von Ulna = Elle) befinden.

Im Vergleich tritt der „Tennisarm“ weit häufiger auf, als der „Golferarm“. Das Wort humeri kommst übrigens von Humerus = Oberarmknochen.

Warum rund besser als gerade ist

Beim Krafttraining können Schmerzen im Ellenbogen- oder auch Handgelenk oft dadurch entstehen, dass, bedingt durch eine Langhantel/Klimmzugstange etc., die Griffpositionen extrem supiniert sind, was nicht selten durch die hinzukommende Last der Gewichtssteigerung noch verstärkt wird.

Wenn du dein Wissen über die verschiedenen Griffpositionen auffrischen oder erweitern willst, dann kannst du dies in meinem Artikel: Gym-Deutsch; Deutsch-Gym Teil I tun.

Des Weiteren kann auch ein Abknicken der Handgelenke, z.B. beim Bankdrücken dafür sorgen, dass dein Neuromuskuläres System an Kraft in den Handgelenken und den Händen (Griffkraft) verliert.

Wenn du die zu bewegende Last (in der Regel Langhantel oder andere Griffe) nicht mit einer Faust umgreifen kannst, bedeutet dies vermehrte mechanische Belastung(en) auf den größeren Gelenken. Im Falle der Arme, auf dem Ellenbogen- und Schultergelenk.

Meist sind Hantelgriffe aber gerade und geben dir nicht die Möglichkeit sie wie eine Faust, also rund, zu umgreifen. Doch auch hierfür gibt es eine einfache, aber geniale Lösung:Die GLOBE GRIPZ™.

GLOBE GRIPZ™ – das ultimative workout tool?

DSC02657

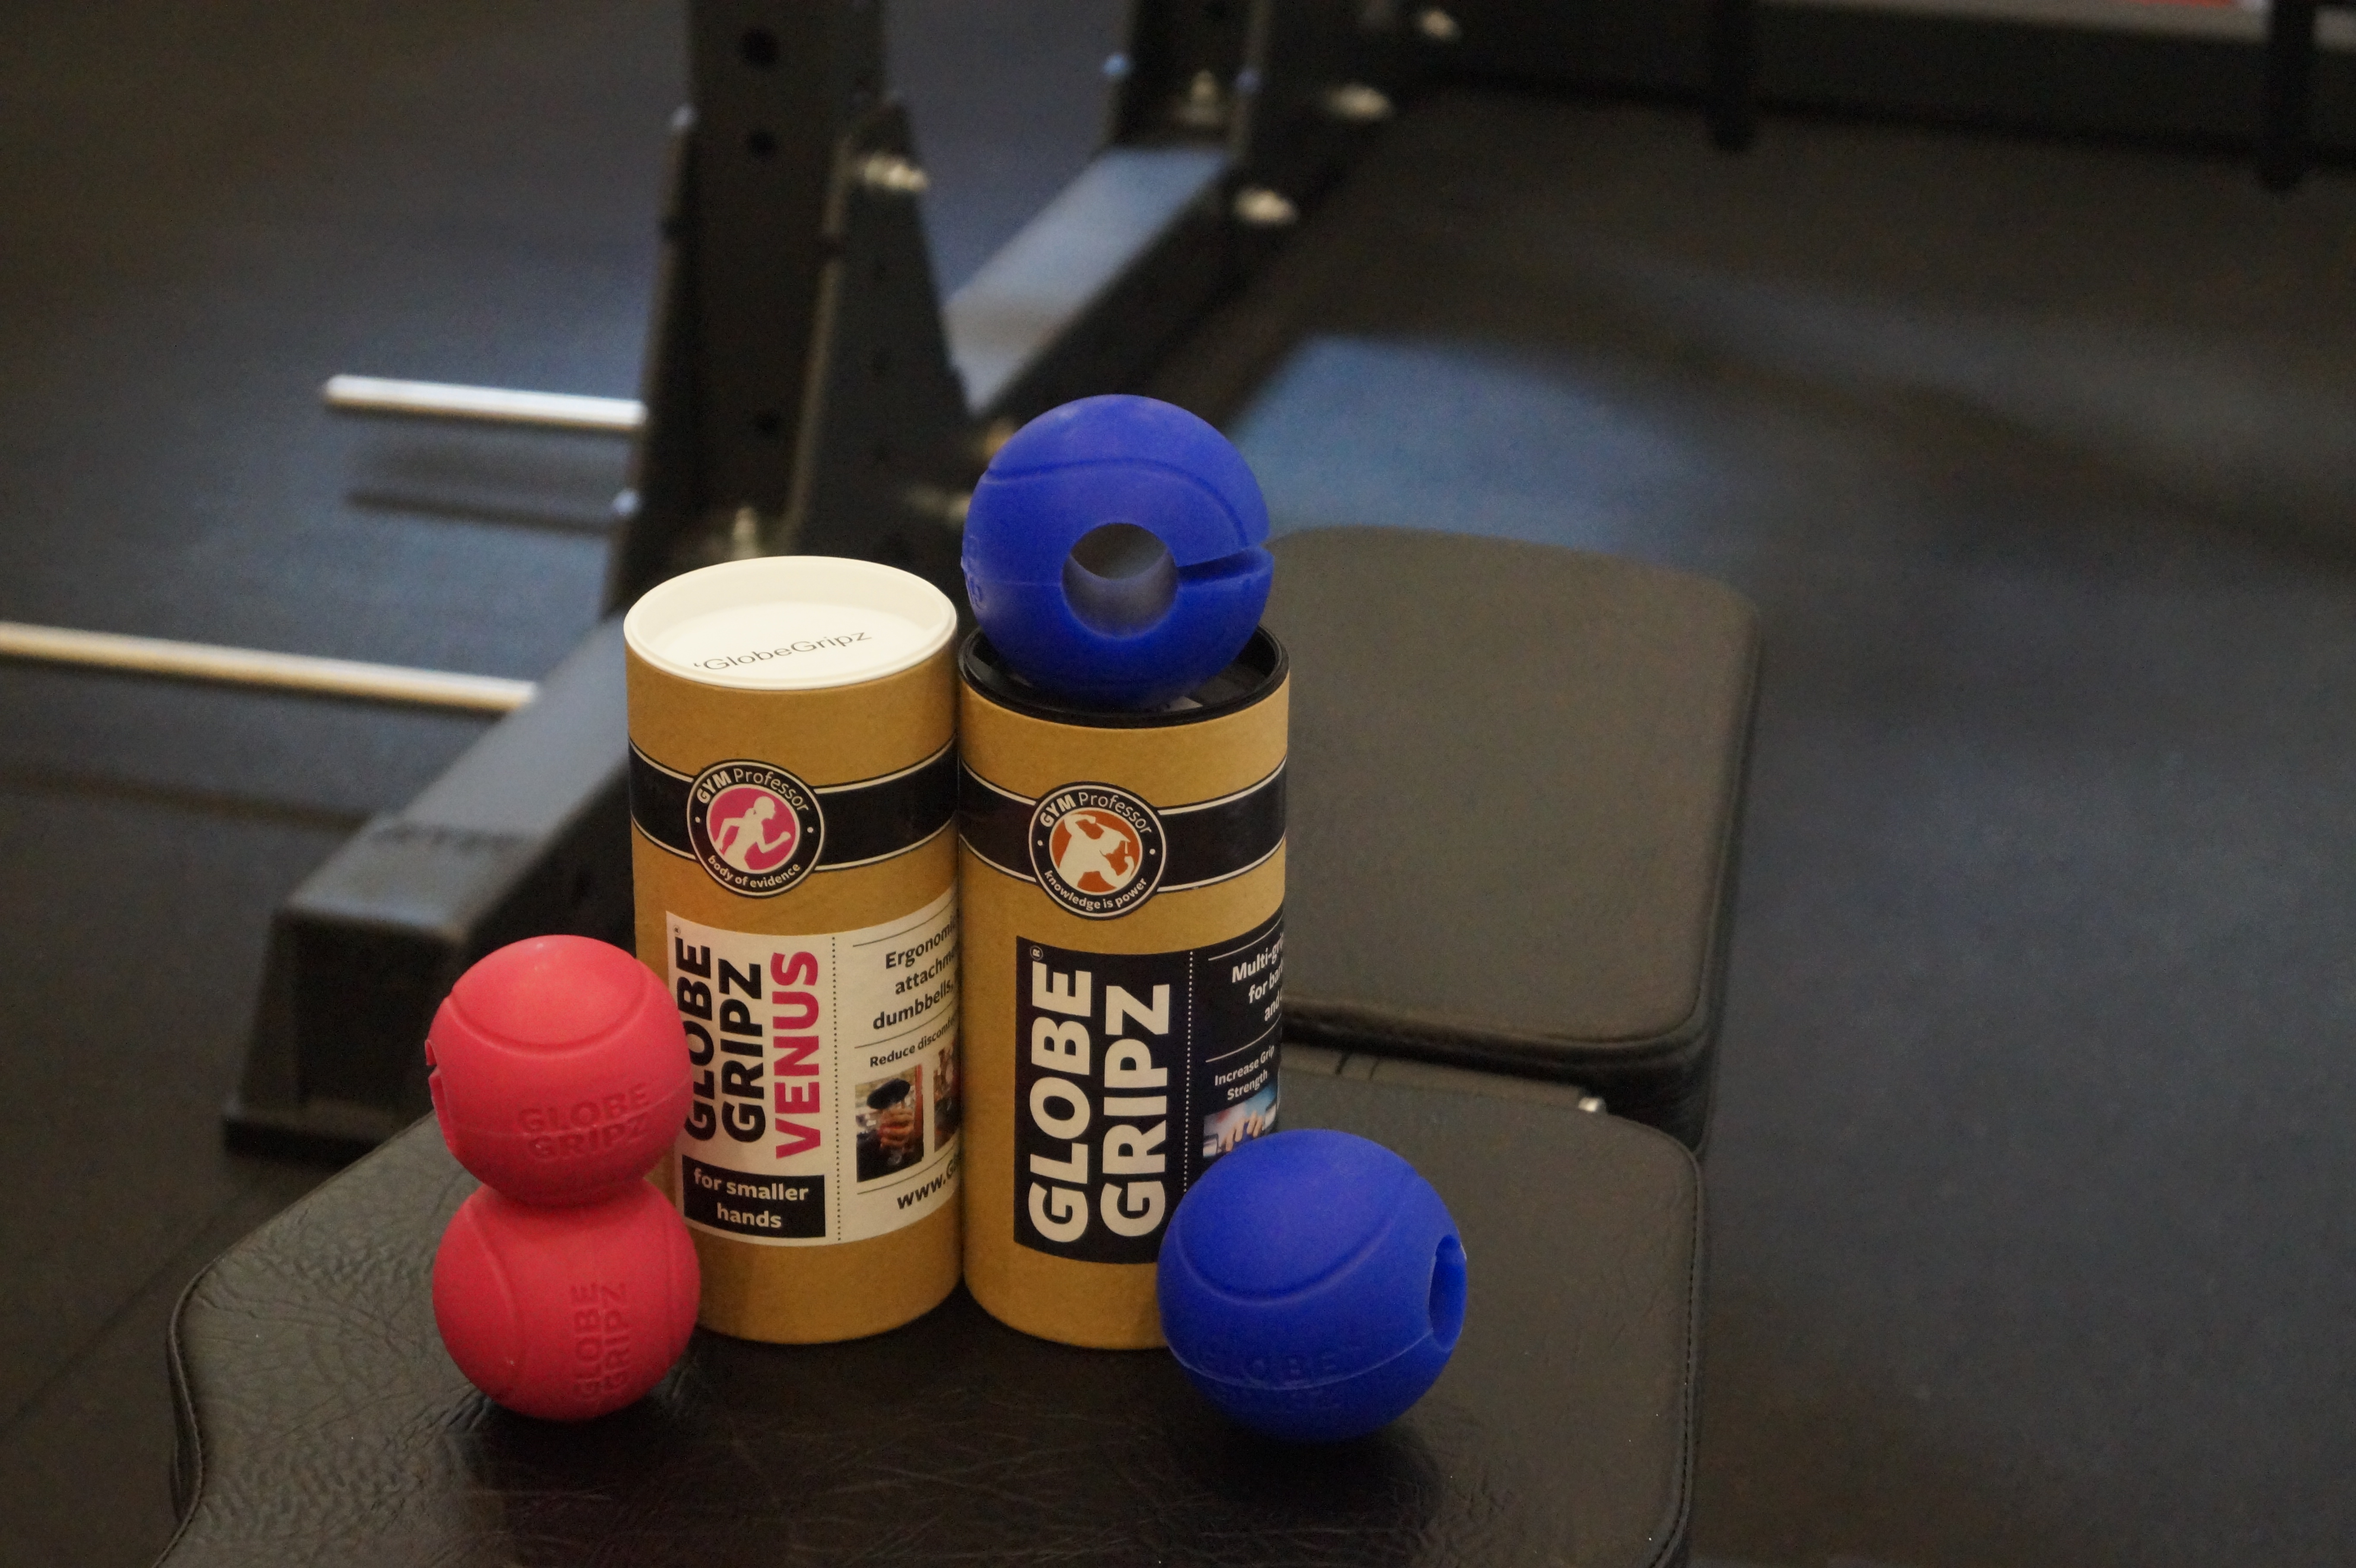
GLOBE GRIPZ und GG VENUS, von “Gym Professor”.

Wenn du meinen Blog regelmäßig liest, dann sind dir sicher die Fat Gripz Hantelgriffe (Ø 5,7cm) und die Fat Gripz Extreme Hantelgriffe, (Ø 7cm) ein Begriff. Beides extra aufsteckbare Hantelgriffe aus Gummi, die den Stangendurchmesser deutlich erhöhen. Dies sorgt für mehr Muskelfaserrekrutierung.

Falls die Fat Gripz Neuland für dich sind dann kannst du darüber und über andere tolle Trainingstools zum Unterarmtraining in meinem Artikel: Wie du – im wahrsten Sinne des Wortes – Schwäche einfach „in den Griff“ bekommst mehr erfahren.

Die Fat Gripz haben aber ein Problem, sie sind nicht rund. Für einen faustähnlichen Griff benötigst du aber runde Griffe. Hierbei liefern die GLOBE GRIPZ™ (GG) dir eine geniale Möglichkeit. Sie können auch einfach nachträglich an quasi jede normale Hantelstange, Zugstange, Klimmzugstange, Seil etc. angebracht werden.

Die Globe Gripz™ gibt es in zwei Varianten. Die größeren blauen (Erde/Earth) und die etwas Kleineren pinken (Venus), für Damen.

DSC02661

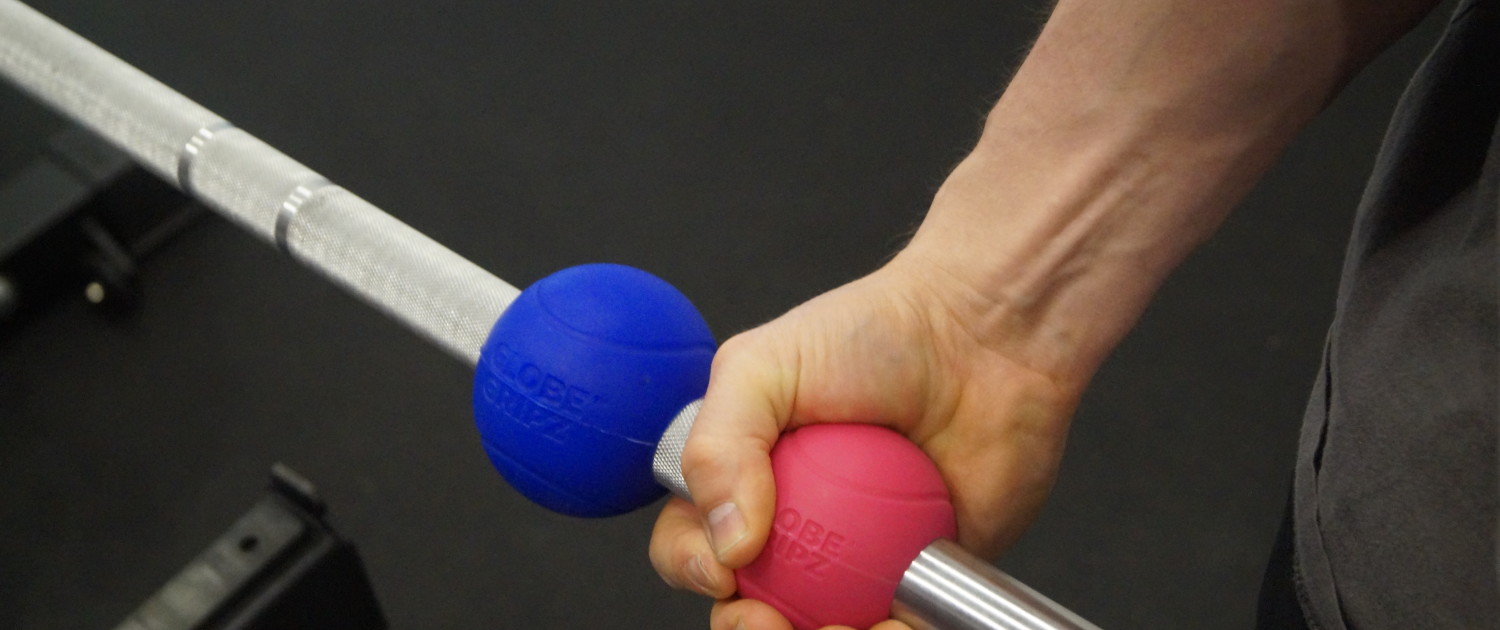
GLOBE GRIPZ “Earth” (blau) und “Venus” (rosa) im Größenvergleich, auf einer ATX Bulls Bearing Bar.

Mit einem Durchmesser von 73mm sind die blauen GG in etwas so groß, wie ein Tennisball.

Die kleineren pinken GG messen 63mm im Durchmesser und sind somit perfekt, für kleinere Hände.

http://www.globegripz.com

Training mit den Globe Gripz™ ermöglicht dir u.a. die folgenden Vorteile:

    • Geringe mechanische Belastung bei ausgewählten Übungen und Winkelstellungen insbesondere im Handgelenk
    • Trainingsvariation für konstante Fortschritte (Progression)
    • Bessere Verteilung der Last in der Hand
    • Verbesserung der Griffkraft
    • Größere Muskelfaserrekrutierung
    • Sportspezifisches Training (z.B. „pitching-grip“)
    • Extra Version für kleinere Damenhände

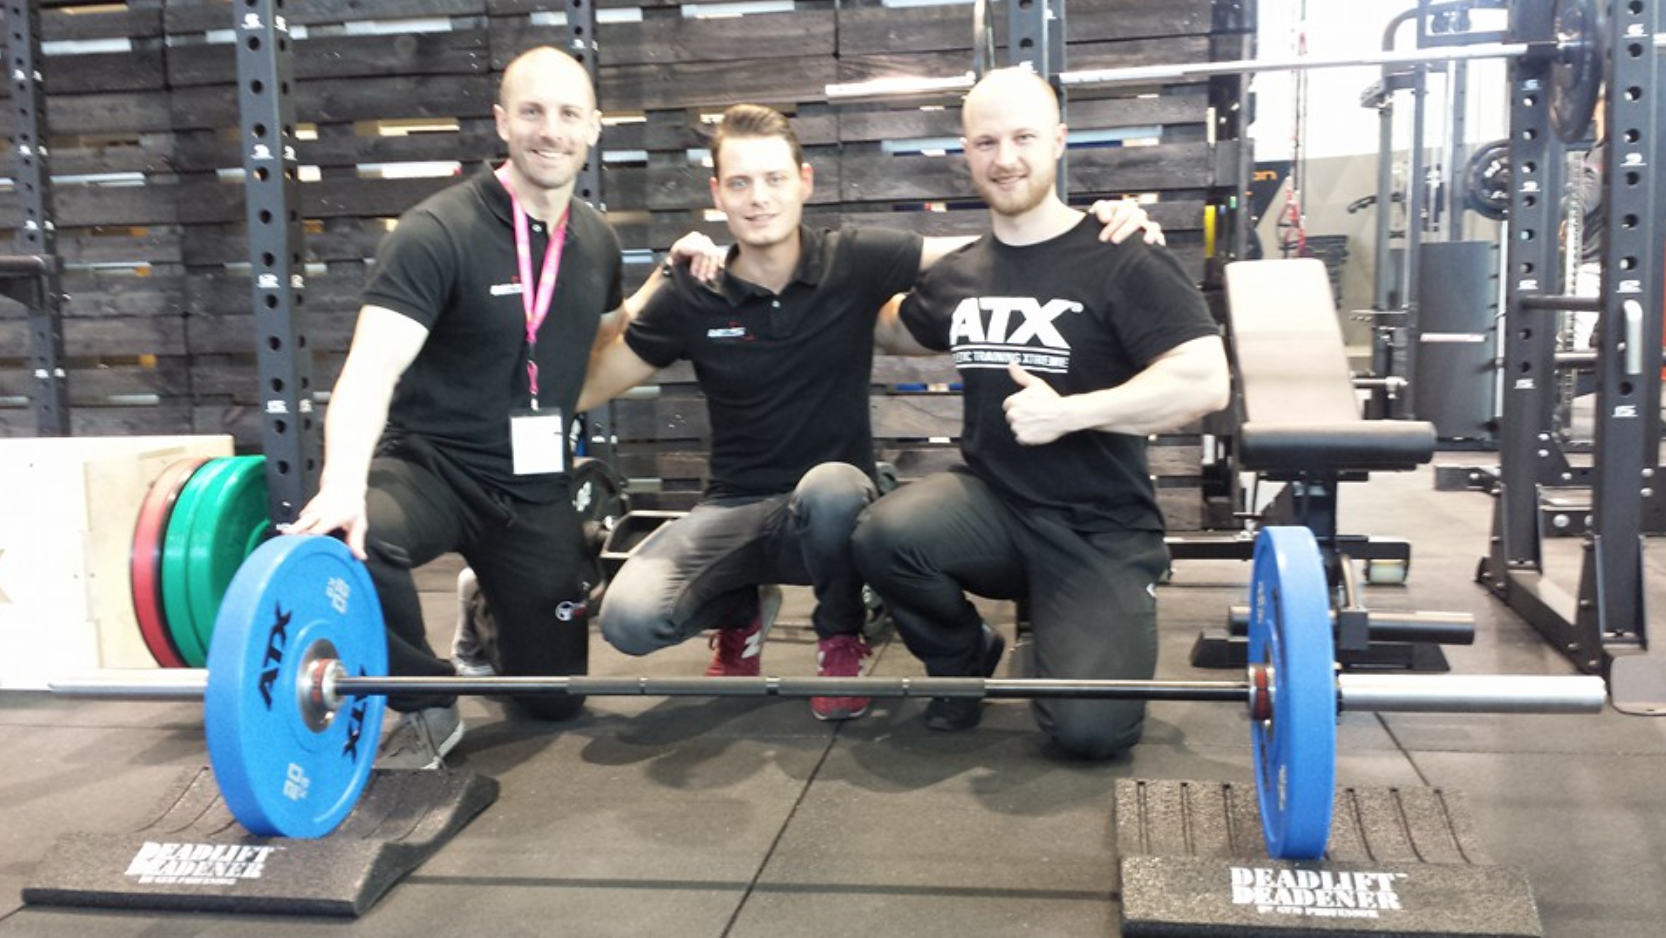
Erfinder der Globe Gripz™ ist Matt „Gym Professor“ Bembridge aus England. Matt ist übrigens ebenfalls der Kopf hinter der Idee der Deadlift Deadener™, einem genialen Trainingswerkzeug, welches du zum Kreuzheben einsetzen kannst.

DSC02664

Griff Vergleich, mit supiniertem Griff. Auch mit einer Langhantel lässt sich z.B. bei Bizepscurls die Handgelenksbelastung deutlich reduzieren. Auch können mehr Muskelfasern rekrutiert werden, was die Trainingseffizienz weiter erhöht.

Mehr über die Deadlift Deadener™ erfährst du in meinem Artikel: DEADLIFT DEADENER – Die clevere Art des Kreuzhebens  oder bei uns im Shop, unter: https://www.bernd-stoesslein.de/shop/

Ein Tipp den du sofort umsetzen kannst (auch ohne GLOBE GRIPZ™)

Solltest du unter „Tennis- und oder Golferarm“ leiden dann kannst du sofort etwas dagegen tun, indem du deine Griffpositionen von proniert oder supiniert auf neutral wechselst.

Erklärungen zu allen Winkelstellungen gibt’s –> hier <–.

So kannst du also z.B. von klassischem Langhantel Bankdrücken auf Bankdrücken mit einer Camber- oder Football Bar wechseln. Sollte dein Studio nicht über diese Stangen verfügen dann wähle neutrales Kurzhantel Bankdrücken, mit einem Winkel von Torso zu Ellenbogen von ca. 42°.

Gleiches gilt z.B. für stehendes/sitzendes Nackendrücken. Wenn du über ein Power Rack verfügst, dann könntest du z.B. statt wie gewöhnlich mit einer Langhantel oder in der Multipresse mit einer Hex Bar/Trap Bar Nackendrücken ausführen. Ebenfalls mit neutraler Griffposition.

DSC02667

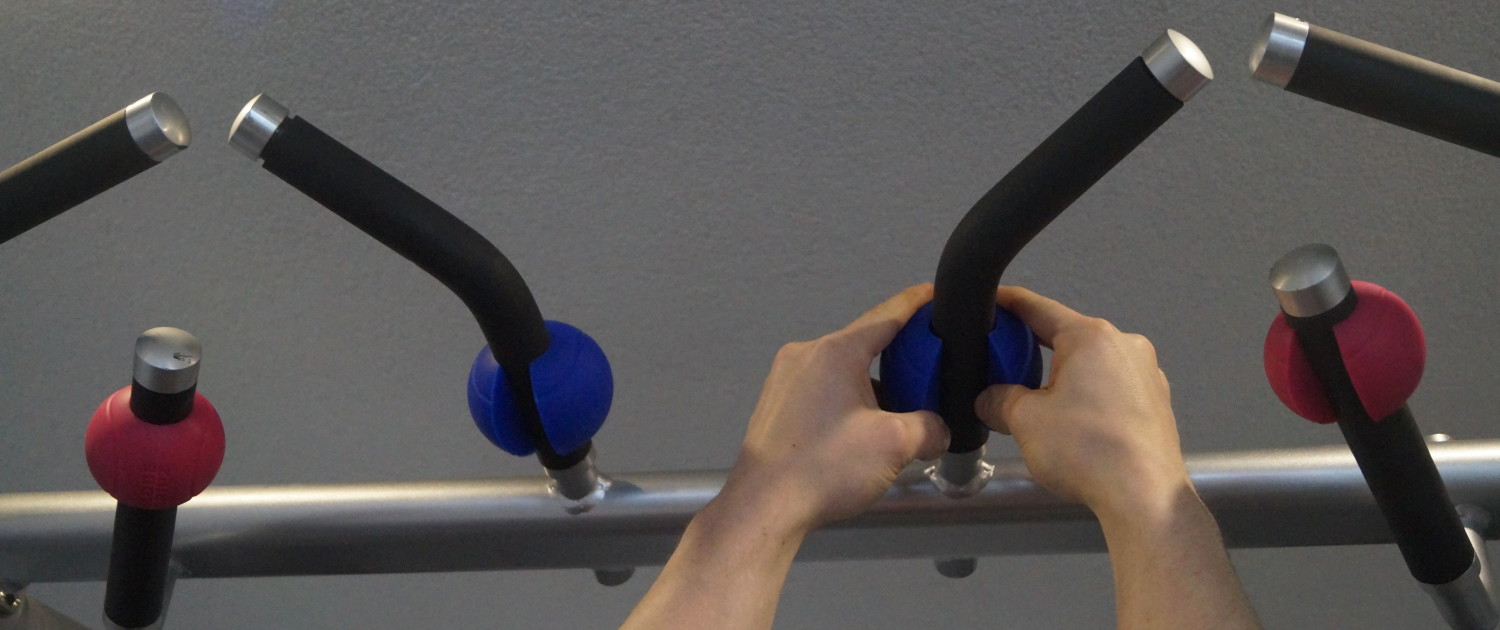
Die GLOBE GRIPZ können an quasi jede herkömmliche Stange oder Griffe montiert werden. Ob Langhantel, Kurzhanteln oder wie hier z.B. an Griffen für einen Kabelzug.

Fazit

Das wichtigste beim Trainings sollte immer sein, dass man verletzungsfrei bleibt. Training nach dem Mott „ich will mich zerstören“ ist meiner Meinung der falsche Ansatz.

So ist es also schon präventiv wichtig so zu trainieren, dass du zwar besser wirst, aber nicht auf Kosten deiner Gesundheit bzw. dabei nicht in gleichem Maße eine Abnutzung/ein Verschleiß deiner Muskeln, Sehnen, Knochen usw. vorangetrieben wird.

Tennis- oder Golferarm sind keine Seltenheit bei Leuten, die regelmäßig „ans Eisen“ gehen. Da kein Training keine Option ist, empfehle ich dir die Globe Gripz™ in dein Training zu integrieren da sie gleich mehrere Probleme gleichzeitig lösen.

Sie verbessern eventuell vorhandene Beschwerden im Handgelenk/Ellenbogengelenk durch einen ergonomischeren (runden) Griff und sorgen durch den vergrößerten Querschnitt der Hantelgriffe auch noch für mehr Muskelfaserrekrutierung und mehr Griffkraft.

DSC02674

Was ist deine bevorzugte Griffposition beim Training? Variierst du regelmäßig deine Griffpositionen und Übungen?

Hinterlasse einen Kommentar.


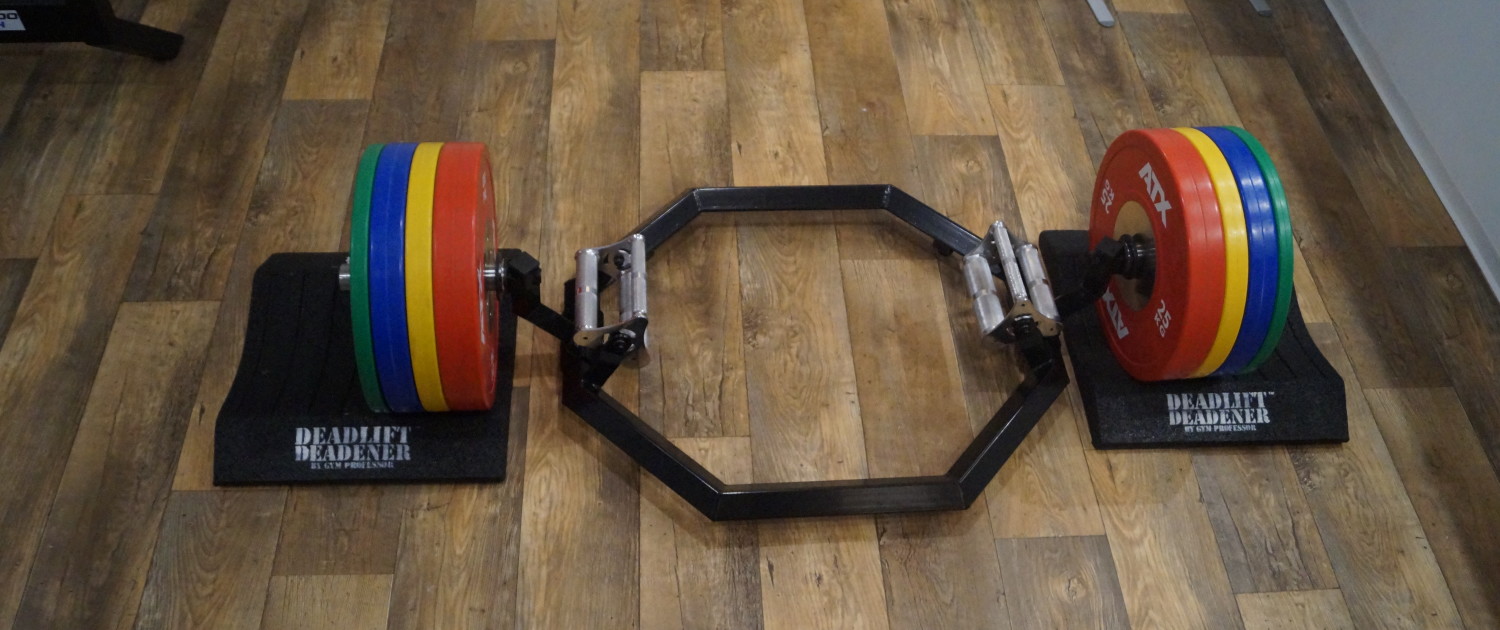
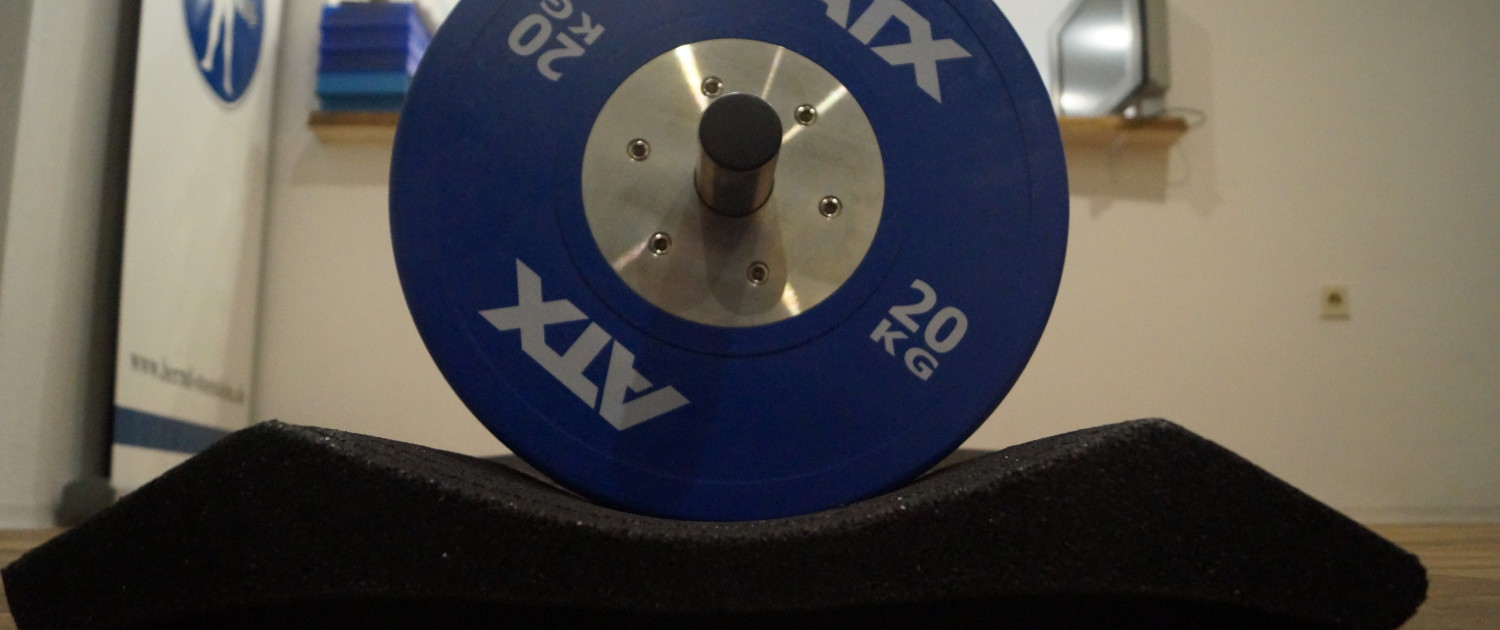
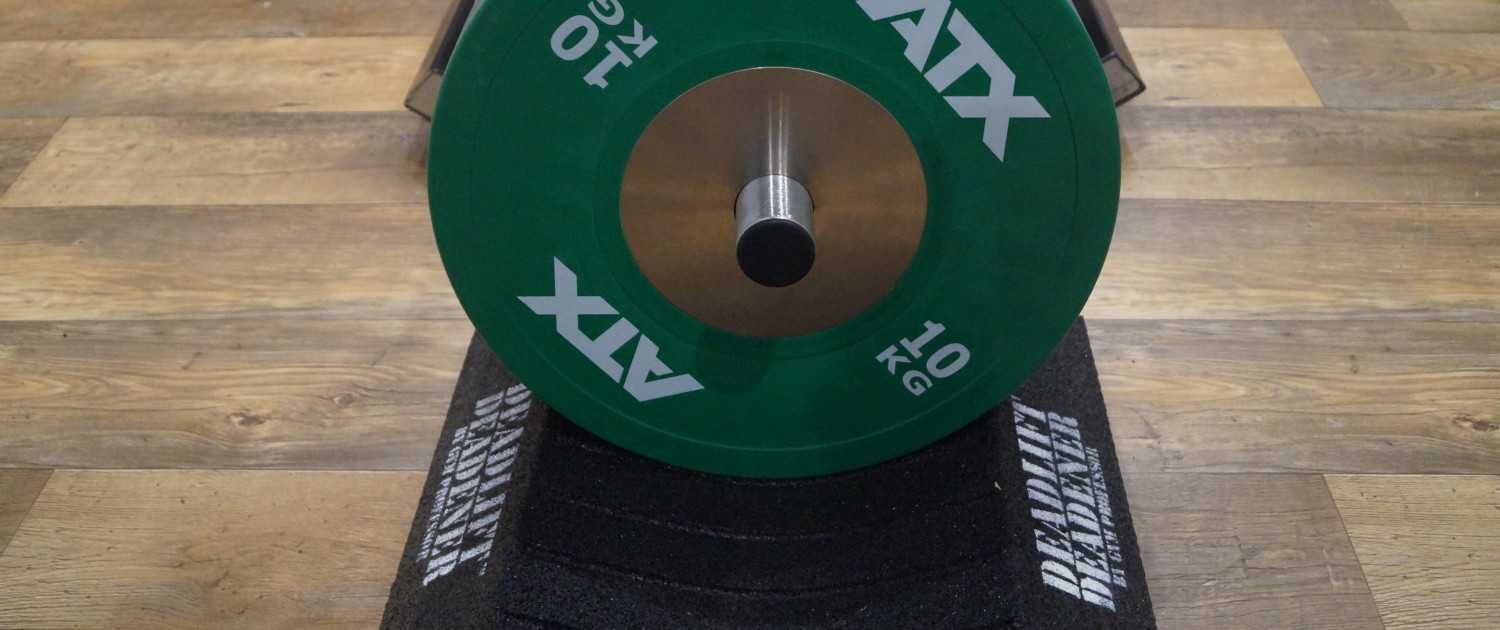
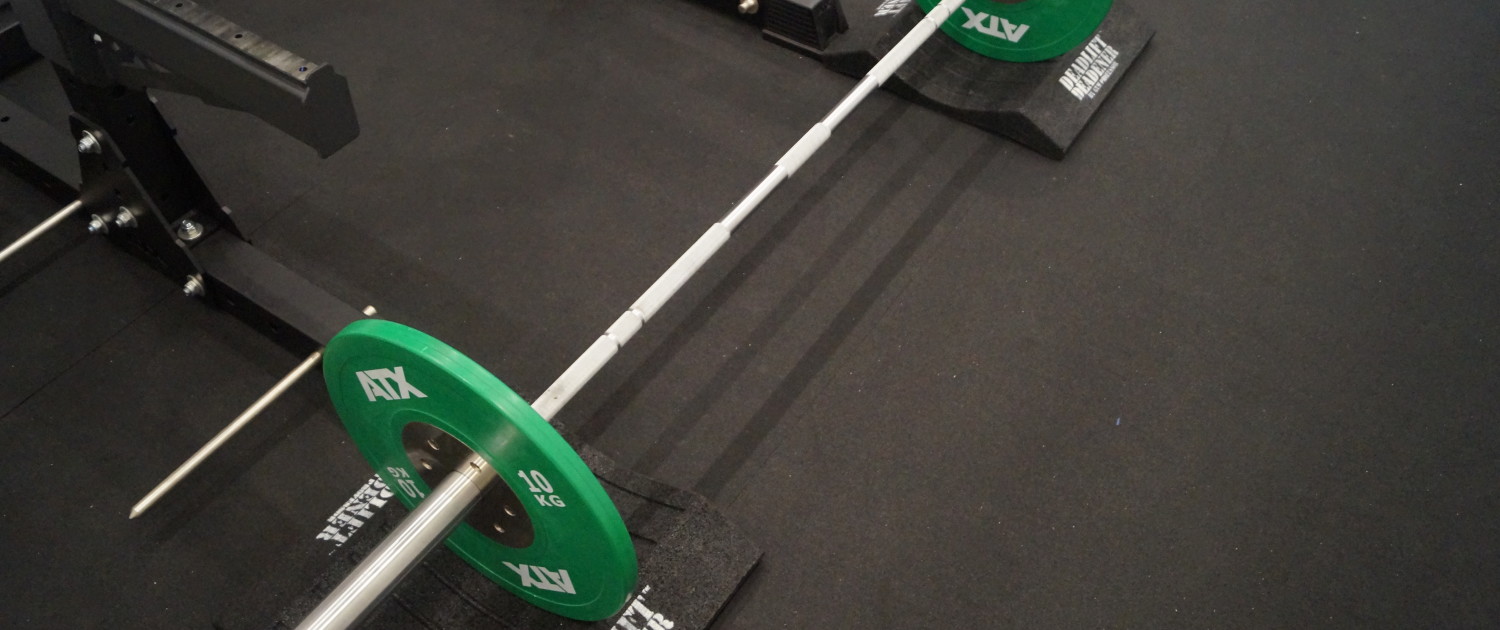
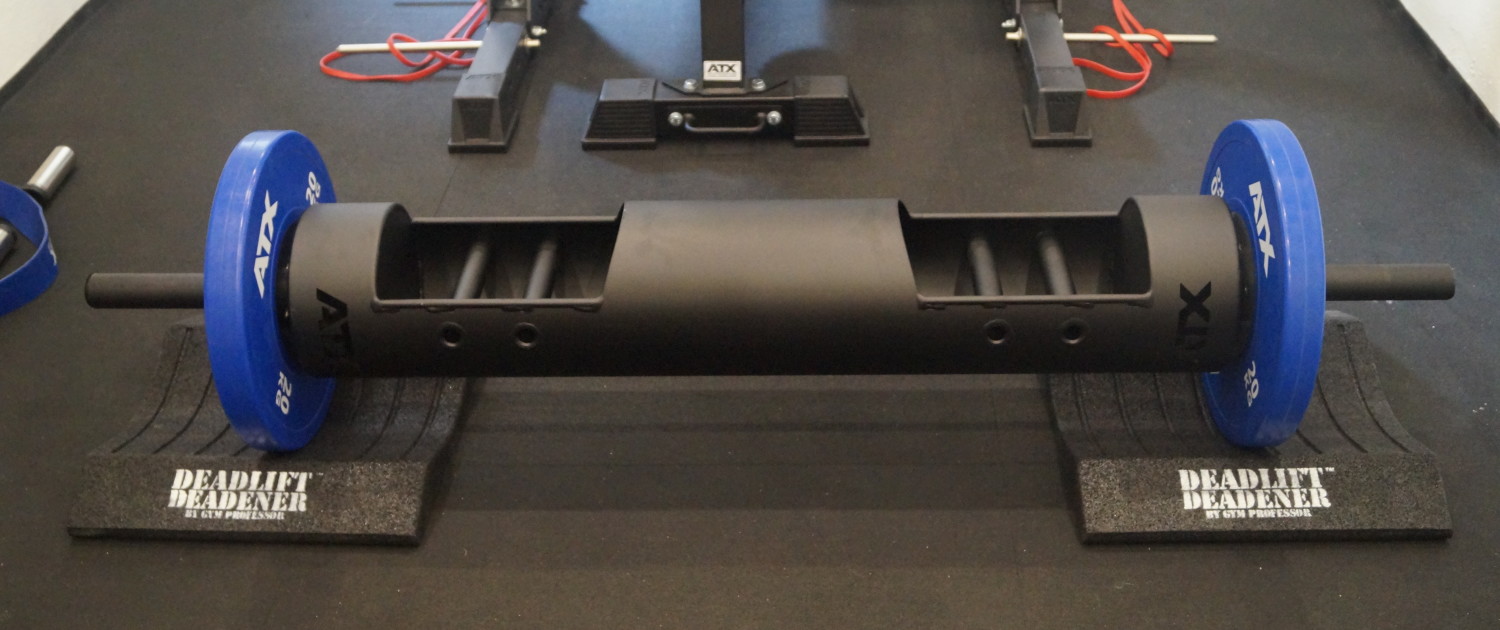
Weltrekordhalter im Kreuzheben und Englands stärkster Mann, Eddie Hall, schwört auf dieses geniale Trainingsequipment. Verbessere auch du deine Leistung, und schütze gleichzeitig dein Trainingsequipment mit dem Deadlift Deadener.

Die Deadlift Deadener sind so einfach wie genial. In diesem Artikel erfährst du, wie du von ihrem Einsatz profitierst und dein Training auf ein neues Level hebst.

Vielen Dank an dieser Stelle an Matt Bembridge von Gym Professor, der das BSPT-Studio mit Deadlift Deadener™ 500 (Strongman Ausführung) ausgestattet hat.

Thanks to Matt Bembridge from Gym Professor for equipping the BSPT-Gym with  Deadlift Deadener™ 500 (Strongman Edition). Looking forward to seeing you soon!

An english version of this article can be found here.

FIBO 2016, mit Matt "Gym Professor" Beibringe und Marvin Jeunessen von "Fitness Seller". Im Bild die Sumo Bar von ATX und die Deadlift Deadener 500.

FIBO 2016 am Stand von ATX, mit Matt “Gym Professor” Bembridge (links). Im Bild die Sumo Bar von ATX und die Deadlift Deadener 500.

Kreuzheben, Kraft und Kilos

Natürlich soll an dieser Stelle auch der Erfinder der Deadlift Deadener gewürdigt werden. Es ist mein Kollege Matt – „Gym Professor“ – Bembridge. Er ist auch der Erfinder der genialen GLOBE GRIPZ™

DSC02645

Deadlit Deadener 500 (Strongman Edition) mit der Hex-Bar PRO mit 3 unterschiedlichen Griffdicken (Megafitness-Shop.info)

Wenn du auf der Suche nach professionellem Equipment bist, das über “normale” Matten zum Kreuzheben hinausgeht, deine Kreuzhebetechnik verbessert, Geräusche reduziert und gleichzeitig dein Equipment schon, dann bist du hier genau richtig. Lies weiter.

Die Lebensdauer deines Trainingsequipments wir verlängert

Durch die massiv vergrößerte Aufprallfläche der Hantelscheiben wird die Lebensdauer des oft sehr teuren Gym-Equipments deutlich verlängert. Durch die soliden Deadlift Deadener werden nämlich nicht nur die Hantelscheiben, sondern natürlich auch die Hanteln selbst geschützt.

Der Aufprall verteilt sich auf eine größere Fläche, und der Gummi der Deadlift Deadener absorbiert den Großteil des Aufpralls. Dies beugt einem Verziehen oder Verbiegen der Hantelstangen vor.

Schützt den Untergrund/Studioboden

Durch das Material der Deadlift Deadener (massiver Hartgummi) werden zudem nicht nur Hantelscheiben und Hanteln geschützt, sondern auch der Untergrund im kommerziellen Fitnessstudio wie auch in deinem Home Gym.

Denn nicht jedes Studio oder gar Heimstudio verfügt über einen Gummiboden, der ein hartes Aufsetzen (auch bei guter Technik, durch entsprechendes Gewicht) „verzeiht“. Das letzte, was man möchte ist, dass schweres Kreuzheben einem den Boden beschädigt und hässliche Spuren hinterlässt.

Die Deadlift Deadener verhindern dies und schützen auch deinen Boden im Heimstudio oder wo auch immer du dein Kreuzheben ausführen möchtest.

DSC02646

Mehr Schutz für deinen Boden und Equipment durch eine ausreichend dicke Polsterung, auch bei schweren Gewichten.

Reduziert den Geräuschpegel

Sicher bist auch du schon einmal im Fitnessstudio darauf hingewiesen worden, dass du beim Kreuzheben zu laut bist. Das kommt zum einen von dem kraftvollen „Gebrüll“ (bedingt durch die schwere Last) und zum anderen vor allem durch den lauten Knall, den die aufsetzenden Hantelscheiben verursachen.

Viele Studiomitglieder fühlen sich dadurch gestört, und man sucht meist nach suboptimalen Möglichkeiten, um diesen Geräuschpegel zu reduzieren. Nicht selten müssen dafür ein paar „Fitnessmatten“ herhalten, die ihre Arbeit aber nur mehr schlecht als recht erfüllen.

Durch den Einsatz der Deadlift Deadener ist zwar das Problem deines Gebrülls nicht gelöst,,aber wenigsten wird das Aufprallgeräusch bestmöglichst gedämpft und der Geräuschpegel wird massiv gesenkt!

DSC02644

Mehr Sicherheit und optimierte Technik

Darüber hinaus kann durch den Einsatz der Deadlift Deadener ein weiteres „nerviges“ Problem gelöst werden: das Herumrollen der Hantelstange.

Beim Kreuzheben hat man oft die Schwierigkeit, dass die mit Gewichten beladene Langhantel, Hexbar/Trapbar, Log oder welcher Stange auch immer, gerne einmal herumrollt.

Dies birgt zum einen die Gefahr in sich, dass man darüber stolpert und sich ernsthaft verletzen kann, und zum anderen die Schwierigkeit, dass die Hantel beim Herausheben oft nicht in der richtigen Position liegt.

 Häufig ist auch der Untergrund nicht eben, und dann ergibt  sich beim Heben der Stange eine unsaubere Technik. Dies kann zu Muskeldysbalancen, im schlimmsten Fall zu Verletzungen führen.

Auch hier schaffen die Deadlift Deadener Abhilfe. Durch ihre Halbkreisform senken sich diese beim Herablassen des Gewichtes leicht ab. Die Hantelscheiben setzten auf dem Gummi auf, und die Außenseiten der Deadlift Deadener heben sich leicht an.

So sind die Hantelscheiben sicher umschlossen, und ein Weg- oder Herumrollen der Langhantel wird erfolgreich verhindert. Auch der Untergrund ist eben, da beide Deadlift Deadener die selbe Höhe besitzen.

DSC02649

Platzsparen, portabel und günstig

Ein weiterer Aspekt der die Deadlift Deadener noch interessanter macht, ist deren Größe. Es gibt zwei Varianten. Einmal die normalen Deadlift Deadener mit 250mm Breite und dann die „Strongman“ Deadlift Deadener (siehe Fotos) mit 500mm Breite. Beide Ausführungen haben eine Höhe von 100 mm.

Die Strongman Edition wiegt zusammen 25kg. Also eine sehr solide Geschichte, die niemals verrutscht oder einfach auseinanderbröckelt.

Ein komplettes Studio oder auch nur einen größeren Freihantelbereich komplett mit speziellem Gummiboden auszustatten ist in der Regel relativ teuer. Somit stellen die Deadlift Deadener insbesondere auch für dein Home Gym eine hervorragende Alternative dar.

Worauf du, bei der Einrichtung eines eigenen Home Gym achten solltest  kannst du in meinem Artikel Home Sweet Home Gym lesen.

Die Deadlift Deadener sind außerdem sehr platzsparend. Wenn diese gerade nicht benötigt werden, können sie einfach beiseitegelegt werden, und sie nehmen im Gegensatz zu einer Abwurfplattform nicht so viel Platz ein.

DSC02652

Woher bekommst du Deadlift Deadener™ ?

Beide Varianten der Deadlift Deadener kannst du über unseren Shop bestellen:

https://www.bernd-stoesslein.de/shop/


Für die normale 250er Variante investierst du nur 140,- EUR (inkl. 35€ Importkosten aus England) und für die größeren 500er (Strongman Edition) ebenfalls nur 210,- EUR (ebenfals inkl. 35€ Importkosten).

Ich empfehle dir – für welche Version du dich auch immer entscheidest – dieses Equipment, um dein Kreuzheben zu optimieren und gleichzeitig dein Equipment zu schonen.

DSC02640

Fazit

In der Fitnessindustrie gibt es vieles an „Innovationen“, das kommt und geht. So ist es im „Dschungel“ der Trends oft schwer, den Überblick zu bewahren und zu differenzieren, was nun gut ist und eine lohnenswerte Investition darstellt . Vor allem auch, ob es sich um etwas handelt, das dir nur dein Geld aus den Taschen zieht.

Die Deadlift Deadener sind zwar eine ganz simple, aber dennoch geniale Erfindung, und sie lösen gleichzeitig gleich mehrere Probleme. Mit maximal 210 EUR für die Strongman Edition sind sie deshalb eine wirklich lohnenswerte Investition für dich und dein Training.

Neben dem klassischem Kreuzheben kannst du die Deadlift Deadener natürlich darüber hinaus für viele andere Übungen nutzen ( wie z.B. „Log Bar Lifts“ oder „Pinch Grips“).

—> Hole dir jetzt deine DEADLIFT DEADENER™  <—


Mehr über den Log Bar und seine Vorteile erfährst du in meinem Artikel:

Log Bar Training – Eine minimalistische Anleitung zum stärker werden

Mehr über Pinch Grips und Unterarmtraining allgemein erfährst du in meinem Artikel:

Wie du – im wahrsten Sinne des Wortes – Schwäche in den Griff bekommst

Falls du die Deadlift Deadener gerne einmal testen möchtest, dann kannst du dies z. B. im Rahmen einer unserer Seminare im BSPT-Studio tun.

In diesem Zusammenhang kannst du dich auch von weiteren innovativen Geräten, Hantelstangen und einzigartigen Tools und Techniken wie der BAMBOO BENCH® begeistern lassen.

Setzte völlig neue Reize, hebe dein Training auf ein ganz neues Level und melde dich jetzt zu unseren eintägigen Praxisseminaren unter:

 https://www.bernd-stoesslein.de/seminare/ an.


Du hast einen Händedruck wie ein Schulbub? Lerne wie du mit nur 10 Minuten/Tag im Handumdrehen stärker werden kannst.

Was ist eigentlich Griffkraft?

Eine Kette ist bekanntlich nur so stark, wie ihr schwächstes Glied. Genau dieses berühmt berüchtigte schwächste Glied ist deine Griffkraft.

Es ist derPunkt,an dem deine Oberkörperkraft auf die zu bewegende Last übertragen wird. Im Training ist das in der Regel eine Hantel oder ein anderes Gewicht, das bewegt werden soll/muss.

Wenn du keine starke Griffkraft hast, bedeutet das, dass du schwach bist. Und wenn du schwach bist, dann sind deine Gelenke instabil(er). Insatbile(re) Gelenke führen dann zu einem höheren Verletzungsrisiko usw.

Außerdem lässt dich ein schwacher Händedruck nicht gerade souverän auftreten, denn wer schüttelt schon gerne einem „feuchten Handtuch“ die Hand…

Doch keine Angst: Gegen eine schwache Griffkraft ist vielerlei „Eisenkraut“ gewachsen und ganze Bücher wurden bereits mit dem Thema Griffkraft gefüllt. So auch das sehr empfehlenswerte Standardwerk von John Brookfield „Mastery of Hand Strength“.

So schreibt der Mediziner Randal J. Strossen bspw hierzu.:

I am firmly convinced that the reason why John reached the pinnacle oft he grip strength world is because he is so creative about training and is forever coming up with new exercises.

Ich bin überzeugt davon, dass John den Gipfel der Griffkraft Welt erreicht hat, weil er so kreativ ist, was das Training angeht und nie müde wird sich neue Übungen auszudenken.

(Randal J. Strossen Ph.D., President, Iron Mind Enterprises, Inc.)

Die Vorteile eines dickeren Griffes

Wenn es um Muskelfaserrekrutierung geht, dann entscheidet die Dicke des Griffes bzw. der Hantel darüber, wieviele Muskelfasern rekrutiert werden. Je dicker der Griff, desto schwieriger ist es, ihn zu umgreifen.

Wenn du also stärker werden willst, dann solltest du neben deinem absoluten Gewicht auf der Hantel also auch den Durchmesser variieren. So gestaltest du dein Training abwechslungsreich und sorgst dafür, Plateaus zu überwinden.

Durch diesen simplen „Trick“ werden nicht nur deine Unterarmmuskeln stärker, sondern auch deine Leistungen in anderen elementaren Übungen wie z.B. beim Kreuzheben oder bei Klimmzügen.

Denn wenn du es nicht greifen kannst, dann kannst du es auch nicht heben (zumindest nicht ohne Hilfen wie bspw. Zugschlaufen).

Funktionell gesehen bringt dir dies immer dann, wenn du etwas Schweres heben musst, denn das was immer zu allererst versagt, ist deine Handkraft. Dann gehen dir die Finger auf und die zu bewegende Last rutsch dir aus der Hand.

Weitere Vorteile, die den Einsatz von dickeren Stangen bzw. von Griffkrafttraining sinnvoll machen, sind z.B. Sportarten in denen viel gegriffen werden muss. Hierzu zählen viele Kampfsportarten, aber z.B. auch Leichtathletik oder auch so etwas „exotisches“ wie der Schwertkampf.

Kurzum: Immer wenn dir ein starker Griff Vorteile bringt, sollte er möglichst nicht versagen! Stärke also deine Griffkraft durch entsprechendes Training.

Wie du den Durchmesser von Griffen vergrößerst

Wenn du Platz für das entsprechende Equipment hast, dann kannst du dir natürlich entsprechende Hanteln, wie z.B. die Hex-Bar Pro mit unterschiedlichen Griffvarianten zulegen.

Weitere sinnvolle Anschaffungen und Anregungen für dein eigenes „Home Gym“ findest du in meinem Artikel:

Home Sweet Home Gym

Eine einfache und trotzdem effiziente Lösung sind wohl Griffaufsätze mit denen du ganz einfach jede Hantel im Durchmesser modifizieren kannst. Hierzu kannst du z.B. die sogenannten Fat Gripz Hantelgriffe (Ø 5,7cm) verwenden.

Diese gibt es in zwei Ausführungsvarianten, die normalen sind blau und die Fat Gripz Extreme Hantelgriffe, (Ø 7cm), rot.

Erweiterungsgriffe gibt es neben den geraden Fat Gripz auch in runder Form, als sogenannte Globe Gripz.

für eine noch größere Variation beim Training.

Für den Anfang reichen dir aber erst einmal die normalen (blauen) FAT GRIPZ, da diese schon wesentlich dicker sind als der Durchmesser einer gewöhnlichen Hantel.

Dein 10 Minuten Griffkraft Workout-Plan für maximale Kraft

Du beanspruchst deine Unterarme ständig und täglich. Aufgrund dessen vertragen sie auch ein hohes Trainingsvolumen und eine Trainingsfrequenz.

Montag: Hängen mit Fat Gripz und ggf. Zusatzgewicht verwenden (Dipgürtel).

10 Minuten insgesamt mit jeweils 30 Sekunden Pause zwischen den Sätzen.

Dienstag:  Lang- oder Kurzhantel oder SZ- Unterarmcurls (supinierter Griff) auf der Flachbank.

10 Minuten insgesamt mit jeweils 30 Sekunden Pause zwischen den Sätzen.

Mittwoch: „Thors Hammer“ z.B. mit einer Metallstange.

10 Minuten insgesamt mit jeweils 30 Sekunden Pause zwischen den Sätzen.

Donnerstag: Farmers Stands“: stehendes Halten von Griffen am Kabelzug,

mit Fat Gripz Extremes

10 Minuten insgesamt mit jeweils 30 Sekunden Pause zwischen den Sätzen.

Freitag: Zangengriff“ mit verschieden dicken Gewichtsscheiben,10, 15, 20, 25 usw.

10 Minuten insgesamt mit jeweils 30 Sekunden Pause zwischen den Sätzen.

Samstag: Lang- oder Kurzhantel oder SZ- Reverse-Unteramrcurls (pronierter Griff). 10 Minuten insgesamt mit jeweils 30 Sekunden Pause zwischen den Sätzen.

 Sonntag: Pause

Wenn du dein Wissen hinsichtlich der unterschiedlichen Griffvarianten erweitern oder wieder auffrischen möchtest, dann kannst du dies in meinem Artikel: Gym-Deutsch; Deutsch-Gym: Was bedeutet was im Fitnessstudio? Teil I tun.

Wie du dir ganz schnell und einfach einen Unterarmtrainer selber baust

Wenn du in einem gut ausgestatteten Fitnessstudio trainierst, dann kannst du dir auch mit dem dortigen Equipment selbst ganz einfach und schnell einen Unterarmtrainer „bauen“ bzw. die Ausrüstung umfunktionieren.

DSC02408

Dafür benötigst du Folgendes:

  • (Half) Rack oder Kniebeugenständer
  • Langhantel mit kugelgelagerten Scheibenaufnahmen
  • Widerstandbänder (Achtung! Bitte nur professionelle Widerstandsbänder benutzen, die auch für den Fitnessstudiogebrauch zugelassen sind wie die Power Bands)
  • Gewichtsscheiben
  • Optional: Kettlebell

Anleitung:

Lege eine Langhantel in das Rack oder den Kniebeugenständer. Achte darauf, dass sich die Stange etwa auf Schulterhöhe befindet.

Belade die Stange auf nur einer Seite mit einer ausreichend schweren Gewichtsscheibe (ca. 20-25kg). Diese fungiert später als Gegengewicht.

Nimm eine Kettlebell oder ein anderes geeignetes Gewicht mit Befestigungsmöglichkeit, und befestige daran die eine Seite des Widerstandsbandes (siehe Foto).

Wrist Roller

Auf der freien Seite der Langhantel befestigst du nun das andere Ende des Widerstandsbandes, indem du die Schlaufe mittig darüberlegst und einmal komplett herumwickelst (siehe Bild).

DSC02409

Fertig! Nun kannst du mit dem Unterarmtraining loslegen.

Ein komplettes Video zu dieser Anleitung (in englisch) findest du hier.

Metolius “Rock Rings”

Eine weiteres geniales Tool zum Training deiner Unterarm- und Fingerkraft sind die Metolius “Rock Rings”. Diese kommen eigentlich aus dem Klettersport können aber auch im Krafttraining hervorragend eingesetzt werden.

Bildschirmfoto 2016-03-26 um 00.02.34

Neben Klimmzügen mit der kompletten Hand kannst du mit den Rock Rings auch nur vier, drei oder gar nur zwei Finger nutzen (siehe Bild).

Neben Klimmzügen können diese Trainingsutensilien auch für zahlreiche Zugübungen am Kabelzug verwendet werde, wie z.B. Sitzendes Rudern zum Hals (siehe Bild).

Bildschirmfoto 2016-03-26 um 00.02.43

Die Metolius “Rock Rings” findest du bei amazon in den unterschiedlichsten Farben. Qualität oder Größenunterschiede gibt es keine. Ein cooles Tool, das für Abwechslung und Spaß im Klimmzugtraining sorgt.

Fazit

Vom allgemeinen Einsatz im Alltag bis hin zum speziellen Gebrauch im Profisport ist ein starker Griff entscheidend.

Leider werden die Unterarme – wenn überhaupt – nur sehr stiefmütterlich trainiert. Ab und an sieht man mal jemanden ein paar Unterarmcurls machen, und das war es dann aber auch schon.

Da du die Muskeln deiner Unterarme nicht nur im Training, sondern eben auch im Alltag ständig gebrauchst, vertragen diese auch ein hohes Trainingsvolumen bzw. eineTrainingsfrequenz.

Das heißt, du kannst nach jedem Training noch eine 10-minütige „Intensivkur“ einlegen, um dir ein solides Paar Unterarme zu schmieden.

Wenn du danach noch deinen Shaker halten kannst, dann war das Training zu lasch 😉

Sei kreativ, was das Unterarmtraining angeht,  und wechsle bei jedem Workout die Übung, um für konstante Progression zu sorgen.

Durch stärkere Unterarme wird sich auch deine Leistung in den übrigen Übungen verbessern!

Trainierst du bereits gezielt deine Unterarme?

Hinterlasse einen Kommentar.